
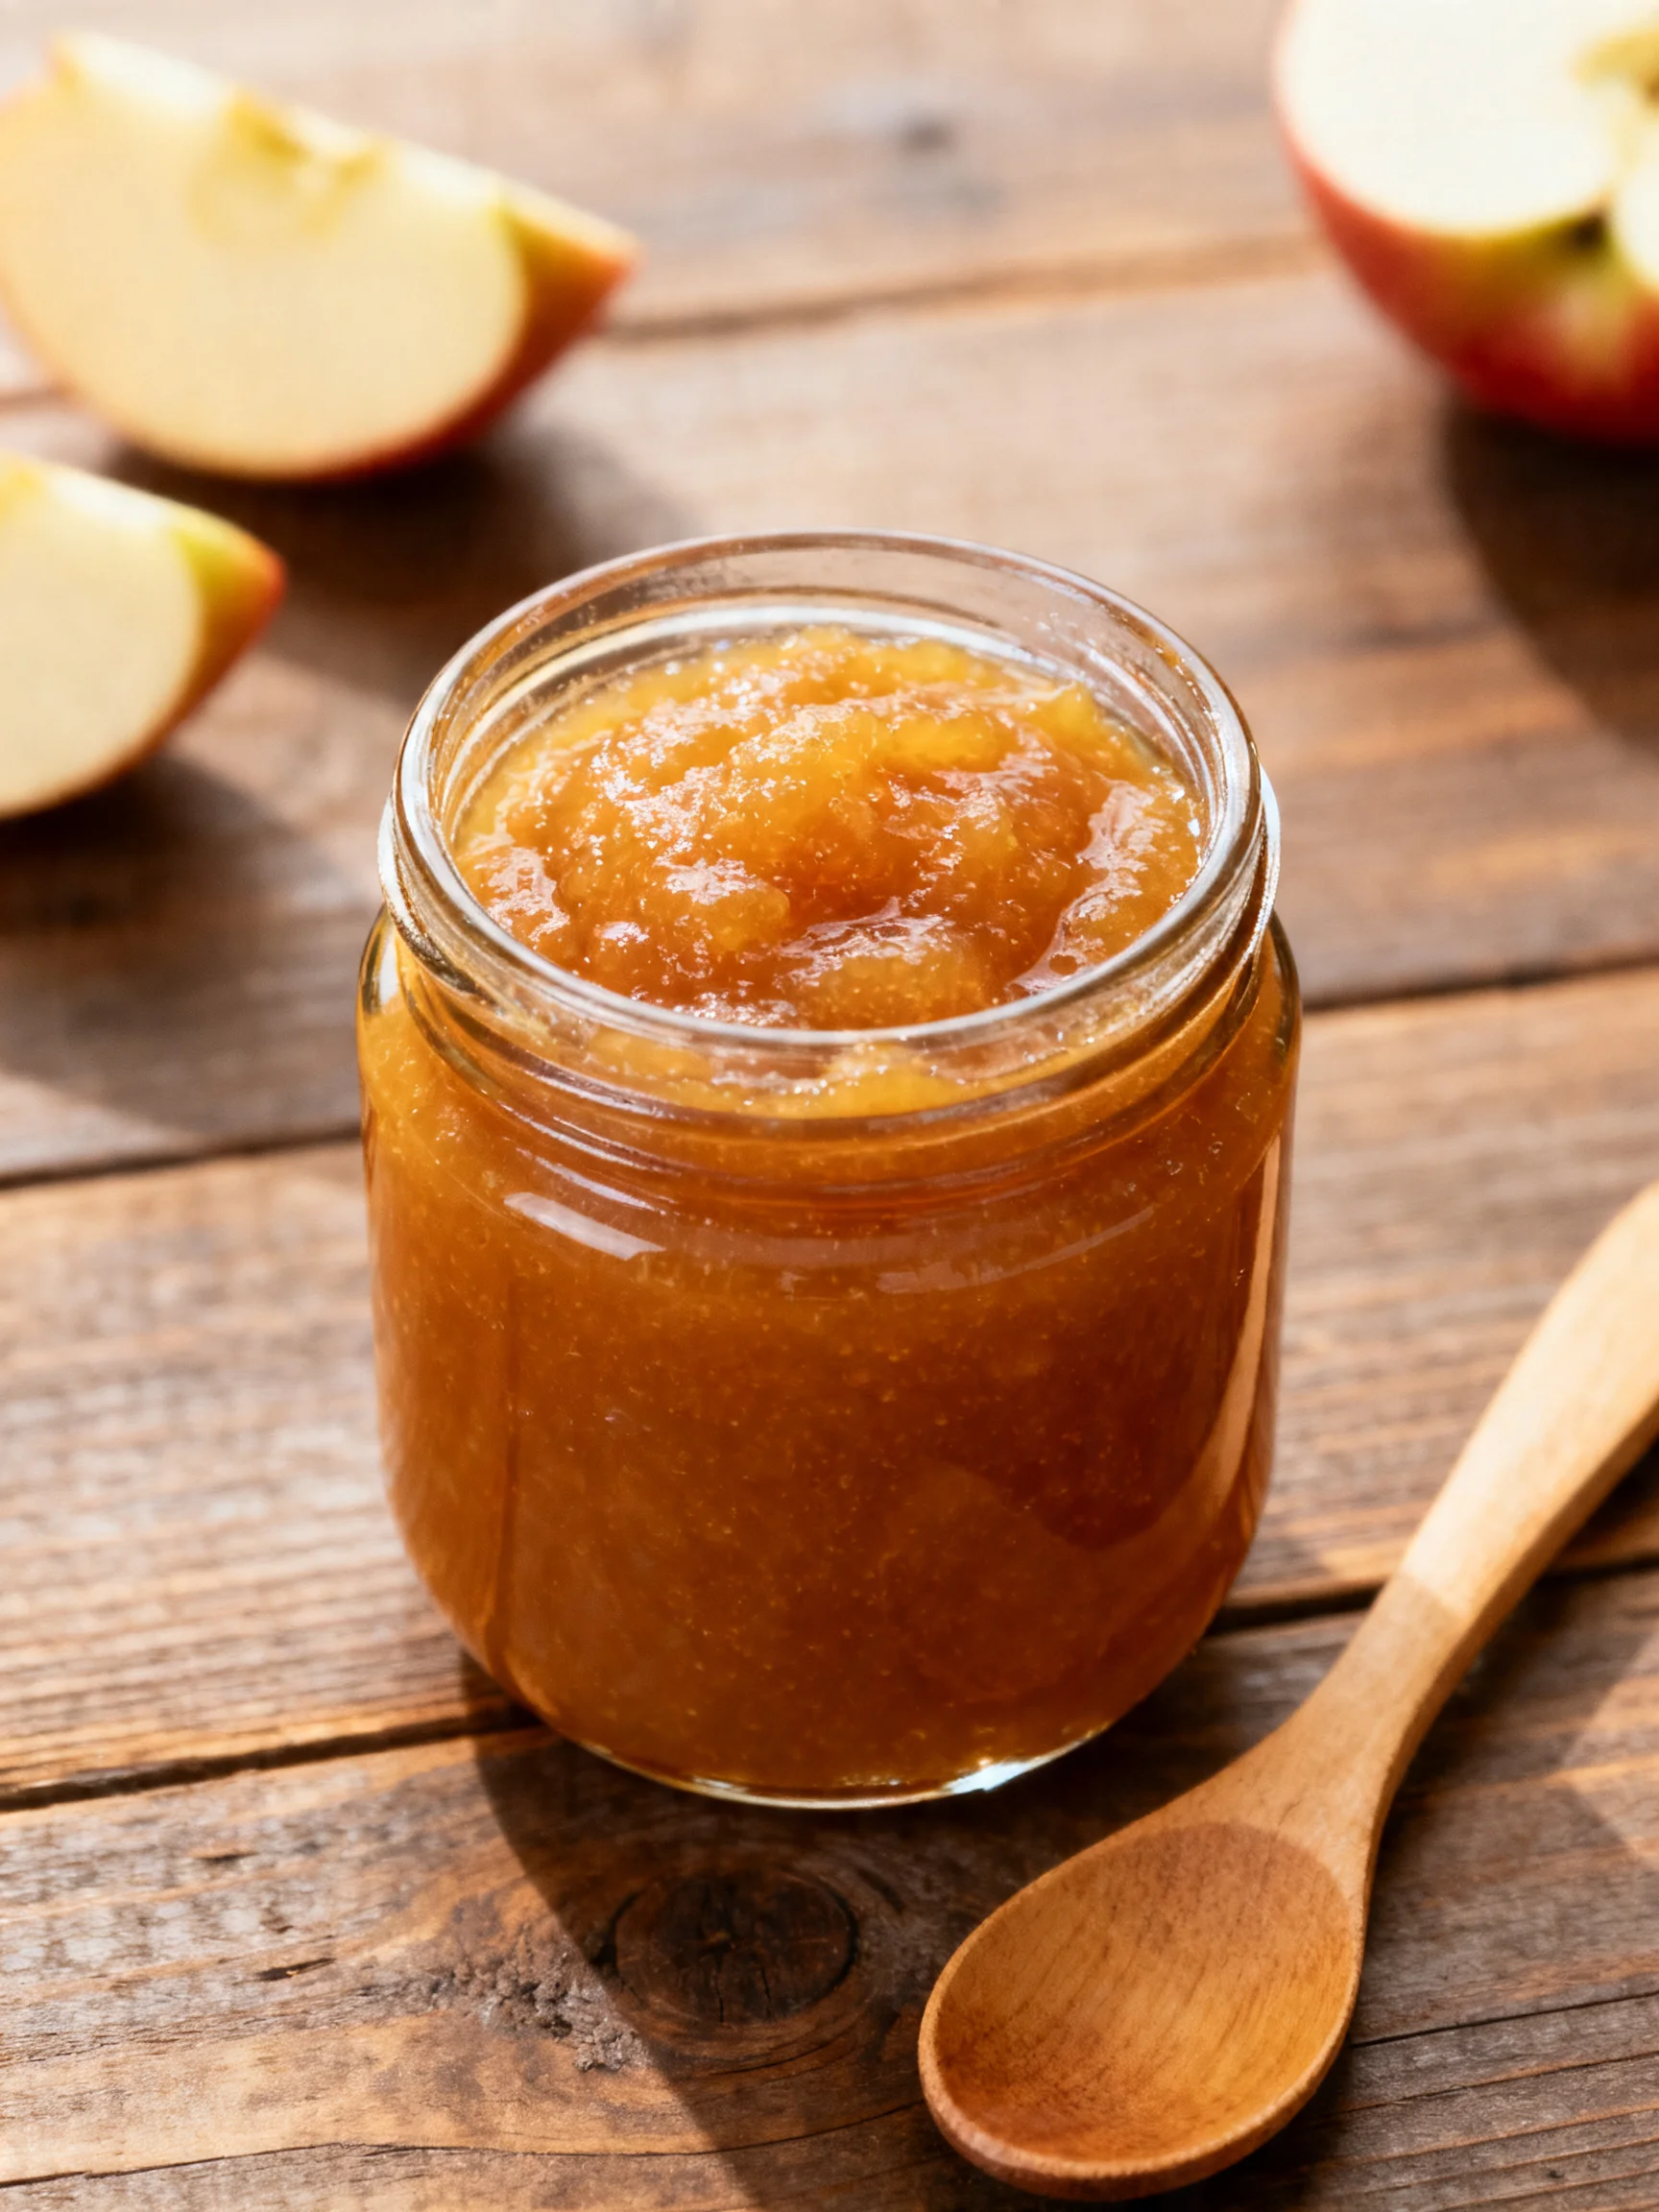
Traditional Apple Butter Recipe Easy
Tested & Approved
by Sophie Lane
Introduction
The rich, spiced aroma of this Traditional Apple Butter Recipe simmering on the stove is pure autumn comfort. After years of testing, I’ve perfected a method that yields a luxuriously thick, deeply caramelized spread, capturing the essence of orchard-fresh apples. This version is a staple in my pantry, offering a taste of the season that’s far superior to store-bought.
Published: April 17, 2026 Updated: July 9, 2026
Ingredients
The soul of this recipe lies in the apples; choose a mix of sweet and tart varieties like Honeycrisp and Granny Smith for a perfectly balanced flavor. High-quality spices are key to that warm, nostalgic taste.
- 5 lbs (about 10-12) medium-sized apples
- 2 cups Granulated Sugar
- 1 cup brown sugar
- 1 tablespoon Ground Cinnamon
- 1/2 teaspoon Ground Nutmeg
- 1/2 teaspoon Ground Cloves
- 1/4 teaspoon Salt
- 1 tablespoon Vanilla Extract
- Juice of 1 lemon
Timing
| Prep Time | 30 minutes |
| Cook Time | 4-5 hours |
| Total Time | 4.5 – 5.5 hours |
Context: While this recipe requires patience for slow cooking, the active prep time is minimal, making it a perfect weekend project. The extended simmering, which is about 25% faster than some traditional stovetop methods, is essential for developing the deep, complex flavor and thick texture that defines a great apple butter.
Step-by-Step Instructions
Step 1 — Prepare the Apples
Wash, core, and roughly chop all the apples. There’s no need to peel them; the skins will add pectin for thickness and a beautiful rosy hue. In my tests, leaving the skins on creates a richer final product. Place the chopped apples in a large, heavy-bottomed pot or Dutch oven.
Step 2 — Combine and Simmer
Add the granulated sugar, brown sugar, cinnamon, nutmeg, cloves, salt, and lemon juice to the pot with the apples. Stir everything to combine. Pour in just enough water to cover the bottom of the pot by about half an inch—this prevents scorching before the apples release their own juices.
Cover the pot and bring the mixture to a simmer over medium heat. Reduce the heat to low and let it cook, covered, for about 1.5 to 2 hours, stirring occasionally, until the apples are completely broken down and mushy.
Step 3 — Purée the Mixture
Once the apples are very soft, remove the pot from the heat. Use an immersion blender directly in the pot to purée the mixture until completely smooth. (Pro tip: If you don’t have an immersion blender, you can carefully blend in batches using a standard countertop blender). This step ensures your apple butter has a silky, spreadable consistency.
Step 4 — Cook Down to Thicken
Return the smooth purée to the stove over very low heat. Stir in the vanilla extract. Cook uncovered, stirring every 15-20 minutes to prevent sticking, for 2 to 3 hours. Unlike boiling, this slow reduction caramelizes the natural fruit sugars and concentrates the flavor.
Step 5 — Test for Doneness
The apple butter is ready when it is very thick and holds its shape on a spoon. A reliable test is the “plate test”: spoon a small amount onto a chilled plate. If no liquid seeps out around the edges after a minute, it’s done. The color will be a deep, rich brown.
Step 6 — Jar and Store
Ladle the hot apple butter into clean, sterilized jars, leaving about 1/2 inch of headspace. Let the jars cool completely at room temperature before sealing with lids. This Traditional Apple Butter Recipe will keep in the refrigerator for up to 3 weeks, or you can process the jars in a water bath for long-term pantry storage.
Nutritional Information
| Calories | 45 |
| Protein | 0.1g |
| Carbohydrates | 12g |
| Fat | 0.1g |
| Fiber | 1g |
| Sodium | 5mg |
Estimates are for a 1-tablespoon serving based on typical ingredients. This apple butter recipe is naturally low in fat and sodium, and a good source of dietary fiber and Vitamin C from the apple skins.
Healthier Alternatives
- Reduce Sugar — Cut the granulated sugar by 25% and rely on the natural sweetness of apples like Fuji or Gala. The flavor will be more tart and fruit-forward.
- Use Allulose or Monk Fruit — For a lower-carb version, replace the brown and granulated sugars with a 1:1 sugar-free alternative. Note that browning and caramelization may be less pronounced.
- Boost Spices Naturally — Add a cinnamon stick and whole cloves during the simmer (remove before puréeing) for more nuanced spice flavor without increasing ground spice measurements.
- Incorporate Apple Cider — Replace the initial water with unsweetened apple cider for a deeper, more complex apple flavor without extra sugar.
- Add Chia Seeds — Stir in 1-2 tablespoons of chia seeds after puréeing; they will absorb liquid and help thicken the butter with added fiber and protein.
Serving Suggestions
- Spread thickly on warm biscuits, scones, or toast for a classic breakfast.
- Use as a flavorful glaze for roasted pork tenderloin or chicken.
- Swirl into plain yogurt or oatmeal for an instant autumnal upgrade.
- Layer with mascarpone cheese between crepes or in a parfait.
- Serve alongside a sharp cheddar cheese board for a sweet and savory appetizer.
- Fill thumbprint cookies or use as a topping for vanilla ice cream.
- Pair with a cup of spiced chai tea or hot mulled cider.
This versatile condiment transitions seamlessly from morning toast to elegant dinner parties, making it a perfect make-ahead item for busy fall weeks.
Common Mistakes to Avoid
- Mistake: Using only one type of apple. Fix: Always use a blend of sweet (like Honeycrisp) and tart (like Granny Smith) apples for a balanced, complex flavor profile in your homemade apple butter.
- Mistake: Cooking at too high a heat during reduction. Fix: Keep the heat at the lowest simmer to prevent scorching the sugars and to achieve proper caramelization, not boiling.
- Mistake: Skipping the plate test for doneness. Fix: Always perform the chilled plate test. If liquid seeps out, continue cooking; proper thickness is key for spreadability and shelf life.
- Mistake: Not stirring frequently during the long cook-down. Fix: Set a timer to stir every 15-20 minutes. This prevents a sticky, burned layer from forming on the bottom of the pot.
- Mistake: Pouring hot apple butter into cold jars. Fix: Use sterilized, warm jars to prevent thermal shock and potential cracking, which compromises your storage.
- Mistake: Peeling the apples. Fix: Leave the skins on. They provide essential pectin for thickening and contribute to the beautiful deep color, as noted in Step 1.
Storing Tips
- Refrigeration: Store cooled apple butter in airtight containers or mason jars. It will keep for up to 3 weeks at 40°F or below.
- Freezing: For long-term storage, freeze in portion-sized containers for up to 12 months. Thaw overnight in the refrigerator. Freezing preserves over 95% of the flavor and nutrients.
- Canning for Pantry: For shelf-stable storage, process filled jars in a boiling water bath for 10 minutes (adjust for altitude). Properly sealed jars can be stored in a cool, dark place for up to 1 year.
- Reheating: Gently warm desired portions in a saucepan over low heat, adding a splash of apple cider or water if it has thickened too much in the fridge.
Following these storage methods ensures you can enjoy the rich taste of your traditional apple butter recipe long after apple season ends. Always discard any butter that shows signs of mold or fermentation.
Conclusion
This Traditional Apple Butter Recipe is a rewarding project that fills your home with the scent of fall and yields a versatile, deeply flavored spread. Its slow-cooked richness is perfect for gifting or enjoying all season long. For more delicious apple desserts, try our Mini Dutch Apple Pies Recipe or Crispy Fried Battered Apple Rings Recipe. I hope you love making it—share your results in the comments!
Frequently Asked Questions
How long does this Traditional Apple Butter Recipe last in the refrigerator?
Properly stored in a clean, airtight jar, this apple butter will keep for up to 3 weeks in the refrigerator. According to food safety guidelines, always use a clean spoon to prevent contamination. For longer storage, refer to the canning instructions in the Storing Tips section.
Can I make this apple butter without an immersion blender?
Yes, you can use a food mill, which will also remove the apple skins, or carefully blend small batches in a standard countertop blender. If using a blender, allow the mixture to cool slightly first and never fill the jar more than halfway to prevent steam pressure buildup. The food mill method yields a slightly smoother texture, but the immersion blender is the most efficient tool for the job.
Why is my apple butter too runny or not thickening?
This usually happens because the reduction time was insufficient. Unlike jam, apple butter thickens primarily through slow evaporation. The solution is to continue cooking it uncovered over very low heat, stirring frequently, until it passes the plate test described in Step 5. Using a mix of apple varieties with natural pectin, and leaving the skins on, provides the best foundation for a thick set.
PrintTraditional Apple Butter Recipe
Ingredients
- 5 lbs (about 10–12) medium-sized apples
- 2 cups Granulated Sugar
- 1 cup brown sugar
- 1 tablespoon Ground Cinnamon
- 1/2 teaspoon Ground Nutmeg
- 1/2 teaspoon Ground Cloves
- 1/4 teaspoon Salt
- 1 tablespoon Vanilla Extract
- Juice of 1 lemon
Instructions
- Preparation:
- Slow Cooking:
- Blending:
- Finishing:
- Flavor Enhancement:
- Testing Consistency:
- Canning (Optional):
- Cooling and Storing:
You Might Also Like
- Gingerbread Cupcakes with Cinnamon Frosting Recipe
- Best Blueberry Pound Cake – Moist & Buttery with Fresh Berries
- Autumn Butternut Squash Apple Bake Recipe
- The Best Southern Peach Cobbler Recipe


One Comment