Sweet & Salty Trail Mix Bark (The Double-Layer Trick)
Tested & Approved
by Sophie Lane
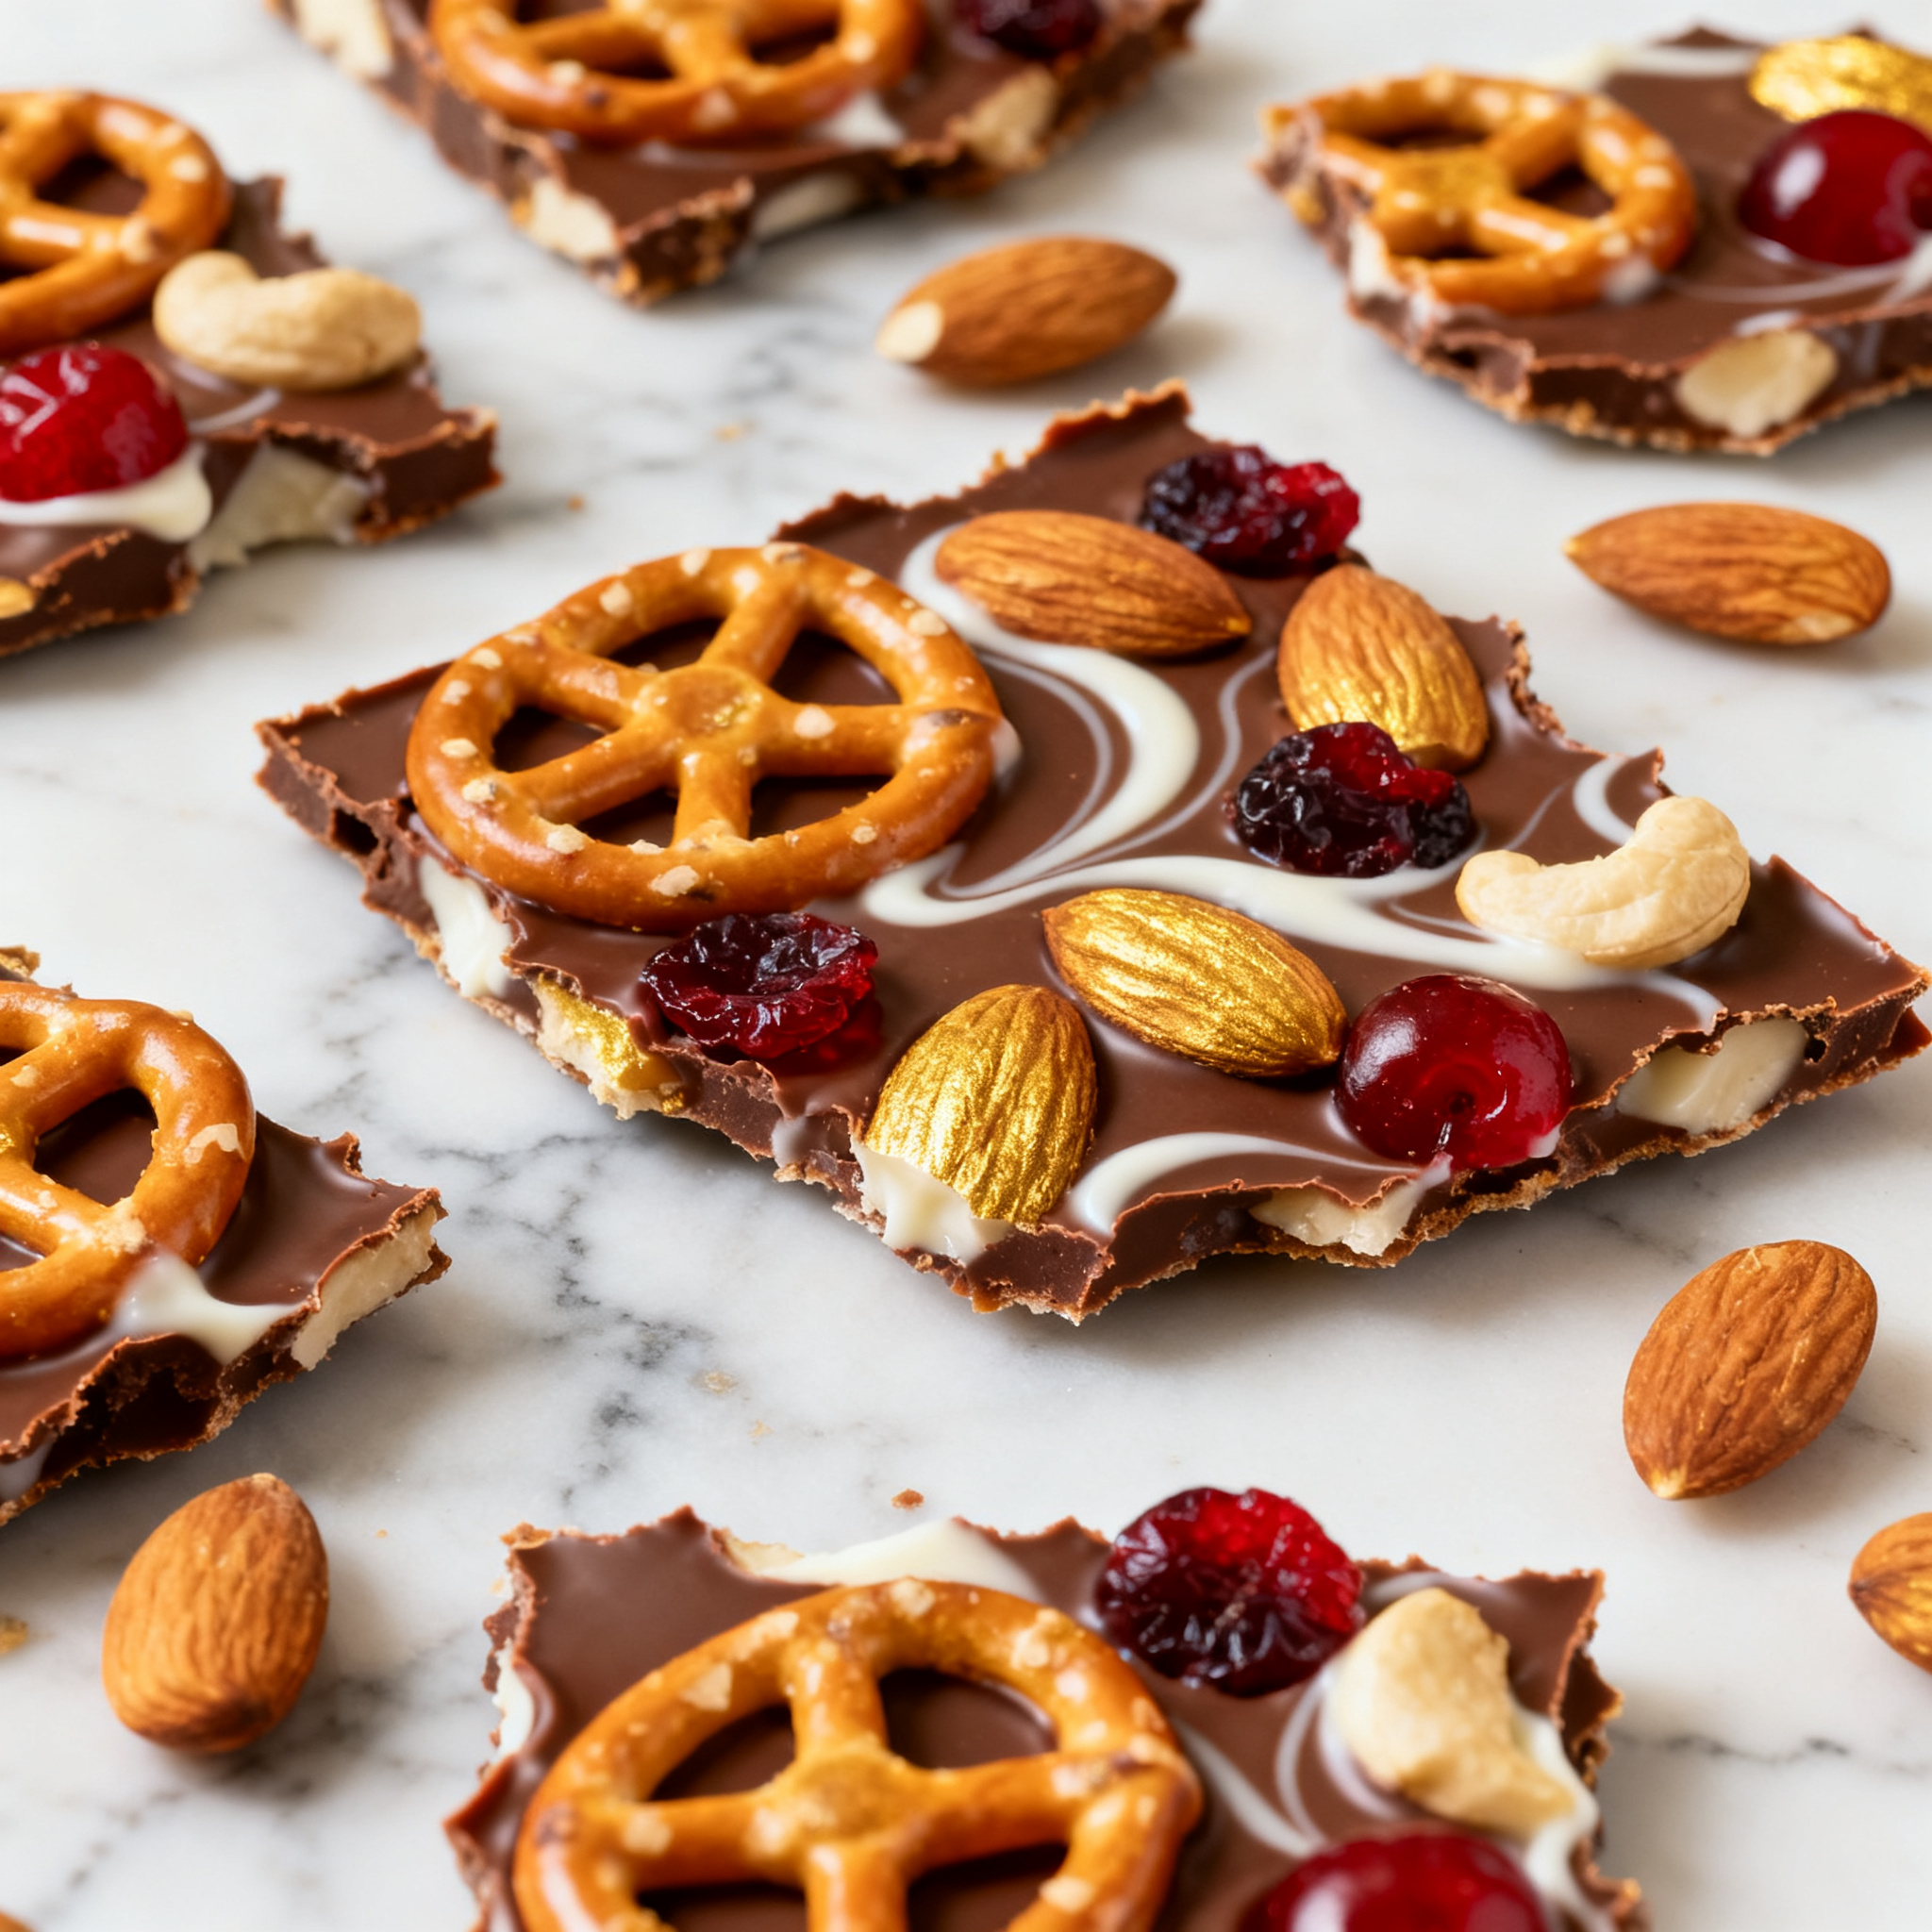
Most trail mix bark is just melted chocolate with stuff scattered on top, which means half your toppings end up on the counter instead of in the bite. This version presses pretzels, nuts and dried fruit into two separate layers of chocolate, so every single shard breaks with the same sweet-salty crunch — no bald spots, no sad naked corners.
Published: August 24, 2026
Simple, everyday ingredients and clear, step-by-step instructions — every recipe made in Dorothy"s kitchen before it reaches yours. Jump to the full recipe card below.
PrintSweet & Salty Trail Mix Bark (The Double-Layer Trick)
A double-layer sweet and salty trail mix bark with pretzels, nuts, dried fruit, and a browned butter swirl that keeps every shard packed with crunch.
- Prep Time: 15 minutes
- Cook Time: 10 minutes
- Total Time: 40 minutes
- Yield: 20 pieces 1x
- Method: No-bake
- Cuisine: American
Ingredients
- 10 oz dark chocolate (60-70%), chopped or wafers
- 4 oz white chocolate, chopped or wafers
- 2 tbsp unsalted butter
- 1/4 tsp espresso powder (optional)
- 1 cup pretzels, roughly crushed, divided
- 1/2 cup roasted salted almonds, chopped, divided
- 1/3 cup pepitas (pumpkin seeds), divided
- 1/3 cup dried cherries or freeze-dried strawberries, divided
- 1/2 tsp flaky sea salt
Instructions
- Line a half sheet pan with parchment paper.
- In a small saucepan, melt the butter over medium heat, swirling often, until it foams and the milk solids turn golden and smell nutty, about 3-4 minutes. Remove from heat and set aside to cool slightly.
- Melt the dark chocolate in a double boiler or in the microwave in 20-second bursts, stirring between each, until smooth. Stir in espresso powder if using. Make sure your bowl and utensils are completely dry to avoid seizing.
- Pour the dark chocolate onto the parchment and spread into an even layer about 1/4 inch thick.
- While the chocolate is still warm, press half the pretzels, almonds, pepitas, and dried cherries directly into the surface so they"re anchored.
- Drizzle the browned butter over the top in thin ribbons; don"t stir it in fully, you want visible streaks.
- Melt the white chocolate and drizzle it over the dark chocolate in lines. Drag a toothpick or skewer through both to create a marbled swirl.
- Scatter the remaining mix-ins over the top and press gently so they stick.
- Finish with flaky sea salt.
- Freeze for 15-20 minutes, or refrigerate for 45 minutes, until fully set and firm.
- Break into irregular shards. Store in an airtight container in a cool spot.
Notes
Keep every bowl and utensil completely dry — any moisture will seize the melting chocolate into a grainy clump. Spread the chocolate no thicker than 1/4 inch or you"ll end up with a candy bar instead of bark. Store bark in the fridge if your kitchen runs warm, but let it sit at room temp for a few minutes before serving so it doesn"t crack unevenly.
Here"s the problem with almost every trail mix bark recipe: you melt chocolate, pour it, and scatter your mix-ins across the top like you"re feeding birds. It looks great in the photo and falls apart the second you snap into it, because nothing is actually anchored — the almonds and pretzels are just resting on a slick surface, waiting to skitter off. The fix is embarrassingly simple and nobody does it: split your mix-ins in half, press the first batch directly into the chocolate while it"s still warm and tacky, then scatter the second batch on top and press again before it sets. Now the crunch is structural, not decorative.
The other move that separates this from a basic candy-bar-in-a-pan situation is browned butter. A couple tablespoons cooked until the milk solids turn nutty and amber, then drizzled in thin ribbons over the chocolate (not stirred in — ribboned, so it stays distinct), gives the whole slab a toffee-ish backbone that plain melted chocolate chips can"t fake. It"s a small step but it"s the difference between bark that tastes like a melted candy bag and bark that tastes like you actually cooked something.
Two things will wreck this recipe if you"re not careful. First, any stray water — a damp bowl, condensation from the fridge — will make your chocolate seize into a grainy clump the instant it hits the melt, so keep everything bone dry. Second, spread the chocolate too thick and you"ve made a chocolate bar with garnish, not bark; you want roughly a quarter inch so it shatters clean instead of snapping like a Snickers. Freeze the whole tray for the last stretch of setting rather than refrigerating — it locks the layers together fast and gives you that satisfying, glossy-shard crack when you break it.
Swap freely: dried cherries or freeze-dried strawberries add tartness that cuts the sweetness, coconut flakes toasted first bring a different kind of crunch, and a swap to white chocolate as the base (with dark chocolate as the drizzle instead) flips the whole flavor balance if you want something lighter for a holiday tin.
Frequently Asked Questions
Why does my trail mix bark keep losing its toppings?
The mix-ins are usually just scattered on top of the melted chocolate instead of pressed in. Press half your toppings into the chocolate while it's still warm and tacky, then add the rest and press again — this anchors everything so it breaks off in the bite, not off the bark.
Can I make trail mix bark without a candy thermometer?
Yes, this recipe doesn't require tempering. It won't have the same glossy snap as professionally tempered chocolate, but freezing it (rather than just refrigerating) gives you a clean, satisfying break and it holds fine at room temperature for a few days.
What's the best chocolate to use for bark?
Good-quality chopped chocolate bars or chocolate wafers/melts made for melting work best. Chocolate chips contain stabilizers that keep them from melting fully smooth, so they can leave your bark slightly grainy.
How long does trail mix bark last?
Stored in an airtight container at room temperature, it keeps about 2 weeks. In the fridge, it lasts closer to a month — just let it come to room temperature before serving so the texture isn't stiff.
Get our 10 best recipes — free
Join the Rapid Recipes newsletter and we’ll email you our 10 most-loved recipes as a free PDF.
Free PDF + new recipes every week. Unsubscribe anytime.