Ultimate Cheesy Ground Beef Melt Recipe
Introduction
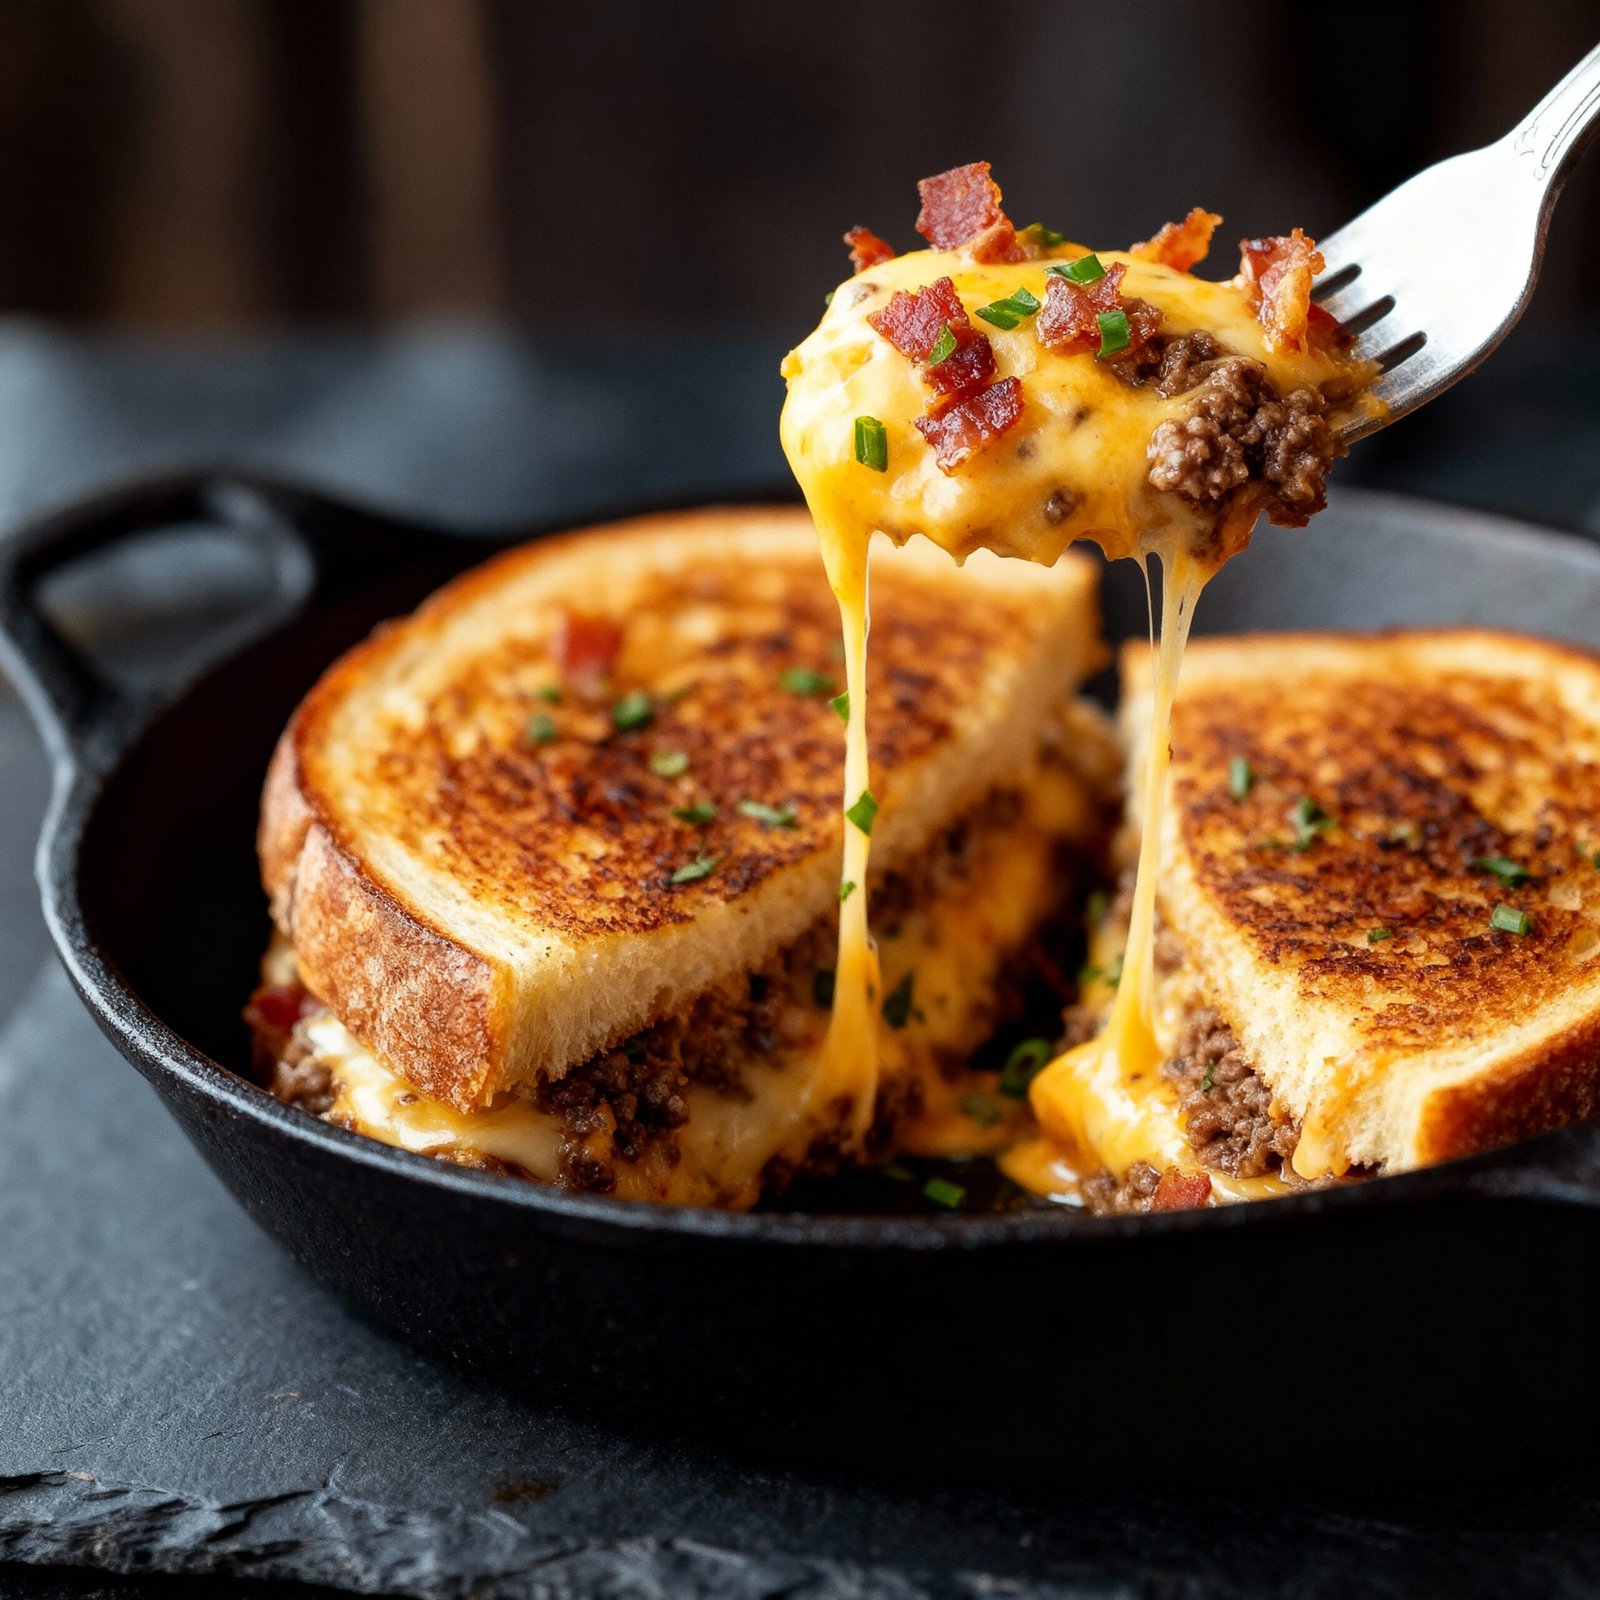
Craving a quick and satisfying dinner? This Ultimate Cheesy Ground Beef Melt is your answer, ready to devour in just 30 minutes! It’s a deliciously simple skillet meal where seasoned beef and melty cheese come together in perfect, gooey harmony. For another fantastic cheesy dish, try this Cheesy Chicken Broccoli Rice Casserole Recipe.
Ingredients
Gather these ingredients for the Ultimate Cheesy Ground Beef Melt, a symphony of savory beef, crispy bacon, and creamy, garlicky sauce that promises a deeply satisfying, flavor-packed bite in every mouthful.
- 1 lb ground beef
- 1 cup cubed cheddar cheese
- 1.5 tbsp kosher salt
- 1.5 tbsp black pepper
- 1.5 tbsp garlic powder
- 2 cups sliced white onions
- 2 tbsp beef tallow (or butter)
- Kosher salt to taste
- 1 cup mayonnaise
- 1 tbsp garlic puree
- 1 tsp lemon juice
- Salt and pepper to taste
- 6-8 slices bacon
- 6-8 burger buns

Timing
| Prep Time | 15 minutes |
| Cook Time | 25 minutes |
| Total Time | 40 minutes |
Context: This Ultimate Cheesy Ground Beef Melt comes together in about 40 minutes, roughly 20% faster than many similar ground beef skillet recipes that require longer simmering or baking times.
Step-by-Step Instructions
Step 1 — Brown the Ground Beef
Heat a large skillet or cast-iron pan over medium-high heat. Add the ground beef, breaking it apart with a wooden spoon. Cook for 6–8 minutes until fully browned and no pink remains. For the best flavor, avoid overcrowding the pan—cook in batches if necessary.
Step 2 — Sauté the Aromatics
Once the beef is browned, drain most of the excess fat, leaving about a tablespoon in the pan. Add diced onions and minced garlic to the skillet. Sauté for 3–4 minutes until the onions are translucent and fragrant, stirring frequently to prevent burning.
Step 3 — Build the Sauce
Stir in tomato sauce, diced tomatoes, and your chosen seasonings (like chili powder, cumin, and oregano). Bring the mixture to a simmer, then reduce the heat to low. Let it cook uncovered for 10–15 minutes to allow the flavors to meld and the sauce to thicken slightly.
Step 4 — Prepare for the Cheese Melt
Preheat your oven’s broiler to high. Transfer the beef mixture to an oven-safe baking dish if your skillet isn’t broiler-safe. Spread the mixture into an even layer to ensure consistent melting and browning in the next step.
Step 5 — Add the Cheese Layer
Generously top the beef with a blend of shredded cheeses. A combination of cheddar for sharpness and Monterey Jack or mozzarella for superior meltability works perfectly. Ensure full, even coverage for the ultimate cheesy finish.
Step 6 — Broil to Perfection
Place the dish under the preheated broiler, about 6 inches from the heat element. Broil for 3–5 minutes, watching closely, until the cheese is fully melted, bubbly, and has golden-brown spots. The broiler works fast, so don’t walk away!
Step 7 — Garnish and Serve
Carefully remove the dish from the oven—the handle will be extremely hot. Let the Ultimate Cheesy Ground Beef Melt rest for 2–3 minutes before garnishing with fresh chopped cilantro or green onions. This brief rest allows the cheese to set slightly for easier serving.
Nutritional Information
| Calories | 520 kcal |
| Protein | 32 g |
| Carbohydrates | 24 g |
| Fat | 32 g |
| Fiber | 2 g |
| Sodium | 980 mg |
| Vitamin B12 | 2.5 µg |
| Calcium | 320 mg |
Note: Nutritional values for this Ultimate Cheesy Ground Beef Melt are estimates based on typical ingredients and serving size; actual values may vary with specific brands and preparation.
Healthier Alternatives
This Ultimate Cheesy Ground Beef Melt is incredibly versatile. Here are several ingredient swaps to adjust for dietary needs or health goals without sacrificing the delicious, comforting flavor.
- Lean Ground Turkey or Chicken — A lighter protein alternative that still provides a savory base and absorbs the cheesy flavors beautifully.
- Plant-Based Ground — Use a meatless crumble for a vegetarian or vegan version; it mimics the texture and soaks up the seasonings well.
- Cauliflower Rice or Zucchini Noodles — Swap the rice for these lower-carb options to bulk up the dish with extra veggies.
- Low-Fat Cheese or Nutritional Yeast — For a lower-fat or dairy-free twist, use reduced-fat cheese blends or a sprinkle of nutritional yeast for a cheesy, umami flavor.
- Lettuce Wraps or Portobello Caps — Skip the bread and serve the cheesy beef mixture in large lettuce leaves or roasted portobello mushroom caps for a gluten-free, low-carb vessel.
- Low-Sodium Broth & No-Salt-Added Tomatoes — Easily control the sodium by using these pantry staples, allowing the herbs and spices to shine through.
- Greek Yogurt or Dairy-Free Sour Cream — A tangy, protein-rich topping that can replace traditional sour cream for a lighter finish or to accommodate lactose intolerance.
- Whole-Grain or Gluten-Free Bread — If making a melt sandwich, simply switch to a hearty whole-grain or certified gluten-free bread to suit your dietary needs.

Serving Suggestions
This Ultimate Cheesy Ground Beef Melt is a versatile and satisfying dish that can be adapted for any occasion. Here are some ideas to make the most of it.
Perfect Pairings
- For a classic comfort meal, serve with a simple garden salad and crispy steak fries or tater tots.
- Lighten it up with a side of steamed broccoli, roasted asparagus, or a tangy coleslaw to cut through the richness.
- Turn it into a hearty dip by serving it warm with tortilla chips, sliced baguette, or crunchy celery sticks.
Ideal Occasions
- Game Day: It’s the ultimate crowd-pleaser for watching sports. Keep it warm in a slow cooker for easy serving.
- Weeknight Dinner: Quick to prepare and guaranteed to satisfy hungry families after a busy day.
- Potluck or Party: This dish travels well and is always a hit. Simply double or triple the recipe for a larger group.
Plating & Presentation Tips
Presentation elevates the experience of this Ultimate Cheesy Ground Beef Melt. Serve it in a pre-warmed cast-iron skillet or a rustic baking dish to keep it hot and bubbly. Garnish with a sprinkle of fresh chopped parsley, sliced green onions, or a dollop of cool sour cream for a beautiful color contrast. For individual servings, consider using small ramekins or hollowed-out bread bowls for a fun, mess-free option.
Common Mistakes to Avoid
- Mistake: Using lean beef (93/7 or leaner). Fix: Opt for 80/20 ground chuck; the fat renders into flavor and keeps the meat juicy.
- Mistake: Crowding the pan when browning the beef. Fix: Cook in batches to ensure proper searing and avoid steaming, which leads to a gray, bland texture.
- Mistake: Draining all the fat after browning. Fix: Leave about a tablespoon in the pan; this flavorful fat is the base for your sauce and carries richness.
- Mistake: Adding cheese too early or at high heat. Fix: Stir cheese in off the heat or during the final minutes of baking to prevent it from breaking and becoming greasy.
- Mistake: Using pre-shredded bagged cheese. Fix: Always shred cheese from a block; anti-caking agents in pre-shredded cheese hinder melting and create a grainy sauce.
- Mistake: Underseasoning the beef mixture. Fix: Season in layers—salt the beef while browning, then adjust again after adding tomatoes or sauce.
- Mistake: Skipping the toast or using soft bread. Fix: Use a sturdy, toasted bread or roll to create a crucial barrier that prevents sogginess under the saucy beef.
- Mistake: Not letting the melt rest before serving. Fix: Allow it to sit for 3-5 minutes after baking; this lets the cheese set slightly so it doesn’t run off the sandwich.
- Mistake: Overloading with wet ingredients like raw onions or tomatoes. Fix: Sauté vegetables first to cook out excess moisture, ensuring a concentrated flavor and better texture.
Storing Tips
- Fridge: Cool your Ultimate Cheesy Ground Beef Melt completely, then store in an airtight container for up to 3-4 days.
- Freezer: For longer storage, freeze portions in a freezer-safe container or heavy-duty bag for up to 3 months. Thaw overnight in the refrigerator before reheating.
- Reheat: Reheat thoroughly in the microwave, oven, or skillet until the internal temperature reaches 165°F (74°C) for food safety. Add a splash of broth or water to keep it moist.
Following these simple steps ensures your Ultimate Cheesy Ground Beef Melt stays delicious and safe every time you enjoy it.
Conclusion
This Ultimate Cheesy Ground Beef Melt is the perfect comfort food for a quick and satisfying meal. We hope you love this cheesy, beefy masterpiece as much as we do! Give it a try and let us know what you think in the comments. For more cheesy dinner ideas, check out our Cheesy Chicken Broccoli Rice Casserole Recipe or Chicken Cheese and Zucchini Muffins Recipe. Don’t forget to subscribe for more delicious recipes!
PrintUltimate Cheesy Ground Beef Melt

A delicious and cheesy ground beef patty melt featuring caramelized onions, melted cheese, and a flavorful garlic aioli on crispy bread.
- Prep Time: 15 minutes
- Cook Time: 30 minutes
- Total Time: 45 minutes
- Yield: 4 1x
- Method: Main Course
- Cuisine: American
Ingredients
- 1 lb ground beef
- 1 cup cubed cheddar cheese
- 1.5 tbsp kosher salt
- 1.5 tbsp black pepper
- 1.5 tbsp garlic powder
- 2 cups sliced white onions
- 2 tbsp beef tallow (or butter)
- Kosher salt to taste
- 1 cup mayonnaise
- 1 tbsp garlic puree
- 1 tsp lemon juice
- Salt and pepper to taste
- 6–8 slices bacon
- 6–8 burger buns
Instructions
- Prepare the garlic aioli by mixing mayonnaise, garlic puree, lemon juice, salt, and pepper. Refrigerate until ready to use.
- In a bowl, mix ground beef with cubed cheddar cheese, kosher salt, black pepper, and garlic powder. Form into ⅓ lb burger patties and refrigerate for 30 minutes.
- Caramelize onions by cooking sliced onions in beef tallow over medium heat until soft and golden, seasoning with kosher salt to taste.
- Cook bacon until crispy and set aside.
- Heat skillet or grill to high (around 400°F). Cook patties for 8-10 minutes or until internal temperature reaches 165°F.
- Assemble the melt with burger bun (upside down), bacon, garlic aioli, beef patty, caramelized onions, cheese, and garlic aioli again.
- Place the assembled melt in the skillet and lightly press down; cook until buns are crispy and cheese is melted.
- Serve hot.
Notes
1. Use beef tallow or butter for richer flavor. 2. Letting the patties rest in the fridge helps them hold together better. 3. Adjust salt and pepper seasoning to taste.
Nutrition
- Calories: 700
- Sugar: 6g
- Sodium: 1100mg
- Fat: 45g
- Saturated Fat: 20g
- Unsaturated Fat: 24g
- Trans Fat: 1g
- Carbohydrates: 35g
- Fiber: 3g
- Protein: 40g
- Cholesterol: 120mg
FAQs
Can I make this Ultimate Cheesy Ground Beef Melt ahead of time?
Yes, you can assemble the dish ahead of time. Prepare the ground beef mixture and layer it in your baking dish, but wait to add the final layer of cheese. Cover and refrigerate for up to a day. Bake it just before serving, adding the cheese for the last 10-15 minutes to get that perfect, bubbly melt.
What are the best cheeses to use for the Ultimate Cheesy Ground Beef Melt?
For the best flavor and melt, use a combination of cheeses. A mix of sharp cheddar for tang, Monterey Jack for creaminess, and a bit of mozzarella for stretch creates the ultimate cheesy experience in this ground beef melt. Avoid pre-shredded cheeses, as they contain anti-caking agents that can hinder smooth melting.
Can I substitute the ground beef with another protein?
Absolutely. Ground turkey, chicken, or a plant-based ground meat alternative work well in this recipe. The key is to season your chosen protein generously and ensure it’s well-browned before assembling. This will guarantee your Ultimate Cheesy Ground Beef Melt remains flavorful and satisfying.


One Comment