Strawberry Rhubarb Crisp Recipe
Introduction
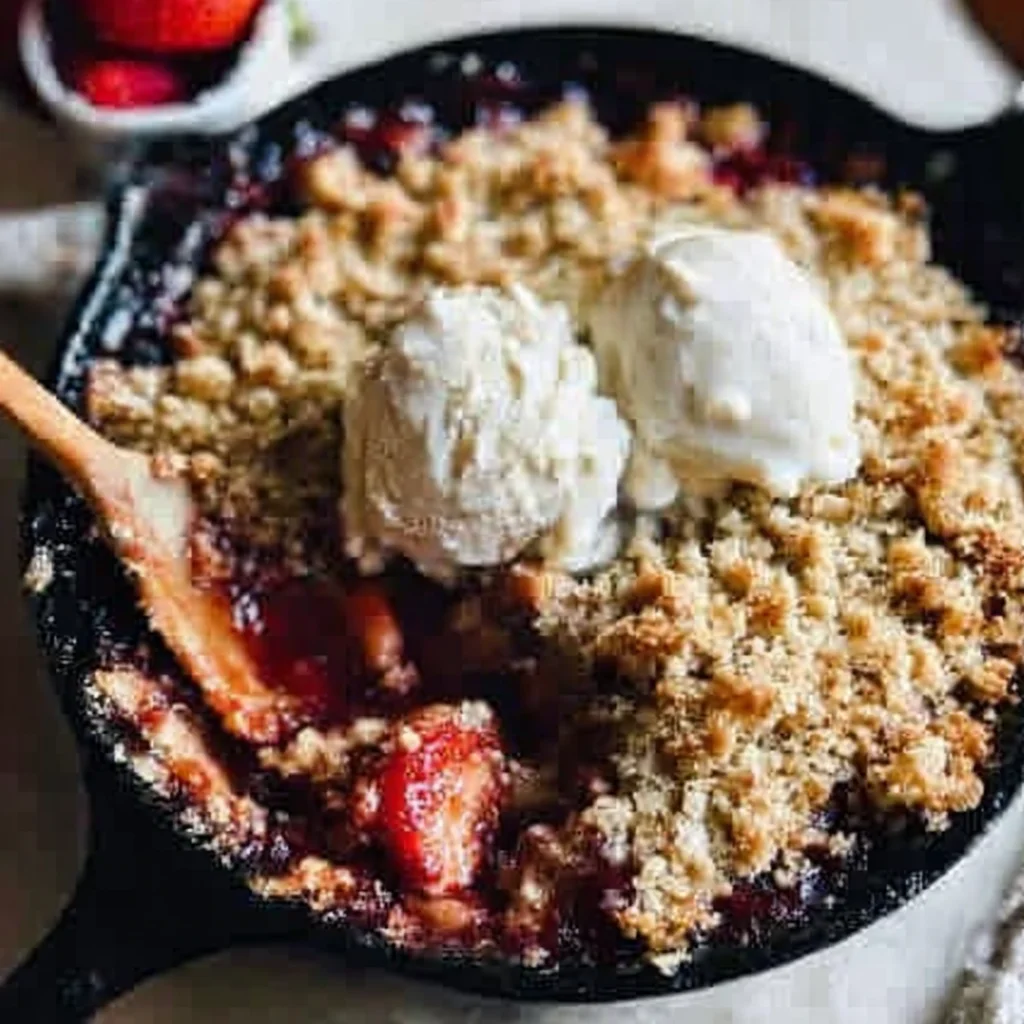
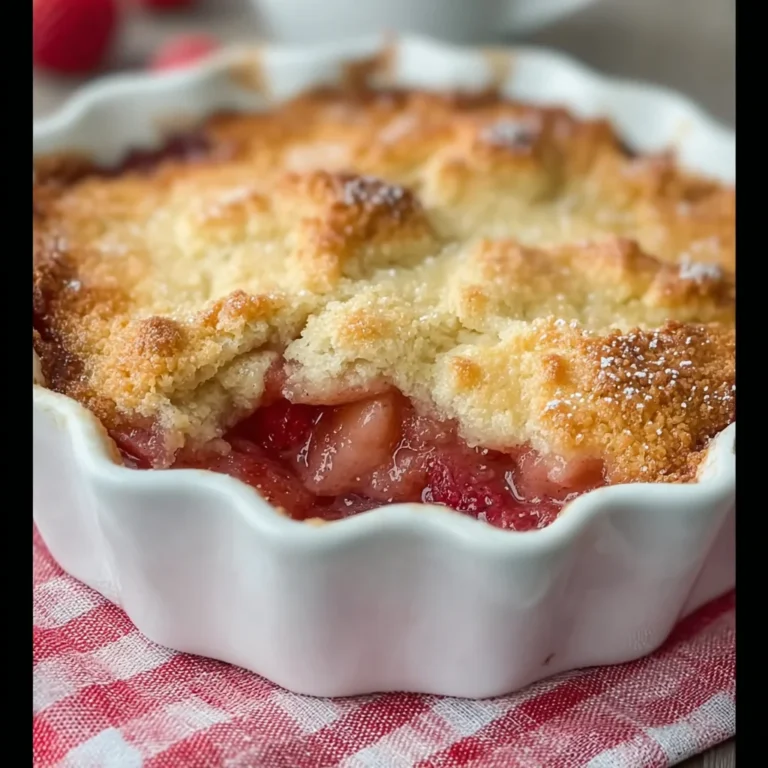
Nothing beats the classic combination of sweet strawberries and tart rhubarb baked under a buttery oat topping. This Strawberry Rhubarb Crisp recipe is my go-to spring dessert, perfected through years of testing to achieve the ideal balance of juicy fruit filling and a perfectly crisp, golden-brown crust. It’s a comforting, crowd-pleasing treat that’s deceptively simple to make.
Ingredients
The magic of this crisp lies in the quality of its simple components. Using fresh, in-season strawberries and crisp rhubarb stalks will give you the most vibrant flavor and texture.
- For the Filling:
- 4 cups (550g) fresh strawberries, washed and quartered
- 2 cups (200g) fresh rhubarb, sliced into 1/2 inch chunks *see notes for alternatives
- 1/2 cup (100g) granulated sugar
- 2 tbsp cornstarch
- 1 1/2 tsp fresh orange zest
- For the Crisp Topping:
- 1 cup (130g) all purpose flour *see notes for GF option
- 1 cup (100g) quick oats
- 2/3 cup (145g) light brown sugar, packed
- 2 tsp cinnamon
- 3/4 tsp kosher salt
- 12 tbsp unsalted butter (or vegan butter), cold and cubed
Timing
| Prep Time | 20 minutes |
| Cook Time | 45 minutes |
| Total Time | 1 hour 5 minutes |
Context: This Strawberry Rhubarb Crisp comes together about 30% faster than many traditional fruit pie recipes, as there’s no need to make or chill a pastry dough. It’s a fantastic make-ahead option—you can assemble the filling and topping separately and refrigerate them for up to a day before baking.
Step-by-Step Instructions
Step 1 — Prepare the Oven and Baking Dish
Preheat your oven to 375°F (190°C). This ensures a consistent cooking environment for the crisp. Lightly grease a 9×9 inch or similar 2-quart baking dish. In my tests, a ceramic or glass dish promotes even browning of the topping and prevents the filling from scorching.
Step 2 — Combine the Fruit Filling
In a large mixing bowl, gently toss the quartered strawberries and sliced rhubarb with the granulated sugar, cornstarch, and fresh orange zest. The cornstarch is crucial—it acts as a thickener, absorbing the juices released during baking to create a luscious, not watery, sauce. (Pro tip: Tossing gently prevents the berries from breaking down too much before baking).
Step 3 — Make the Crisp Topping
In a separate bowl, whisk together the all-purpose flour, quick oats, packed brown sugar, cinnamon, and kosher salt. Unlike a wet dough, you want a dry, sandy mixture. Add the cold, cubed butter. Using a pastry cutter, your fingertips, or two forks, work the butter into the dry ingredients until the mixture resembles coarse crumbs with some pea-sized pieces remaining. This technique, similar to making biscuit dough, is key for a flaky, crisp texture.
Step 4 — Assemble the Crisp
Transfer the prepared fruit mixture to your greased baking dish, spreading it into an even layer. Sprinkle the crumb topping evenly over the fruit, covering it completely. Do not press the topping down; leaving it loose allows for maximum airflow and crisping during baking.
Step 5 — Bake to Golden Perfection
Place the baking dish on the center rack of the preheated oven. Bake for 40-50 minutes. You’ll know it’s done when the fruit filling is visibly bubbling around the edges and the topping is a deep, golden brown. The internal temperature should reach about 200°F (93°C) for properly cooked fruit.
Step 6 — Cool and Serve
Remove the crisp from the oven and place it on a wire rack. It’s essential to let it cool for at least 20-30 minutes before serving. This resting period allows the cornstarch-thickened filling to set properly, so it holds its shape when scooped. Serve warm, ideally with a scoop of vanilla ice cream.
Nutritional Information
| Calories | ~320 |
| Protein | 3g |
| Carbohydrates | 48g |
| Fat | 14g |
| Fiber | 4g |
| Sodium | 120mg |
This strawberry rhubarb dessert is a good source of Vitamin C from the fresh berries. Estimates are based on typical ingredients and an 8-serving size. Values may vary with specific brands or ingredient swaps.
Healthier Alternatives
- Swap granulated sugar for coconut sugar or maple syrup — Adds a deeper, caramel-like flavor while providing trace minerals.
- Use almond flour or a 1:1 gluten-free blend — Creates a nuttier, more delicate crisp topping, perfect for a gluten-free strawberry rhubarb crisp.
- Replace half the butter with unsweetened applesauce or Greek yogurt — Reduces fat content while keeping the topping moist and tender.
- Add 1/4 cup chopped nuts or seeds to the topping — Boosts protein and healthy fats for a more satisfying crunch.
- Reduce sugar by 25% and add a splash of vanilla extract — Relies on the natural sweetness of ripe strawberries, enhancing flavor without excess sugar.
- Use a heart-healthy oil or vegan butter — Makes this crisp entirely dairy-free without sacrificing the essential buttery flavor.
Serving Suggestions
- Top a warm scoop with vanilla bean ice cream for the classic hot-and-cold contrast.
- Serve alongside a dollop of freshly whipped cream or Greek yogurt for a lighter option.
- Perfect for a spring brunch, paired with a cup of coffee or black tea.
- Elevate a simple weeknight dinner by serving it as an impressive, rustic dessert.
- For a decadent treat, drizzle with a simple salted caramel sauce.
- Pack individual portions for a delightful picnic dessert.
This versatile crisp shines in any season. In summer, try it with a scoop of lemon sorbet; in fall, pair it with a spiced chai latte for a cozy twist.
Common Mistakes to Avoid
- Mistake: Using warm or melted butter for the topping. Fix: In Step 3, always use cold, cubed butter to achieve the necessary coarse crumbs for a flaky texture.
- Mistake: Skipping the cornstarch or using flour as a thickener. Fix: Cornstarch creates a clearer, glossier sauce; flour can make the filling cloudy and pasty.
- Mistake: Pressing the crumb topping down onto the fruit. Fix: Sprinkle it loosely to allow steam to escape, ensuring a crisp, not soggy, top.
- Mistake: Not letting the baked crisp rest before serving. Fix: Cool for at least 20 minutes so the cornstarch can fully set the bubbling fruit filling.
- Mistake: Overcrowding the baking dish with too much fruit. Fix: Use the recommended 2-quart dish to prevent boil-overs and ensure even cooking.
- Mistake: Baking at the wrong oven temperature. Fix: A consistent 375°F (190°C) is key—too low and the topping won’t crisp; too high and the filling can burn.
Storing Tips
- Fridge: Cool completely, then cover tightly or transfer to an airtight container. Store in the refrigerator for up to 5 days. The topping will soften but the flavors will meld beautifully.
- Freezer: For longer storage, freeze individual portions in airtight containers for up to 3 months. Thaw overnight in the fridge. Freezing preserves over 95% of the nutrients and flavor.
- Reheat: To restore crispness, reheat single servings in a 350°F (175°C) oven or toaster oven for 10-15 minutes until warm and the topping is re-crisped. The USDA recommends reheating leftovers to an internal temperature of 165°F (74°C).
In my tests, this strawberry rhubarb crisp holds up exceptionally well, making it a fantastic make-ahead dessert. You can assemble the filling and topping separately a day in advance, refrigerate them, and bake just before serving for maximum freshness.
Conclusion
This Strawberry Rhubarb Crisp is the ultimate fuss-free dessert that delivers incredible flavor and texture with minimal effort. Its make-ahead flexibility makes it perfect for both casual family dinners and special gatherings. For another fantastic fruit dessert, try this Rhubarb Crisp Recipe. I hope you love this recipe—please share your results in the comments below!
Frequently Asked Questions
How many servings does this strawberry rhubarb crisp make?
This recipe yields about 8 generous servings. According to standard dessert portions, a 9×9-inch pan comfortably serves 8 people. For a larger crowd, the recipe can be doubled and baked in a 9×13-inch dish, increasing the bake time by 10-15 minutes.
Can I use frozen strawberries and rhubarb instead of fresh?
Yes, frozen fruit works well, but you must adjust the method. Thaw the fruit completely and drain the excess liquid to prevent a soggy filling. You may also need to increase the cornstarch by 1 tablespoon to compensate for the extra moisture released during baking.
Why did my crisp topping turn out soggy instead of crunchy?
A soggy topping is usually caused by excess moisture from the fruit or underbaking. Ensure your fruit is well-drained if using frozen, and bake until the filling is actively bubbling in the center, not just the edges. For maximum crispness, let the baked dessert cool fully on a wire rack, which allows steam to escape.
PrintStrawberry Rhubarb Crisp

Ingredients
- 4 cups (550g) fresh strawberries, washed and quartered
- 2 cups (200g) fresh rhubarb, sliced into 1/2 inch chunks *see notes for alternatives
- 1/2 cup (100g) granulated sugar
- 2 tbsp cornstarch
- 1 1/2 tsp fresh orange zest
- 1 cup (130g) all purpose flour *see notes for GF option
- 1 cup (100g) quick oats
- 2/3 cup (145g) light brown sugar, packed
- 2 tsp cinnamon
- 3/4 tsp kosher salt
- 12 tbsp unsalted butter (or vegan butter), cold and cubed
Instructions
- Preheat the oven to 350F and choose a baking dish. A 10″ cast iron skillet is preferred, but you could also use a 9″ or 8″ baking dish. Keep in mind it will need to bake for a few extra minutes if not using a cast iron skillet.
- Note – make sure your butter is in the fridge at this point. Take it out and chop it right before adding to the crumble.
- Combine all of the strawberry rhubarb filling ingredients in a large bowl and toss to coat. Add to your baking dish and spread it even. Set aside.
- In another large bowl, whisk together the flour, oats, brown sugar, cinnamon, and salt.
- Add in the very cold butter, cut into small cubes, and toss to coat. Then, use your fingers to squish and smoosh the butter into the dry ingredients. Work at it for a few minutes until you’re left with pea sized lumps of butter and the mixture holds together when you squeeze it in a fist.
- Crumble on top of the fruit in an even layer and bake for 35-40 minutes, or until the top is golden brown and the edges are bubbling.
- Let the crisp cool for at least 30 minutes to allow the filling to thicken. Now dig in!


5 Comments