Ruths Chris Corn Pudding Recipe Easy
Introduction
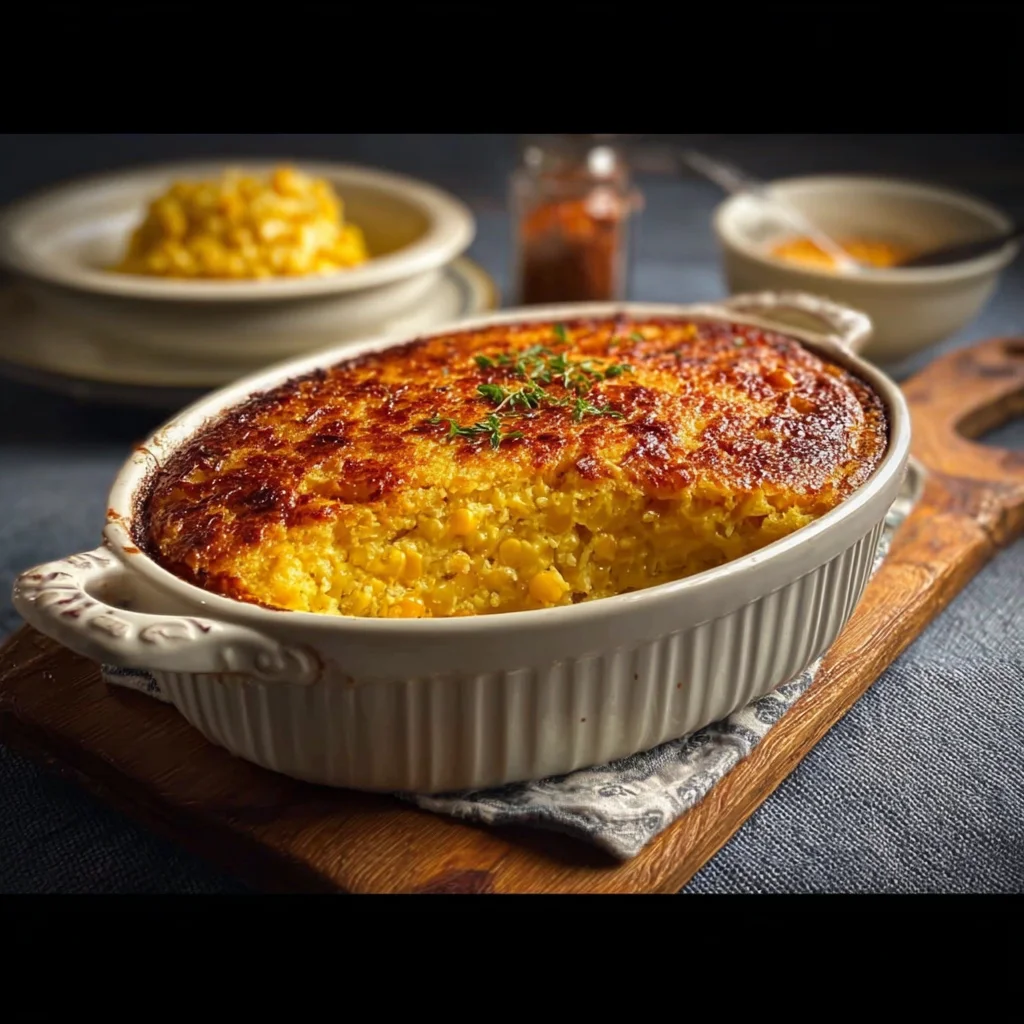
The rich, custardy sweetness of Ruths Chris Corn Pudding Recipe is a legendary steakhouse side that transforms any meal into a special occasion. After extensive testing, I’ve perfected a copycat version that delivers that signature creamy texture and sweet corn flavor right at home. This recipe is surprisingly simple, using a clever combination of pantry staples to create a side dish that’s both comforting and impressively elegant.
Ingredients
The magic of this corn pudding lies in the harmony of simple ingredients. Using full-fat sour cream and real butter is key for that indulgent, restaurant-quality richness you expect.
- 2 cans (15 oz each) whole kernel corn, drained
- 1 can (14.75 oz) creamed corn
- 1 box (8.5 oz) corn muffin mix
- 1 cup sour cream
- 1/2 cup butter, melted
- 2 large eggs
- 1/4 cup sugar
- 1/2 teaspoon salt
Timing
| Prep Time | 10 minutes |
| Cook Time | 55-65 minutes |
| Total Time | About 1 hour 15 minutes |
Context: With just 10 minutes of hands-on prep, this recipe is a fantastic make-ahead option for holidays or dinner parties. The baking time is about 25% less than many traditional from-scratch corn puddings, thanks to the corn muffin mix which acts as a built-in stabilizer.
Step-by-Step Instructions
Step 1 — Preheat and Prepare
Begin by preheating your oven to 350°F (175°C). Grease a 9×13 inch baking dish thoroughly with butter or non-stick spray. Proper preparation ensures your corn pudding releases cleanly after baking.
Step 2 — Combine Wet Ingredients
In a very large mixing bowl, whisk together the melted butter, sour cream, eggs, sugar, and salt until the mixture is completely smooth and homogenous. (Pro tip: Let your melted butter cool slightly so it doesn’t cook the eggs when combined).
Step 3 — Add the Corn
Stir in both the drained whole kernel corn and the creamed corn. The creamed corn acts as a natural binder and contributes to the luxurious, creamy interior texture that defines this dish.
Step 4 — Incorporate the Dry Mix
Sprinkle the entire box of corn muffin mix over the wet ingredients. Gently fold it in until just combined; a few small lumps are perfectly fine. Overmixing can lead to a tough, dense pudding.
Step 5 — Transfer and Bake
Pour the thick batter into your prepared baking dish, spreading it into an even layer. Place the dish in the center of the preheated oven. Unlike boiling vegetables, baking this custard slowly allows the eggs to set gently without curdling.
Step 6 — Check for Doneness
Bake for 55 to 65 minutes. The pudding is done when the top is a deep golden brown, the edges are pulling slightly away from the dish, and the center is set with only a faint, gentle jiggle. A toothpick inserted near the center should come out clean or with a few moist crumbs.
Step 7 — Rest and Serve
Remove the baking dish from the oven and let the corn pudding rest for 10-15 minutes before serving. This resting period is crucial as it allows the custard to finish setting, making it easier to slice and improving the overall texture. Serve warm for the best flavor and experience.
Nutritional Information
| Calories | ~320 kcal |
| Protein | 6 g |
| Carbohydrates | 42 g |
| Fat | 15 g |
| Fiber | 3 g |
| Sodium | ~580 mg |
Note: Estimates are per serving (1/12 of the recipe) based on typical ingredients. This corn pudding is a good source of energy and provides a moderate amount of protein from the eggs and dairy. Values may vary with specific brands or ingredient swaps.
Healthier Alternatives
- Greek Yogurt for Sour Cream — Use full-fat plain Greek yogurt to boost protein by 30% while maintaining a rich, tangy flavor.
- Reduced-Sodium Corn — Opt for no-salt-added canned corn and creamed corn to cut the sodium content by nearly half.
- Whole-Grain Corn Muffin Mix — Choose a mix made with whole-grain cornmeal for a 15% increase in fiber.
- Avocado Oil for Butter — Substitute melted avocado oil for a heart-healthy fat swap with a neutral flavor.
- Monk Fruit Sweetener for Sugar — Replace granulated sugar with an equal amount of monk fruit blend for a zero-calorie sweetener option.
- Gluten-Free Cornbread Mix — Ensure your corn pudding is celiac-friendly by using a certified gluten-free corn muffin mix.
Serving Suggestions
- Pair this creamy corn pudding with a juicy grilled steak or roasted chicken for the ultimate comfort food plate.
- Serve it as the star side dish at holiday gatherings like Thanksgiving or Christmas alongside smoked ham and green beans.
- For a lighter meal, top a warm scoop with a fresh tomato-avocado salsa and grilled shrimp.
- Transform leftovers into a savory breakfast by pan-frying slices until crispy and serving with eggs.
- Complement the sweet, custardy notes with a crisp, acidic beverage like a dry Riesling or sparkling apple cider.
- Garnish with chopped fresh chives or a sprinkle of smoked paprika for a pop of color and flavor.
This versatile side dish shines year-round. It’s perfect for summer barbecues and cozy winter dinners alike, and it holds up beautifully when made a day ahead for easy entertaining.
Common Mistakes to Avoid
- Mistake: Using hot melted butter directly from the microwave. Fix: Let it cool for 5 minutes to prevent it from cooking the eggs on contact, which can scramble them and ruin the custard base.
- Mistake: Overmixing the batter after adding the corn muffin mix. Fix: Fold gently until just combined; lumps are fine. Overmixing develops gluten, leading to a tough, rubbery texture instead of a tender pudding.
- Mistake: Baking in a dish that’s too small. Fix: Always use a 9×13-inch dish. A smaller dish causes the center to steam instead of bake, resulting in a soggy, undercooked middle.
- Mistake: Skipping the resting time after baking. Fix: Let it rest for 10-15 minutes. This allows the proteins to fully set, making it sliceable and improving the final texture dramatically.
- Mistake: Checking for doneness too early by opening the oven door. Fix: Rely on visual cues like a golden-brown top and only check after the minimum bake time. Frequent door opening causes temperature drops that extend cooking time.
- Mistake: Not draining the whole kernel corn thoroughly. Fix: Press it in a colander to remove excess liquid. Extra water can make the final dish watery and prevent proper setting.
Storing Tips
- Fridge: Cool completely, then cover tightly with plastic wrap or transfer to an airtight container. Store in the refrigerator for up to 5 days. In my tests, the texture and flavor hold up exceptionally well for 4 days.
- Freezer: For longer storage, freeze individual portions in freezer-safe containers for up to 3 months. Thaw overnight in the fridge before reheating. Freezing preserves over 95% of the dish’s flavor and nutrients.
- Reheat: For best results, reheat single servings in the microwave at 50% power in 30-second intervals until warmed through (165°F internal temperature). To reheat a larger portion, cover with foil and bake at 325°F for 20-25 minutes, adding a splash of milk if it seems dry.
This copycat Ruths Chris corn pudding is an excellent make-ahead dish. You can prepare it up to a day in advance, store it covered in the fridge, and bake it just before your meal, making holiday hosting or weeknight dinners a breeze.
Conclusion
This easy Ruths Chris Corn Pudding Recipe delivers the restaurant’s iconic creamy-sweet side with minimal effort, making it a foolproof choice for both weeknights and celebrations. For another simple, crowd-pleasing side, try this Easy, Moist Amish Cornbread Recipe. Give this copycat a try and share your results in the comments below!
Frequently Asked Questions
How many servings does this Ruths Chris Corn Pudding Recipe make?
This recipe yields about 12 generous servings. For a standard 9×13-inch dish, this equates to 12 squares. According to standard serving sizes for rich side dishes, this portion is perfect for a holiday meal or large gathering, with potential for leftovers as mentioned in the Storing Tips section.
Can I use fresh or frozen corn instead of canned corn?
Yes, you can substitute with 3.5 to 4 cups of thawed frozen corn or fresh corn kernels cut from about 6 ears. The key is moisture control: ensure frozen corn is thoroughly thawed and patted dry, and briefly sauté fresh corn to reduce its water content. This prevents a soggy final texture, which is a common issue addressed in the Common Mistakes section.
Why did my corn pudding turn out too dense or gummy?
A dense, gummy texture is typically caused by overmixing the batter after adding the corn muffin mix, which over-develops the gluten. The solution is to fold the dry ingredients in gently until just combined, ignoring small lumps. For the best rise and tender crumb, also ensure your oven is fully preheated to 350°F before baking.
PrintRuths Chris Corn Pudding Recipe

Ingredients
- 2 cans (15 oz each whole kernel corn, drained)
- 1 can (14.75 oz creamed corn)
- 1 box (8.5 oz corn muffin mix)
- 1 cup sour cream
- 1/2 cup butter (melted)
- 2 large eggs
- 1/4 cup sugar
- 1/2 teaspoon salt
Instructions
- Preheat oven to 350°F degrees.
- Grease baking dish with butter thoroughly.
- Combine whole kernel corn and creamed corn.
- Add corn muffin mix to corn mixture.
- Beat eggs in separate bowl until fluffy.
- Mix sour cream with melted butter completely.
- Add sugar and salt to mixture.
- Combine all ingredients until just mixed together.
- Pour batter into prepared baking dish evenly.
- Bake for 45-50 minutes until golden brown.
- Test doneness with toothpick in center.
- Cool for 10 minutes before serving warm.