Easy No-Bake Chocolate Cream Pie – Ready in 30 Minutes
Easy No-Bake Chocolate Cream Pie: An Indulgent Delight Ready in Just 30 Minutes
For those seeking a rich and creamy dessert that’s a breeze to prepare, look no further than this Easy No-Bake Chocolate Cream Pie! With its luscious texture and intense chocolate flavor, it’s a crowd-pleaser that’s perfect for any occasion. Designed to be ready in just 30 minutes, this pie is perfect for a last-minute treat or a planned indulgence. Imagine the smooth creaminess of chocolate filling encased in a buttery crust, paired beautifully with a dollop of whipped cream – truly a dessert lovers’ dream.
Quick Recipe Highlights
- Flavor Profile: This pie promises a harmonious blend of deep chocolate flavor with a hint of sweetness.
- Texture: Expect a silky smooth filling that contrasts perfectly with a crunchy crust.
- Aroma: Entices with the rich scent of cocoa, enhanced by a creamy undertone.
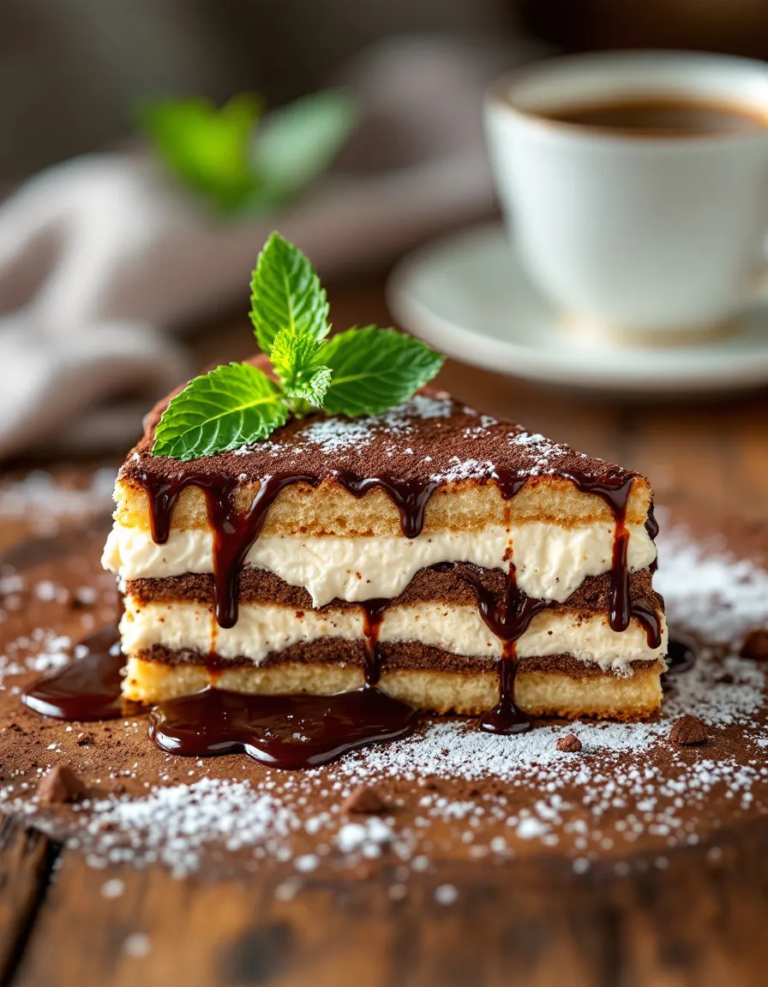
- Visual Appeal: A beautiful pie with a glossy chocolate top, adorned with whipped cream swirls.
- Skill Level Needed: Suitable for beginners due to its simple step-by-step process.
- Special Equipment: Requires just a saucepan and a whisk — no oven needed!
Recipe Overview
- Difficulty Level: Easy, as it involves straightforward mixing and assembly yielding consistent results.
- Category: Ideal for dessert, this pie is an essential addition to your sweet course repertoire.
- Cuisine: Rooted in American dessert traditions, embodying simplicity and indulgence.
- Cost: Cost-effective, using pantry staples and no special or pricey ingredients.
- Season: Perfect year-round, yet particularly lovely for summer when no-bake options are favored.
- Occasion: Suitable for family dinners, festive gatherings, or simply when a chocolate craving strikes.
Why You’ll Love This Recipe
The taste of this chocolate cream pie is unparalleled — rich, creamy, and perfectly balanced with sweetness, appealing even to the most discerning palates. Convenience is a key factor; within thirty minutes, you can have this delectable dessert chilling, ready to impress. It’s also a light alternative to heavier baked desserts when you’re focused on calorie intake but don’t want to skimp on flavor. Additionally, its preparation requires minimal effort — no need to handle complicated baking techniques. Entertaining becomes effortless, as this pie is universally adored, making it a safe bet for gatherings. Its cost-effectiveness means you can enjoy superior taste without an exorbitant price tag.
Historical Background and Cultural Significance
The chocolate cream pie has an interesting origin, finding its roots in the early 20th century American culinary traditions, where no-bake desserts became popular as instant mixes entered the market. This dessert captures a slice of Americana, reflecting the shift in domestic cooking focus towards convenience without sacrificing taste. Its evolution saw variations incorporating different types of chocolate, but the core simplicity remained cherished. There are regional spins on this classic, yet the foundational concept of a creamy chocolate delight persists, illustrating its timeless appeal.
Ingredient Deep Dive
Chocolate is the star ingredient, vital for providing the pie’s rich flavor. Selecting high-quality chocolate ensures a velvety texture and robust taste profile. Cocoa, historically valued for its mood-enhancing properties, offers antioxidants that benefit health. To store chocolate, keep it in a cool, dry place, ensuring it’s protected from direct sunlight to retain its quality. Substitutions like dark or milk chocolate can alter the sweetness and richness, offering flexibility based on personal preferences.
Common Mistakes to Avoid
- Avoid using low-quality chocolate, which can compromise the pie’s flavor and texture.
- Be sure not to overmix the filling as it may become too liquidy, affecting the pie’s ability to set properly.
- Chilling time should be respected; cutting the pie too soon can cause a mess as the filling won’t be firm enough.
- Using a crust that isn’t sufficiently compact can lead to it crumbling when sliced.
- Ensure your whipped cream is properly beaten but not over-whipped to prevent an oily texture.
- Letting the filling come to a boil can cause it to scorch, leading to an unpleasant burnt chocolate flavor.
Essential Techniques
The critical technique for this no-bake recipe is proper cooling. After cooking the chocolate mixture, let it cool slightly before pouring into the crust to prevent the base from softening. Chilling the pie for at least 2 hours sets the filling, making it easier to slice and serve. When whipping cream, maintain a steady speed and stop when soft peaks form to avoid splitting. These simple techniques ensure a professionally finished dessert with minimal fuss.
Pro Tips for Perfect Easy No-Bake Chocolate Cream Pie
Use a balanced blend of chocolates for depth of flavor — combining semi-sweet and dark chocolates can work wonders. Pre-crush your crust ingredients for an even base. For a twist, infuse a hint of espresso into the chocolate mixture to enhance the cocoa undertones. Utilize an offset spatula for a smooth, professional-grade filling surface. Chill your mixing bowl for whipping cream to achieve maximum volume. Don’t forget to incorporate a pinch of salt to enhance the chocolate’s richness.
Variations and Adaptations
For a regional twist, add a splash of bourbon or a sprinkle of local spices to the chocolate mixture, enhancing both flavor and aroma. Vegans can rejoice with plant-based substitutions such as coconut milk for the filling and vegan butter for the crust. Consider using seasonal fruits like berries as decorative toppings to provide a fresh burst of flavor. To elevate texture, fold in chunks of chocolate or nuts in the filling. Finally, for a modern presentation, serve the pie in individual jars or glasses, transforming it into a delightful yet chic dessert.
Serving and Presentation Guide
When ready to serve, cut the pie with a sharp knife warmed in hot water for smooth, clean slices. Garnish with fresh berries or mint leaves for a refreshing color contrast. Pair with a scoop of vanilla ice cream for an a la mode experience. Maintain optimal serving temperature by cooling the pie thoroughly pre-serving, ensuring the ideal texture and consistency. Control portion sizes to strike a balance between indulgence and restraint, ideally serving medium-sized slices to complement other meal courses.
Wine and Beverage Pairing
A full-bodied red wine such as a Zinfandel or a Merlot beautifully complements the intense flavors of the chocolate pie. For non-alcoholic alternatives, a rich, dark hot chocolate or a robust coffee makes for a perfect pair. Undertones of chocolate and coffee harmonize, enhancing each other’s flavors. Serve beverages chilled or warm based on season and personal preference, optimizing the mingling of flavors and textures. Adapt servings based on the occasion; a fine wine for elegance or a cappuccino for casual settings.
Storage and Shelf Life
This pie keeps well in the refrigerator for up to three days when properly covered. Store in an airtight container to prevent it from absorbing other odors and to maintain its fresh flavor profile. Check for signs of spoilage like separation or discoloration before serving. If planning to freeze, wrap the pie securely in plastic wrap, including the plate, to preserve the crust’s texture through freeze-thaw cycles. Reheating is not applicable, but allow it to thaw and return to a creamy, consistent texture.
Make Ahead Strategies
Prepare the crust and filling separately up to two days in advance. Store each component covered tightly in the refrigerator, assembling when needed. This method reduces the stress of timing on event day. Assess quality; a quick whisk or stir can refresh the filling if separation occurs. When ready to serve, whip up a fresh batch of cream for garnish, ensuring a vibrant taste. Allow the pie to sit at room temperature for a few minutes pre-slicing, preventing fractures due to cold.
Scaling Instructions
Halve the recipe for intimate gatherings, using a smaller pie dish to maintain thickness. Conversely, double for larger events, using a sheet pan or converting to a trifle presentation to accommodate size. Adjust equipment – a food processor for larger quantities can hasten the crust preparation. Alter chilling times slightly in response to volume changes, ensuring the filling sets correctly. Remain mindful of storage; ample space is necessary for larger quantities.
Nutritional Deep Dive
This pie offers a balance of macronutrients, primarily featuring fats and carbohydrates, vital for energy. Rich in iron and magnesium, it supports energy release and mental focus. A portion control focus is essential, with the pie’s richness satisfying even a modest serving. Some ingredients offer heart-health benefits due to flavonoids found in quality chocolate. Analyze portions to fit dietary guidelines, ensuring you enjoy this treat harmoniously within your overall daily intake.
Dietary Adaptations
Gluten-free adaptations can be achieved with almond flour or gluten-free biscuits as a crust base, maintaining flavor integrity. For dairy-free needs, almond or coconut milk provides a great substitute without sacrificing creaminess. Vegans can opt for non-dairy whipped toppings and dark chocolate that’s free from milk solids. Low-carb seekers might replace sugar with alternatives like Stevia or Monk fruit sweeteners, effectively lowering carbohydrate intake. Naturally keto-friendly, this pie offers indulgence without overdoing carbs.
The Recipe
Easy No-Bake Chocolate Cream Pie
Serves: 8
Prep Time: 20 mins
Cook Time: 10 mins
Total Time: 30 mins
Kitchen Equipment Needed
- Saucepan
- Whisk
- Mixing bowls
- Pie dish
- Spatula
Ingredients
- 1 pre-made graham cracker crust
- 6 oz semi-sweet chocolate, chopped
- 1 cup heavy cream
- 1/4 cup sugar
- 1 tsp vanilla extract
- A pinch of salt
- Whipped cream, for garnish
Directions
- In a medium saucepan, heat heavy cream over medium heat until it begins to simmer.
- Remove from heat and add chopped chocolate, sugar, vanilla extract, and salt. Let sit for 2 minutes.
- Whisk the mixture until smooth and creamy.
- Pour chocolate filling into the graham cracker crust, smoothing the top with a spatula.
- Chill in the refrigerator for at least 2 hours until set.
- Garnish with whipped cream before serving.
Recipe Notes
- Experiment with different chocolates for varied sweetness levels.
- Add a tablespoon of liqueur for a boozy twist.
- Top with shaved chocolate or nuts for added texture.
Troubleshooting Guide
Address setting issues by ensuring ample chilling time for the filling to solidify thoroughly. If the flavor seems lacking, augment with a pinch of salt to enhance chocolate richness. Tackle temperature problems by monitoring stovetop heat closely, preventing scorching. For equipment challenges, ensure your whisk is robust enough to achieve a smooth filling texture. Ingredient substitutions should reflect similar consistencies to maintain structural integrity. Consider timing concerns by pacing each step, preventing disharmony in texture and taste.
Recipe Success Stories
Our community members rave about the ease of execution and the sumptuous taste of this no-bake treat. A reader swap of white chocolate resulted in a stunning visual and taste twist. Another creatively layered the pie with peanut butter for a nutty variant. Photography enthusiasts achieve striking images by zooming in on the glossy filling and vivid garnish, simple yet effective. Recipe variations reflect personal twists — one story shared the addition of spicy chili flake for an unexpected heat.
Frequently Asked Questions
A: Yes, absolutely! Ensure it’s tightly wrapped to prevent freezer burn. Thaw it gently in the refrigerator for best results when ready to serve.
Q: What can I substitute for graham cracker crust?
A: Crushed cookies, such as Oreos, provide an excellent alternative with a unique flavor twist. For a nutty crust, ground almonds are also perfect.
Q: How can I make this pie firmer?
A: Adding gelatin to the chocolate mixture before pouring it into the pie crust can enhance firmness without altering flavor significantly.
Q: Is this pie suitable for vegans?
A: With a few adaptions, such as using coconut cream and vegan chocolate, this recipe can become a delightful vegan-friendly dessert.
Q: Can the sugar be reduced?
A: Yes, you can reduce the sugar by half without some notable differences in sweetness — increasingly relying on chocolate’s natural flavor.
Q: How early can I make this pie in advance?
A: This pie holds well for up to two days in the fridge. Just ensure it’s well covered to maintain taste and prevent any odor absorption.
Q: How do I prevent the chocolate mixture from seizing?
A: Ensure the cream isn’t too hot, allowing chocolate to melt at a manageable pace. Adding sugar and continuously stirring assists in smooth blending.
Q: What can I serve with the chocolate pie?
A: Pair with sliced strawberries or seasonal fruits to balance the richness of the pie, offering a refreshing complement to the chocolate’s depth.
Q: Are there low-carb options for the crust?
A: Absolutely, crushed nuts bound with a bit of butter are a delightful low-carb selection, providing nutty flavors and maintaining lower carb content.
Q: How does weather affect this recipe?
A: Warm climates call for extended refrigeration, ensuring the pie holds its shape. Conversely, cooler weather generally extends shelf life.
Additional Resources
Browse related no-bake recipes to expand your dessert portfolio, showcasing various flavors from classic cheesecake to fresh fruit tarts. Explore deeper into technique guides for mastering pastry crusts and healthier ingredient selections like natural sweeteners. Equip your culinary arsenal with recommended tools, from offset spatulas to high-quality mixing bowls, for seamless preparation. Delve into seasonal variations, experimenting with local produce and time-honored ingredients enhancing your repertoire.
Join the Conversation
Engage with fellow dessert enthusiasts by sharing your pie creations on social media, using the hashtag #NoBakeDelight. Get photography tips to capture the pie’s beauty — focus on texture close-ups and top-down shots for best results. Leave a review expressing your unique twist and adaptations, enriching the community narrative. Embrace community engagement by participating in discussions, seeking advice, and offering suggestions to elevate each other’s creations. Unleash creativity in recipe variations, personalizing flavor pairings, and decorative elements.