Ultimate Reese’s Peanut Butter Cup Roll Cake – Family Favorite Recipe
Reese’s Peanut Butter Cup Roll Cake: A Decadent Delight for Chocolate Lovers
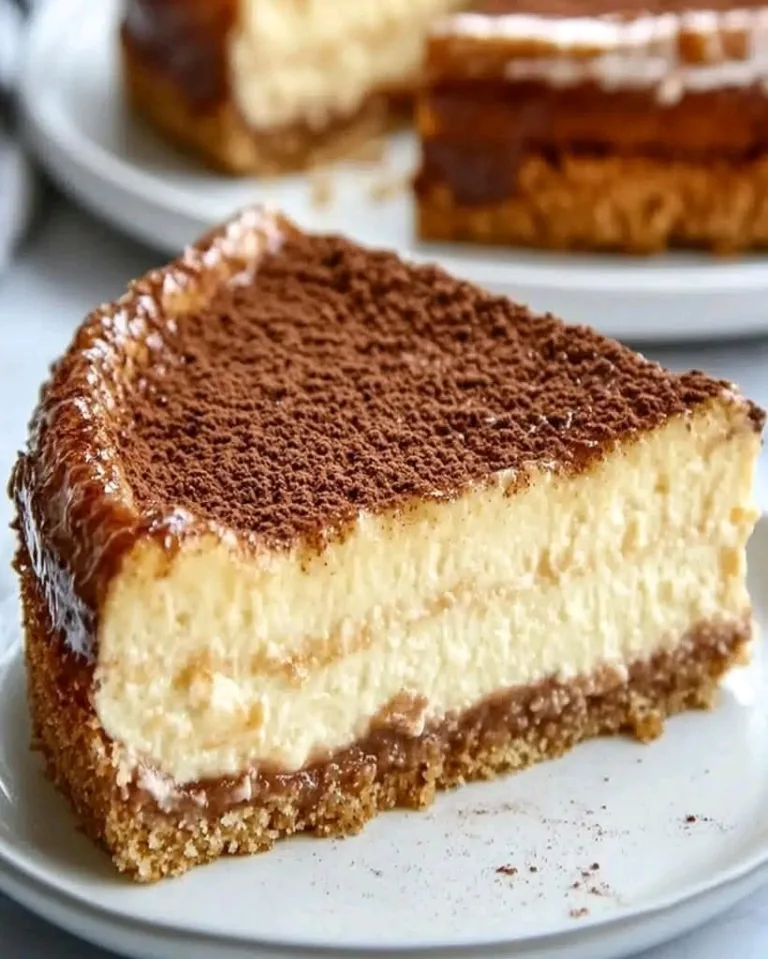
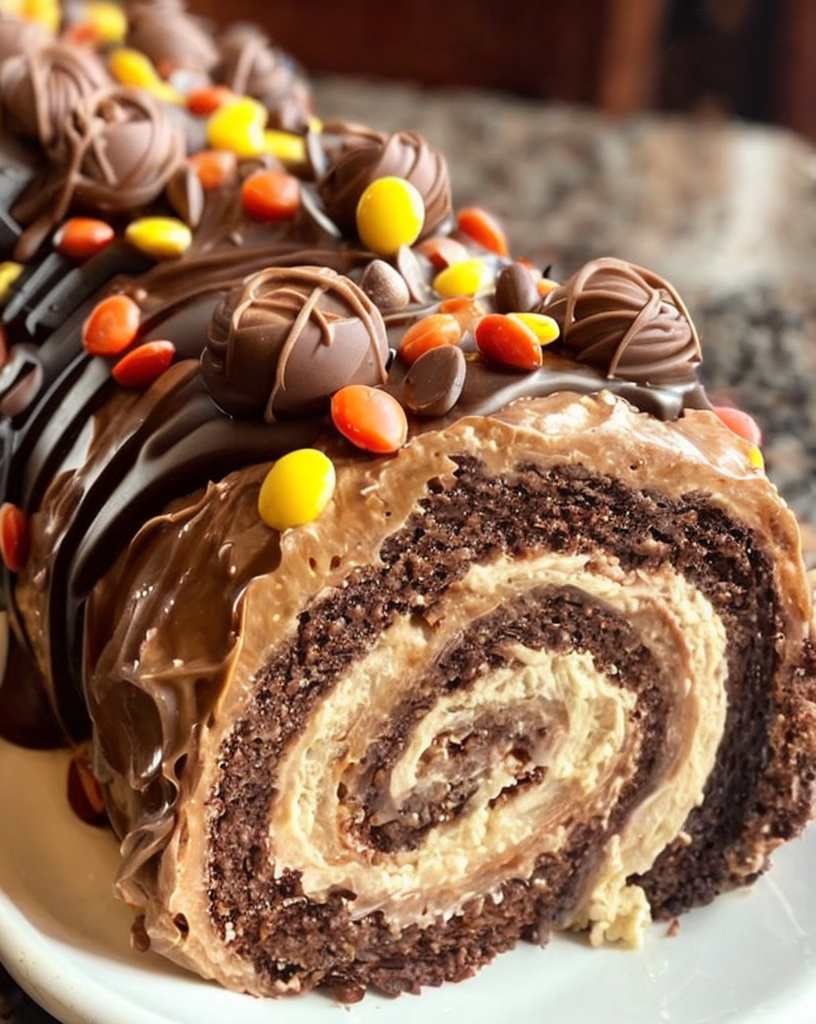
Indulge in this irresistible Reese’s Peanut Butter Cup Roll Cake, where each slice reveals a rich cocoa layer perfectly swirled with the creamy, nutty goodness of peanut butter. Embark on an adventure of flavors with every bite, as chocolate and peanut butter combine to create a dessert experience that’s both comforting and exhilarating. This roll cake makes an excellent addition to any celebration, offering the familiar taste of beloved Reese’s Peanut Butter Cups in a distinctively moist and fluffy cake form.
Quick Recipe Highlights
- Flavor Profile: The cake features deep cocoa flavors balanced by the creamy, slightly salty peanut butter filling, reminiscent of the beloved Reese’s Peanut Butter Cups.
- Texture: Expect a tender, sponge-like cake that rolls seamlessly, complemented by a smooth, rich filling.
- Aroma: The combination of chocolate and peanut butter creates a warm, inviting aroma that fills the kitchen with a sense of comfort and joy.
- Visual Appeal: Rich, dark chocolate spiral with creamy gold in each slice; dusted with cocoa or icing sugar for added elegance.
- Skill Level Needed: Moderate baking skills; requires careful rolling for a flawless presentation.
- Special Equipment: Requires a jelly roll pan, parchment paper, and an offset spatula for spreading.
Recipe Overview
- Difficulty Level: Intermediate due to the rolling technique and ensuring the cake doesn’t crack. Patience and precision are needed for optimal results.
- Category: Perfect for desserts, especially suited for celebratory meals or as a special teatime treat.
- Cuisine: This dessert falls under the contemporary American fusion, influenced heavily by the flavors popularized by Reese’s products.
- Cost: Relatively low-cost, depending mainly on the quality of chocolate and peanut butter used, with pantry staples making up the rest.
- Season: Best enjoyed year-round, particularly popular during holidays as a cozy family treat.
- Occasion: Ideal for birthdays, family gatherings, or whenever you need a sweet fix with a familiar flavor twist.
Why You’ll Love This Recipe
The Reese’s Peanut Butter Cup Roll Cake delights with its exceptional taste and texture, bringing together the timeless combination of chocolate and peanut butter. The process is relatively straightforward, ensuring a convenient baking experience that rewards with a sumptuous cake. Not only does it satisfy dessert cravings, but it also offers nutritional value with protein from peanut butter. Perfect for social gatherings, this cake stands as a delectable centerpiece loved by all ages. Moreover, the ingredients are cost-effective and accessible, allowing you to whip up this masterpiece with ease.
Historical Background and Cultural Significance
Originating as a mix of candy and cake culture, this roll cake takes inspiration from America’s love affair with peanut butter cups. Reese’s has a storied history, stemming from the innovative pairing of chocolate and peanut butter, creating a sensation that swept across dessert palettes worldwide. This cake transforms the classic candy into a sliceable dessert, integrating into modern American culinary traditions. Over time, bakers have refined the recipe, allowing for regional adaptations while retaining its essence, showcasing the evolution from candy to cake.
Ingredient Deep Dive
Chocolate, the heart of this recipe, boasts a rich history intertwined with luxury and celebration. Its antioxidants contribute to heart health, making it a guilty pleasure with benefits. Choose high-quality cocoa for best results, storing it in a cool, dry place to maintain freshness. Peanut butter adds protein and an irresistible nuttiness, vital for the cake’s hallmark flavor. Opt for creamy peanut butter to ensure smoothness in the filling, stored in a sealed container to prevent oil separation.
Common Mistakes to Avoid
- Overbaking the cake: Make sure to keep a close eye during baking to prevent drying out the sponge.
- Rolling the cake when too cool: This can cause cracking; roll while it’s still slightly warm but pliable.
- Too much filling: This can make rolling difficult and cause messy presentation; stick to recommended quantities.
- Improper cooling technique: Let the rolled cake cool enough in its towel wrap for consistent shape.
- Using chunky peanut butter: Opt for smooth peanut butter to ensure an even spread without lumps.
- Skipping parchment paper: It ensures easy extraction post-baking, so don’t skip lining your pan.
- Not refrigerating after filling: This step is crucial for setting the roll and keeping its shape before serving.
- Ignoring quality ingredients: Skimping on key ingredients can drastically affect flavor; use the best chocolate and peanut butter available.
Essential Techniques
Mastering the roll technique is crucial for this cake. It’s important to roll the sponge while still slightly warm to prevent cracking and form the classic swirl. Watch for slight resistance; if it feels too stiff, gently warm it again. Use visual cues like an even golden brown on the cake’s surface to know it’s perfectly baked. Avoid over-whipping the batter as it can introduce excess air, leading to bubbles and uneven baking.
Pro Tips for Perfect Reese’s Peanut Butter Cup Roll Cake
Ensure your eggs are at room temperature for a more stable foam. Use a sifter for the flour and cocoa to achieve a lump-free batter. When spreading the peanut butter filling, leave a small margin around the edges—this prevents overflow when rolling. To cut neat slices, use a sharp serrated knife and a gentle sawing motion. Chill the cake if cutting edges show filling, and wipe the knife between cuts for a cleaner look.
Variations and Adaptations
Explore regional twists by integrating locally appreciated flavors, such as a hint of sea salt for a salted caramel vibe. Adjust seasonally by adding a touch of cinnamon during fall or peppermint in winter. For dietary considerations, use almond butter and gluten-free flour for a different take. Amp up the chocolate notes with a sprinkle of espresso powder, or modify texture by incorporating crunchy peanut butter for added bite.
Serving and Presentation Guide
Artfully plate slices by accompanying them with a scoop of vanilla ice cream or dollops of fresh cream. Garnish with shaved chocolate or a drizzle of melted peanut butter for an appealing finish. Traditionally enjoyed at room temperature, its flavors meld better when slightly cooled. Consistency in portion sizes enhances visual appeal; consider bite-sized pieces if serving as part of a dessert buffet.
Wine and Beverage Pairing
Match this cake with a robust red wine, such as a Zinfandel, to complement the richness of chocolate. For a non-alcoholic twist, serve with chilled milk or a creamy coffee beverage; both harmonize with the peanut butter’s creaminess. Temperature plays a role—room temperature beverages bring out the cake’s flavors best, while serving iced drinks adds a refreshing contrast.
Storage and Shelf Life
Store the cake covered in a refrigerator to keep it moist. Ideal containers are airtight to prevent the cake from absorbing other flavors. Signs of spoilage can include a dry, hard exterior, which indicates excessive storage time. To prolong shelf life, wrap slices individually and freeze, allowing them to thaw naturally before serving. Reheat gently if needed, but avoid altering the original texture.
Make Ahead Strategies
Prepare the sponge a day ahead and wrap tightly to maintain moisture. Fill and roll on the serving day to ensure optimal freshness. If making elements like the filling in advance, store separately to blend freshly before assembling. Critical elements to keep fresh include decorations such as dusting or chocolate drizzle for complete flavor retention.
Scaling Instructions
This recipe doubles efficiently; use larger pans and adjust baking times accordingly. For half recipes, reduce ingredient quantities proportionally, maintaining attention to whipping and baking times. Equipment like mixers and ovens must accommodate increased batches without overcrowding. Ensure adequate storage space, especially when expanding the recipe for larger gatherings.
Nutritional Deep Dive
The cake provides a balanced micro and macronutrient profile with protein from peanut butter, simple carbohydrates from sugar, and healthy fats. It’s a treat best enjoyed in moderation, as portion control helps manage caloric intake. Despite its indulgent nature, it offers nutritional benefits, including antioxidants from cocoa and potential energy-boosting qualities from natural sugars.
Dietary Adaptations
For gluten-free adaptations, use alternative flours like almond or coconut, which may affect texture but cater to dietary needs. Dairy-free versions include plant-based butters, ensuring a similar taste profile. A vegan twist requires egg replacements, demanding trial for desired consistency. Adjust sweeteners for a low-carb variant, considering sugar alternatives that maintain the cake’s sweetness without impacting texture.
The Recipe
Reese’s Peanut Butter Cup Roll Cake
Serves: 8
Prep Time: 30 mins
Cook Time: 15 mins
Total Time: 45 mins
Kitchen Equipment Needed
- Jelly roll pan
- Parchment paper
- Offset spatula
- Mixing bowls
- Electric mixer
- Sifter
Ingredients
- 1/2 cup all-purpose flour
- 1/4 cup cocoa powder
- 1 teaspoon baking powder
- 4 large eggs, separated
- 2/3 cup granulated sugar
- 1 teaspoon vanilla extract
- 1/2 cup smooth peanut butter
- 1/4 cup unsalted butter, softened
- 1/2 cup confectioners’ sugar
Directions
- Preheat the oven to 350°F (175°C) and line a jelly roll pan with parchment paper.
- In a bowl, sift together the flour, cocoa powder, and baking powder. Set aside.
- In a separate large bowl, beat egg yolks and sugar until thick. Mix in vanilla extract.
- In another bowl, whisk egg whites until stiff peaks form.
- Gently fold the sifted ingredients into the yolk mixture, and then add beaten egg whites gradually, ensuring not to deflate.
- Spread the batter evenly in the prepared pan and bake for 15 minutes, or until the cake springs back when touched.
- Turn the warm cake onto a clean, damp towel and roll carefully. Let cool completely.
- For the filling, beat together peanut butter, butter, and confectioners’ sugar until smooth.
- Unroll the cooled cake and spread the filling, leaving a small border. Re-roll firmly.
- Chill in the refrigerator for at least 1 hour before serving sliced.
Recipe Notes
- For a neater finish, dust the cake with cocoa powder or powdered sugar after chilling.
- Try adding a drizzle of melted chocolate over the top for added richness.
Troubleshooting Guide
Address any potential texture issues by ensuring correct mixing times and rolling techniques to keep the sponge flexible yet firm. Always check flavor balance during filling preparation to avoid overly sweet or salty notes. Be mindful of oven temperatures to avoid over/under-baking, which affects the rolling ease. Substitute carefully; each ingredient switch demands consideration of new ratios or textures.
Recipe Success Stories
Readers have praised the Reese’s Peanut Butter Cup Roll Cake for its decadent flavors and have shared delightful variations using holiday spices or extra layers of chocolate ganache. Community feedback emphasizes the importance of rolling precision to achieve those picture-perfect swirls, with suggestions for additional garnishes to tailor the cake for special occasions.
Frequently Asked Questions
What if my cake cracks when rolling?
Cracking usually happens if the cake is overbaked or not rolled immediately. To prevent this, roll while still warm and enveloped in a damp towel right after baking.
Can I use natural peanut butter in the filling?
Yes, but it’s important to mix it thoroughly to ensure any separated oils are reincorporated before using as a filling to maintain consistency.
How do I keep my cake from sticking to the pan?
Always line your pan with parchment paper before pouring in the batter. This eliminates sticking issues and makes extraction post-baking effortless.
Is it possible to freeze the roll cake?
Absolutely! Ensure it’s tightly wrapped in plastic wrap and stored in an airtight container; consume within a month for best taste and texture.
What if I don’t have an offset spatula?
Use a regular spatula or the back of a spoon. The goal is to spread the filling evenly right to the edges without tearing the sponge.
How can I make this cake more festive?
Consider adding colored sprinkles to the outside or layering with vibrant fruit preserves between the peanut butter filling for an unexpected twist.
Why did my filling leak out?
If the filling leaks, it might be from overfilling or rolling too loosely. As practice makes perfect, refine the technique for tightly rolled edges next time.
What’s a good substitution for icing sugar in the filling?
If avoiding sugar, consider sweetening with stevia or monk fruit, though it’s crucial to test small batches to achieve your desired sweetness level.
Additional Resources
Explore other chocolate-based creations such as chocolate lava cakes or brownies to complement your dessert repertoire. Dive into technique guides focused on mastering roll cakes for larger gatherings and browse our suggested equipment list to elevate your baking game. Discover ingredient deep-dives exploring different types of cocoa, or browse through seasonal adaptations to keep your collection refreshed throughout the year.
Join the Conversation
We invite you to share your Reese’s Peanut Butter Cup Roll Cake adventures on social media platforms. Engage with a community of fellow bakers, exchange photography tips, and provide feedback to inspire further improvements. Dive into the comment section to discuss successful variations, creative adaptations, and bask in the shared joy of baking and savoring this delightful dessert.