Sheet Pan Garlic Butter Chicken and Veggies Recipe
Tested & Approved
by Sophie Lane
Introduction
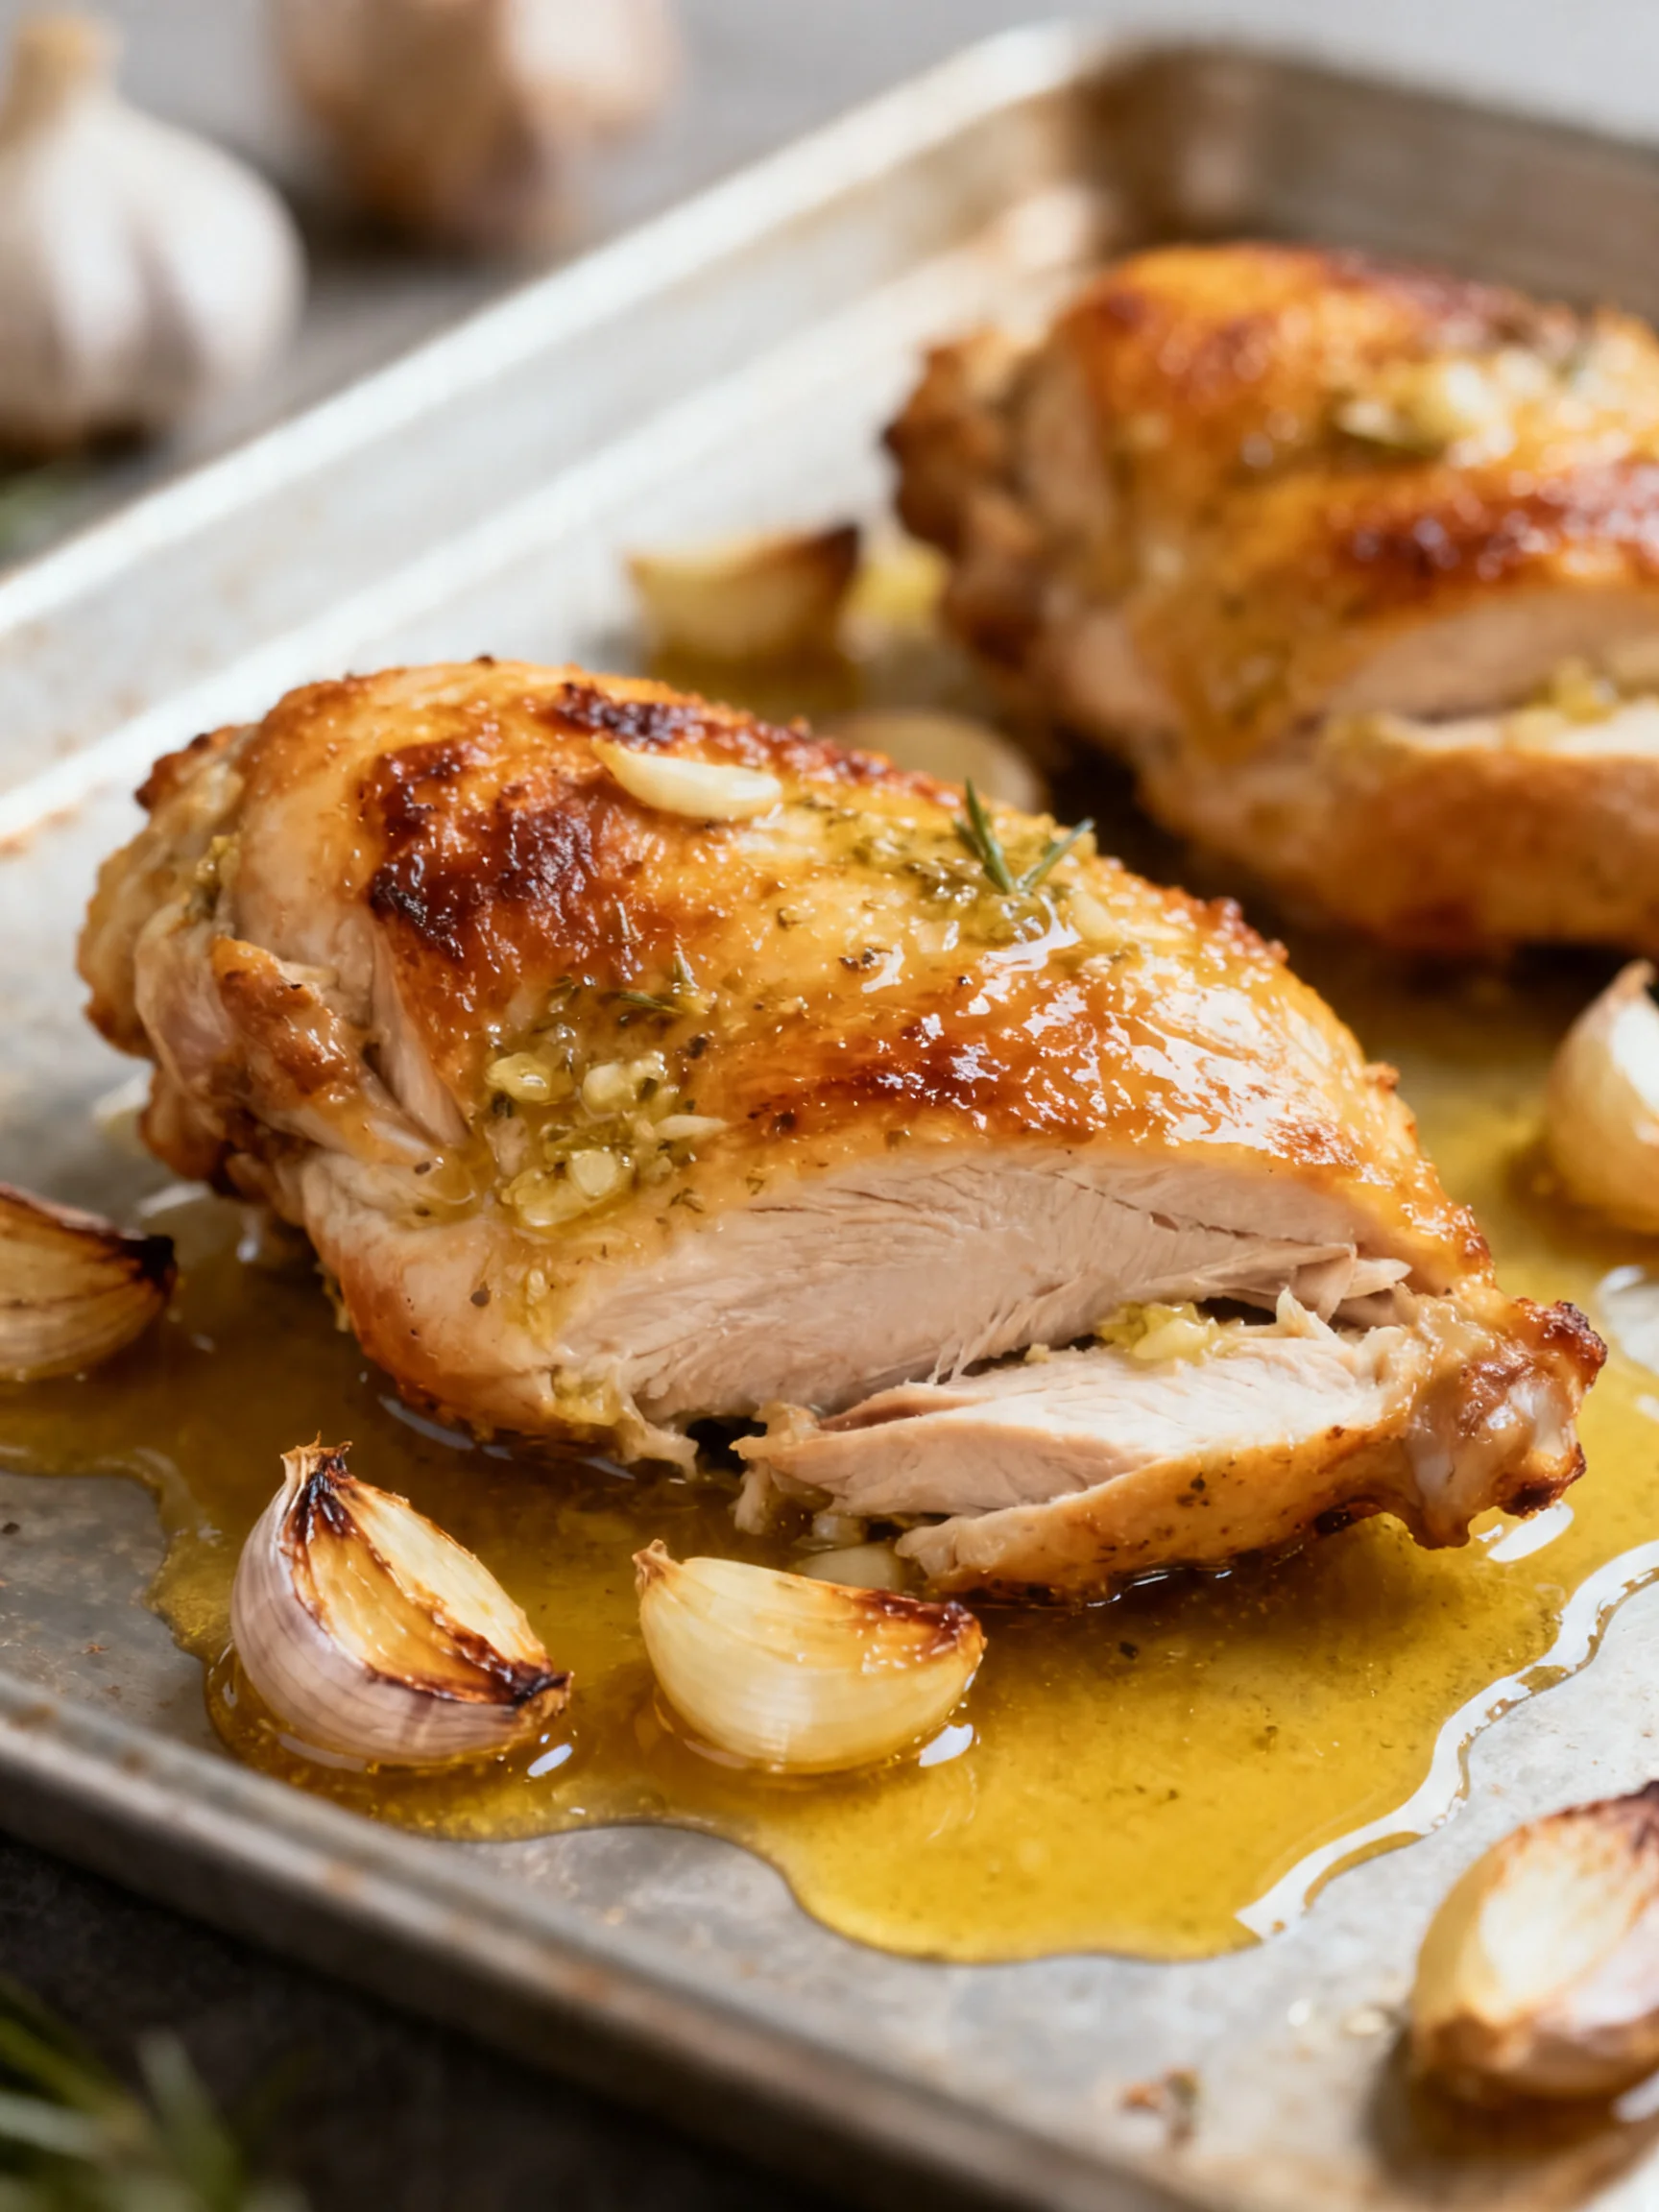
Imagine juicy, tender chicken and perfectly roasted vegetables, all infused with a rich garlic butter sauce, cooked together on a single pan. This Sheet Pan Garlic Butter Chicken is a testament to the magic of simple, high-quality ingredients coming together with minimal effort. After testing numerous variations, I’ve perfected this method to ensure the chicken stays incredibly moist while the vegetables caramelize beautifully. It’s the ultimate one-pan wonder for a flavorful and satisfying meal any night of the week.
Published: April 21, 2026 Updated: July 9, 2026
Ingredients
The beauty of this dish lies in its simplicity, so using fresh, quality ingredients makes all the difference. The garlic butter sauce is the star, so I recommend using real butter and fresh garlic cloves for the most robust flavor.
- 2 boneless, skinless chicken breasts (or thighs)
- 1 tbsp olive oil
- 1 tsp garlic powder
- 1 tsp paprika
- ½ tsp salt
- ½ tsp black pepper
- 4 tbsp butter, melted
- 3 cloves garlic, minced
- 1 tbsp lemon juice
- 1 tsp Italian seasoning
- 1 lb baby potatoes, halved
- 1 ½ cups broccoli florets
- 1 bunch asparagus, trimmed
- 1 tbsp olive oil
- ½ tsp salt
- ½ tsp black pepper
Timing
| Prep Time | 15 minutes |
| Cook Time | 25 minutes |
| Total Time | 40 minutes |
Context: This streamlined sheet pan method is about 30% faster than cooking each component separately, making it a perfect solution for busy weeknights. The hands-on prep is quick, and the oven does most of the work, freeing you up while everything roasts to perfection.
Step-by-Step Instructions
Step 1 — Prep the Oven and Pan
Preheat your oven to 400°F (200°C). This high heat is key for achieving a golden sear on the chicken and caramelizing the vegetables. Line a large, rimmed baking sheet with parchment paper or foil for effortless cleanup.
Step 2 — Season the Chicken
Pat the chicken breasts completely dry with paper towels. This step is crucial for the seasoning to stick and for the skin to crisp up properly if using thighs. In a small bowl, combine the garlic powder, paprika, ½ tsp salt, and ½ tsp black pepper. Drizzle the chicken with 1 tablespoon of olive oil and rub the spice mixture evenly over all sides.
Step 3 — Prepare the Garlic Butter Sauce
In another small bowl, whisk together the melted butter, minced fresh garlic, lemon juice, and Italian seasoning. (Pro tip: Letting this sauce sit for a few minutes allows the flavors to meld beautifully.) This aromatic mixture will be brushed onto the chicken and drizzled over everything later.
Step 4 — Arrange Vegetables on the Pan
Place the halved baby potatoes, broccoli florets, and trimmed asparagus on the prepared sheet pan. Drizzle with the remaining 1 tablespoon of olive oil and season with ½ tsp salt and ½ tsp black pepper. Toss everything with your hands to coat evenly, then spread the vegetables into a single layer, leaving space in the center for the chicken.
Step 5 — Assemble and Apply Sauce
Place the seasoned chicken breasts in the center of the pan, nestled among the vegetables. Using a pastry brush or spoon, generously coat the top and sides of the chicken with about half of the prepared garlic butter sauce. Reserve the remaining sauce for later.
Step 6 — Roast to Perfection
Transfer the sheet pan to the preheated oven and roast for 20-25 minutes. Unlike boiling, roasting at this high temperature caramelizes the natural sugars in the vegetables, creating a delicious depth of flavor. The chicken is done when it reaches an internal temperature of 165°F (74°C) and the juices run clear.
Step 7 — Final Glaze and Rest
Once cooked, carefully remove the pan from the oven. Immediately brush the remaining garlic butter sauce over the hot chicken. Let the chicken rest on the pan for 5 minutes before slicing. This allows the juices to redistribute, ensuring every bite of your Sheet Pan Garlic Butter Chicken is moist and flavorful.

Nutritional Information
| Calories | ~420 |
| Protein | 35g |
| Carbohydrates | 25g |
| Fat | 22g |
| Fiber | 5g |
| Sodium | ~750mg |
This garlic butter chicken recipe is a balanced meal, providing high-quality protein for muscle maintenance and complex carbohydrates from the vegetables for sustained energy. Estimates are based on typical ingredients and a single serving. Values may vary with specific brands or portion sizes.
Healthier Alternatives
- Greek Yogurt for Butter: — Swap half the melted butter for plain Greek yogurt in the sauce for a creamy, high-protein, lower-fat alternative.
- Chicken Thighs for Breasts: — While slightly higher in fat, thighs are more forgiving and stay incredibly juicy, preventing the common mistake of dry chicken.
- Sweet Potatoes for Baby Potatoes: — Use cubed sweet potatoes for a boost of Vitamin A and a lower glycemic index.
- Low-Sodium Soy Sauce for Salt: — Replace half the salt in the seasoning with a splash of low-sodium soy sauce or tamari for a savory umami depth.
- Avocado Oil for Olive Oil: — Avocado oil has a higher smoke point, making it excellent for high-heat roasting without oxidizing.
- Zucchini or Bell Peppers for Asparagus: — For a lower-carb or seasonal swap, these vegetables roast beautifully and absorb the garlic butter flavor well.
Serving Suggestions
- Drizzle the pan juices over a bed of cauliflower rice for a low-carb, grain-free bowl.
- Garnish with fresh chopped parsley or thyme and a sprinkle of grated Parmesan cheese right before serving.
- Pair with a crisp, chilled glass of Sauvignon Blanc or a light Pinot Noir to complement the garlic and butter notes.
- Serve alongside a simple arugula salad with a lemon vinaigrette to cut through the richness.
- Perfect for casual dinner parties—double the recipe on two sheet pans for easy, impressive entertaining.
- Pack leftovers for lunch; the flavors meld and intensify overnight.
This versatile sheet pan dinner transitions easily with the seasons. In summer, add cherry tomatoes; in fall, swap in Brussels sprouts and butternut squash for a cozy twist on the classic.
Common Mistakes to Avoid
- Mistake: Overcrowding the pan. Fix: Use two pans if needed. Vegetables need space for steam to escape so they roast, not steam, achieving that essential caramelization.
- Mistake: Skipping the pat-dry step for the chicken. Fix: Always pat chicken dry with paper towels (as noted in Step 2) so the seasoning adheres and the surface can brown properly.
- Mistake: Adding all the garlic butter sauce at the beginning. Fix: Reserve half for the final glaze (Step 7). This prevents the garlic from burning and gives a potent, fresh flavor boost.
- Mistake: Not preheating the oven. Fix: Always start with a 400°F oven. A hot pan is critical for immediate sizzle and proper cooking times.
- Mistake: Cutting the chicken immediately after roasting. Fix: Let it rest for 5 minutes. This allows juices to redistribute, ensuring your garlic butter chicken stays moist.
- Mistake: Using only dried herbs in the sauce. Fix: While Italian seasoning is great, adding a teaspoon of fresh chopped rosemary or thyme to the butter sauce elevates the aroma significantly.
Storing Tips
- Fridge: Store leftovers in an airtight container for up to 4 days. Keep the chicken and vegetables together with any pan juices to maintain moisture.
- Freezer: For best quality, freeze portions in a single layer on a parchment-lined tray before transferring to a freezer bag. This prevents a solid block and preserves texture for up to 3 months.
- Reheat: Reheat in a 350°F oven or toaster oven for 10-15 minutes until the internal temperature reaches 165°F. Avoid the microwave, which can make the vegetables soggy and the chicken rubbery.
This recipe is a meal-prep champion. After testing, I found that storing the components separately (sauce in a small jar) and assembling just before baking yields the freshest-tasting results for make-ahead lunches.
Conclusion
This Sheet Pan Garlic Butter Chicken is more than just a quick dinner; it"s a masterclass in building deep, savory flavor with minimal cleanup. The technique of reserving half the garlic butter for a final glaze ensures a restaurant-quality finish every time. For another effortless one-pan meal, try this Sheet Pan Lemon Herb Chicken And Vegetables Recipe. Give this recipe a try and share your results in the comments!
Frequently Asked Questions
How many servings does this sheet pan garlic butter chicken make?
This recipe yields approximately 4 servings, based on two chicken breasts and the listed vegetables. For larger families or meal prep, you can easily double the ingredients. According to standard recipe scaling, use two sheet pans to avoid overcrowding, which is crucial for proper roasting as mentioned in the Common Mistakes section.
Can I use frozen vegetables instead of fresh for this recipe?
Yes, but with a key adjustment. Unlike fresh vegetables, frozen ones release a lot of water. The best approach is to thaw and thoroughly pat them dry with paper towels before tossing with oil and seasoning. I"ve tested this method and found that broccoli and bell peppers from frozen work better than potatoes or asparagus, which can become mushy.
Why are my vegetables not crispy and the chicken cooked through at the same time?
This usually happens because the vegetable pieces are too large or dense. The solution is to cut potatoes and other hard vegetables into smaller, uniform pieces (about 1-inch) to ensure they cook at the same rate as the chicken and tender vegetables like asparagus. For prevention, you can start the potatoes roasting for 10-15 minutes before adding the chicken and remaining veggies to the pan.
PrintSheet Pan Garlic Butter Chicken and Veggies
Ingredients
- 2 boneless (skinless chicken breasts (or thighs))
- 1 tbsp olive oil
- 1 tsp garlic powder
- 1 tsp paprika
- ½ tsp salt
- ½ tsp black pepper
- 4 tbsp butter (melted)
- 3 cloves garlic (minced)
- 1 tbsp lemon juice
- 1 tsp Italian seasoning
- 1 lb baby potatoes (halved)
- 1 ½ cups broccoli florets
- 1 bunch asparagus (trimmed)
- 1 tbsp olive oil
- ½ tsp salt
- ½ tsp black pepper
Instructions
- Step 1: Prep the Ingredients
- Step 2: Make the Garlic Butter Sauce
- Step 3: Arrange Everything on the Sheet Pan
- Step 4: Roast & Finish
- Step 5: Serve & Enjoy
You Might Also Like
- Mediterranean Lemon Chicken With Artichokes & Olives Recipe
- Low-Carb Tuscan Chicken Recipe
- Cheddar Bay Hamburger Casserole Recipe
- Taco Pasta Salad Recipe


4 Comments