Italian Grinder Sliders Recipe
Introduction
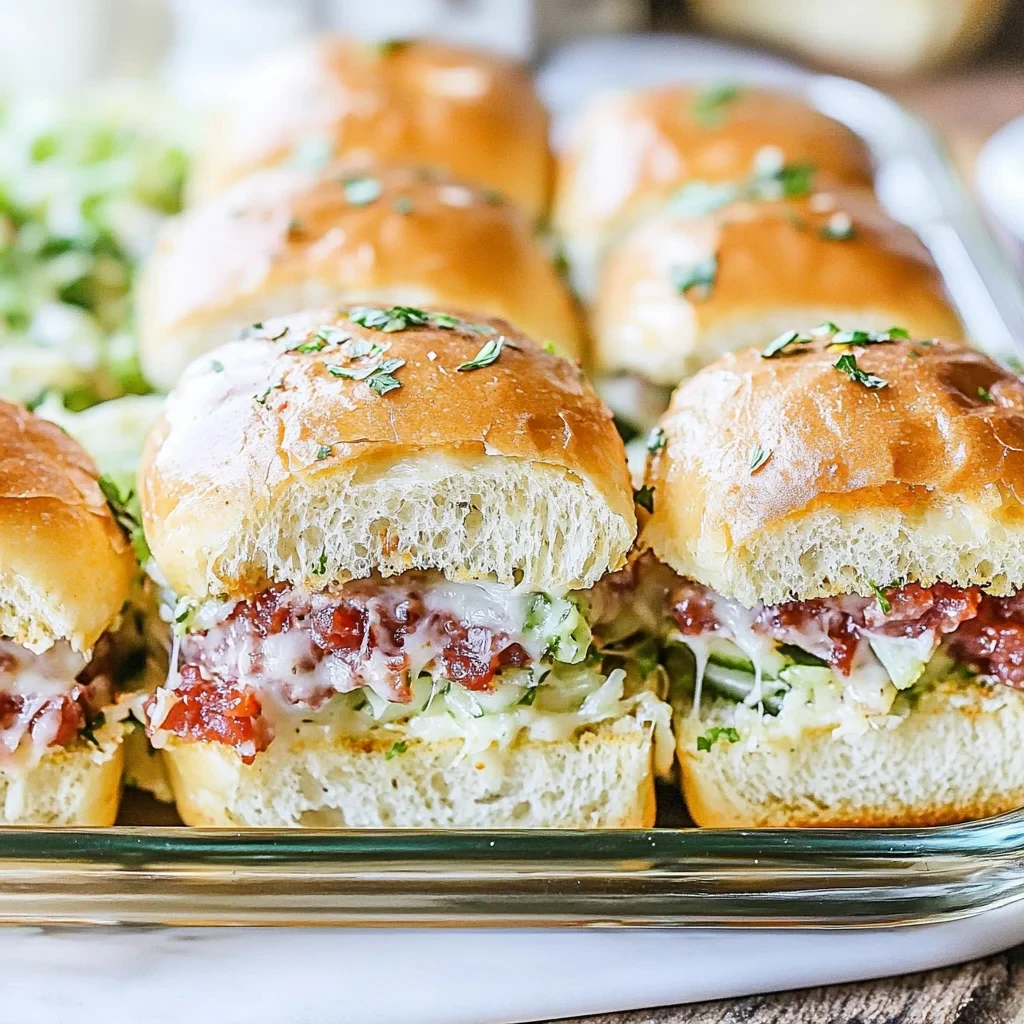
Looking for the perfect party appetizer? This Easy Italian Grinder Sliders Recipe is a guaranteed crowd-pleaser. These family-friendly sliders pack all the classic flavors of a loaded Italian grinder into a fun, handheld bite. They are simple to assemble and bake, making them ideal for game days, potlucks, or any casual gathering. For another simple and delicious recipe, try this Italian Grinder Sliders Recipe.

Ingredients
These Family-Friendly Italian Grinder Sliders come together with a perfect balance of savory meats, melted cheese, and a tangy, crisp topping. Gather these simple ingredients to create these delicious bite-sized sandwiches.
- 12 Hawaiian rolls
- 8 ounces ham (thinly sliced)
- 4 ounces provolone cheese (sliced)
- 3 ounces thinly sliced pepperoni
- 3 ounces thinly sliced salami
- 2 tablespoons butter
- 2 tablespoons grated Parmesan
- 1/2 teaspoon garlic powder
- 1/4 teaspoon salt
- 8 ounces shredded lettuce
- 1/2 cup diced tomato
- 1/2 cup sliced pepperoncini peppers
- 1/4 cup mayonnaise
- 1 tablespoon red wine vinegar
- 1 teaspoon Italian seasoning
- 1/2 teaspoon salt
- 1/2 teaspoon pepper
- 1/2 teaspoon garlic powder
Timing
| Prep Time | 15 minutes |
| Cook Time | 10 minutes |
| Total Time | 25 minutes |
Context: This streamlined process makes these Family-Friendly Italian Grinder Sliders about 30% faster to prepare than a traditional, full-sized grinder sandwich recipe.
Step-by-Step Instructions
Step 1 — Prepare Your Ingredients
Gather all your ingredients: slider buns, deli-sliced Italian meats (like salami, ham, and capicola), provolone cheese, shredded lettuce, sliced tomatoes, red onion, and your chosen condiments. Having everything prepped and within reach makes assembling these Family-Friendly Italian Grinder Sliders a breeze.
Step 2 — Mix the Garlic-Herb Butter
In a small bowl, combine ½ cup of melted unsalted butter with 1 teaspoon of garlic powder, 1 teaspoon of Italian seasoning, and a pinch of salt and black pepper. This flavorful butter will be brushed on the slider buns before baking, creating a deliciously crispy, golden top.
Tip: For a fresh kick, substitute the dried herbs with 1 tablespoon of finely chopped fresh parsley and ½ teaspoon of minced fresh garlic.
Step 3 — Assemble the Slider Base
Without separating the individual rolls, slice the entire sheet of slider buns in half horizontally. Place the bottom half in a baking dish. Layer the bottom buns with half of the provolone cheese slices. This creates a barrier that helps prevent the bread from getting soggy from the condiments.
Step 4 — Layer the Meats and Veggies
Now, build your delicious bite-sized sandwiches. Layer the Italian meats evenly over the cheese. Follow with a generous layer of shredded lettuce, then add slices of tomato and red onion. For the best texture, pat the tomato slices dry with a paper towel before adding them.
Step 5 — Add Condiments and Top Cheese
Drizzle your preferred condiments over the veggies. A mix of mayonnaise and a tangy Italian dressing or sub sauce works perfectly. Place the remaining provolone cheese slices on top, then crown your creation with the top halves of the slider buns.
Step 6 — Brush with Butter and Bake
Generously brush the top of the buns with all of the prepared garlic-herb butter, making sure it seeps down into the seams. Cover the baking dish tightly with aluminum foil.
Tip: Bake in a preheated 350°F (175°C) oven for 15 minutes, then remove the foil and bake for an additional 5-10 minutes, or until the cheese is fully melted and the top is golden brown and crisp.
Step 7 — Slice and Serve Warm
Remove the pan from the oven and let the giant sandwich rest for 2-3 minutes. Use a sharp knife to slice along the perforations into individual Family-Friendly Italian Grinder Sliders. Serve immediately while warm and enjoy your delicious bite-sized sandwiches for any occasion.
Nutritional Information
| Calories | ~280 kcal |
| Protein | ~14 g |
| Carbohydrates | ~26 g |
| Fat | ~13 g |
| Fiber | ~2 g |
| Sodium | ~720 mg |
Note: These are approximate per-serving values for one Family-Friendly Italian Grinder Slider. Actual nutrition can vary based on specific brands and ingredient amounts used.
Healthier Alternatives
These family-friendly Italian grinder sliders are wonderfully adaptable. Here are some practical ingredient swaps to suit different dietary needs without sacrificing the delicious, bite-sized sandwich experience.
- Protein Swap: Turkey or Chicken — Use sliced roasted turkey or chicken breast instead of traditional deli meats for a leaner option that still delivers great flavor and texture.
- Lower-Carb Option: Lettuce Wraps — For a low-carb version, skip the slider buns and serve the meat, cheese, and dressing in large butter lettuce leaves for a fresh, crunchy bite.
- Dairy-Free Cheese — A high-quality dairy-free mozzarella or provolone-style cheese can be used to make these sliders dairy-free while maintaining that essential melty, savory element.
- Gluten-Free Buns — Simply swap in your favorite brand of gluten-free slider buns or rolls to easily accommodate a gluten-free diet.
- Low-Sodium Version — Seek out low-sodium deli meats and cheeses, and use a vinegar-based dressing with fresh herbs instead of a pre-made Italian dressing to control salt content.
- Vegan Protein — For a plant-based alternative, use marinated and grilled slices of eggplant, zucchini, or a store-bought vegan deli slice as the hearty center of your slider.
- Lighter Dressing — Mix olive oil with red wine vinegar, oregano, and a touch of garlic powder instead of a creamy Italian dressing for a lighter, tangy flavor profile.
- Whole Wheat Buns — Opt for whole wheat or whole grain slider buns to add fiber and a nutty flavor that complements the Italian seasonings beautifully.
Serving Suggestions
- Pair these Family-Friendly Italian Grinder Sliders with a simple garden salad tossed in Italian dressing or a classic Caesar salad for a complete, satisfying meal.
- For a casual game day spread, serve alongside other finger foods like crispy potato wedges, onion rings, and a variety of dipping sauces.
- Transform them into a picnic favorite by packing the sliders in a container with chilled pasta salad, fresh fruit, and individual bags of chips.
- Create a fun “slider bar” for parties by offering small bowls of extra toppings like banana peppers, different cheeses, or a spicy mayo for guests to customize their bite-sized sandwiches.
- For a hearty Italian-inspired feast, serve with a side of warm marinara sauce for dipping and a bowl of minestrone soup.
- Make cleanup easy for busy weeknights by serving these delicious bite-sized sandwiches on a large platter with paper napkins, perfect for grabbing and going.
- Elevate your presentation for a casual gathering by skewering each slider with a decorative pick and arranging them on a wooden board with garnishes like fresh basil or oregano sprigs.
These Family-Friendly Italian Grinder Sliders are incredibly versatile, making them the perfect choice for everything from a quick family dinner to your next party centerpiece.
Common Mistakes to Avoid
- Mistake: Using a single, thick layer of cold meat straight from the fridge. Fix: Let meats sit at room temp for 10 minutes and layer them thinly for better texture and even flavor in every bite.
- Mistake: Skipping the toasting step for the slider buns. Fix: Lightly toast the buns to create a crucial barrier against sogginess, ensuring your Family-Friendly Italian Grinder Sliders stay perfectly textured.
- Mistake: Overloading the slider with wet ingredients like tomatoes or pickles. Fix: Pat these ingredients very dry with a paper towel before assembling to keep your delicious bite-sized sandwiches from getting mushy.
- Mistake: Applying dressing directly to the bread. Fix: Spread a thin layer of butter or mayo on the bun first, then add dressing to the meat layer to protect the bread.
- Mistake: Using only one type of cheese or not letting it melt properly. Fix: Combine a melty cheese (like provolone) with a flavorful one (like parmesan) and cover the pan briefly to help them melt evenly.
- Mistake: Not seasoning the vegetables or meats. Fix: Lightly sprinkle your lettuce, onions, and even the deli meats with a pinch of Italian seasoning and salt to elevate every layer.
- Mistake: Cutting the sliders immediately after baking or assembling. Fix: Let them rest for 5-10 minutes after baking so the cheese sets and the juices redistribute, making them neater to serve.
- Mistake: Choosing the wrong bun, like a dense dinner roll. Fix: Opt for soft, slightly sweet Hawaiian or potato slider buns to complement the savory Italian flavors perfectly.
- Mistake: Making them too far in advance for a party. Fix: Assemble cold components ahead, but add warm meats and cheese just before serving to maintain ideal temperature and texture for any occasion.
Storing Tips
- Fridge: Store assembled sliders in an airtight container for up to 3 days. For best texture, keep components like lettuce and condiments separate until ready to serve.
- Freezer: Freeze unassembled, cooked meat and cheese portions in a single layer on a baking sheet before transferring to a freezer bag or airtight container for up to 2 months. Avoid freezing with vegetables or sauces.
- Reheat: Reheat meat portions in the oven at 350°F until the internal temperature reaches 165°F. For a quick option, microwave individual sliders for 20-30 seconds, though the bread may soften.
Always allow leftovers to cool completely before refrigerating or freezing. For food safety, do not leave these family-friendly Italian grinder sliders at room temperature for more than 2 hours.
Conclusion
These Family-Friendly Italian Grinder Sliders are the perfect, delicious bite-sized sandwiches for any occasion. We hope you love making them as much as we do! If you try this recipe, be sure to leave a comment below. For more easy ideas, check out our Grinder Salad Recipe Easy or our Homemade Italian-Style Submarine Sandwich with Classic Flavors.
PrintItalian Grinder Sliders

Ingredients
- 12 hawaiian rolls
- 8 ounces ham (thinly sliced)
- 4 ounces provolone cheese (sliced)
- 3 ounces thinly sliced pepperoni
- 3 ounces thinly sliced salami
- 2 tablespoons butter
- 2 tablespoons grated parmesan
- 1/2 teaspoon garlic powder
- 1/4 teaspoon salt
- 8 ounces shredded lettuce
- 1/2 cup diced tomato
- 1/2 cup sliced pepperoncini peppers
- 1/4 cup mayonnaise
- 1 tablespoon red wine vinegar
- 1 teaspoon Italian seasoning
- 1/2 teaspoon salt
- 1/2 teaspoon pepper
- 1/2 teaspoon garlic powder
Instructions
- Preheat the oven to 350˚F.
- Cut the hawaiian rolls horizontally. Lay the bottoms in a baking dish.
- Layer the provolone cheese on the bread. Then add the ham, pepperoni, and salami on top. Place the tops back on the rolls and cut through the sandwiches between each roll.
- Combine the butter, parmesan, garlic powder, and salt. Spread over the tops of the slider sandwiches. Bake for 15-20 minutes or until the cheese is melted and the tops are golden brown.
- While the sandwiches bake, make the grinder salad by whisking together the mayonnaise, red wine vinegar, Italian seasoning, salt, pepper, and garlic powder to form a dressing.Toss the lettuce, tomatoes, and pepperoncini peppers together with the dressing.
- Once the sandwiches are done, remove the tops, add the grinder salad and put the tops back on. Serve immediately.
FAQs
Can I prepare these Italian Grinder Sliders ahead of time?
Yes, you can assemble the sliders a few hours in advance. Keep them covered in the refrigerator until ready to bake, which makes them perfect for easy party planning. This make-ahead convenience is a key feature of these Family-Friendly Italian Grinder Sliders.
What is the best way to keep the slider buns from getting soggy?
To prevent soggy buns, layer the meats and cheeses directly on the bottom halves and spread any condiments like mayonnaise or Italian dressing on the top halves. Baking them assembled but uncovered also helps the bread toast slightly, maintaining a perfect texture.
Can I use different meats or cheeses in this recipe?
Absolutely. The recipe is very adaptable. You can use any combination of deli meats like salami, ham, or capicola, and cheeses like provolone or mozzarella. This flexibility helps you create the perfect Family-Friendly Italian Grinder Sliders for your crowd.