The Best Buttermilk Fried Chicken Recipe
Introduction
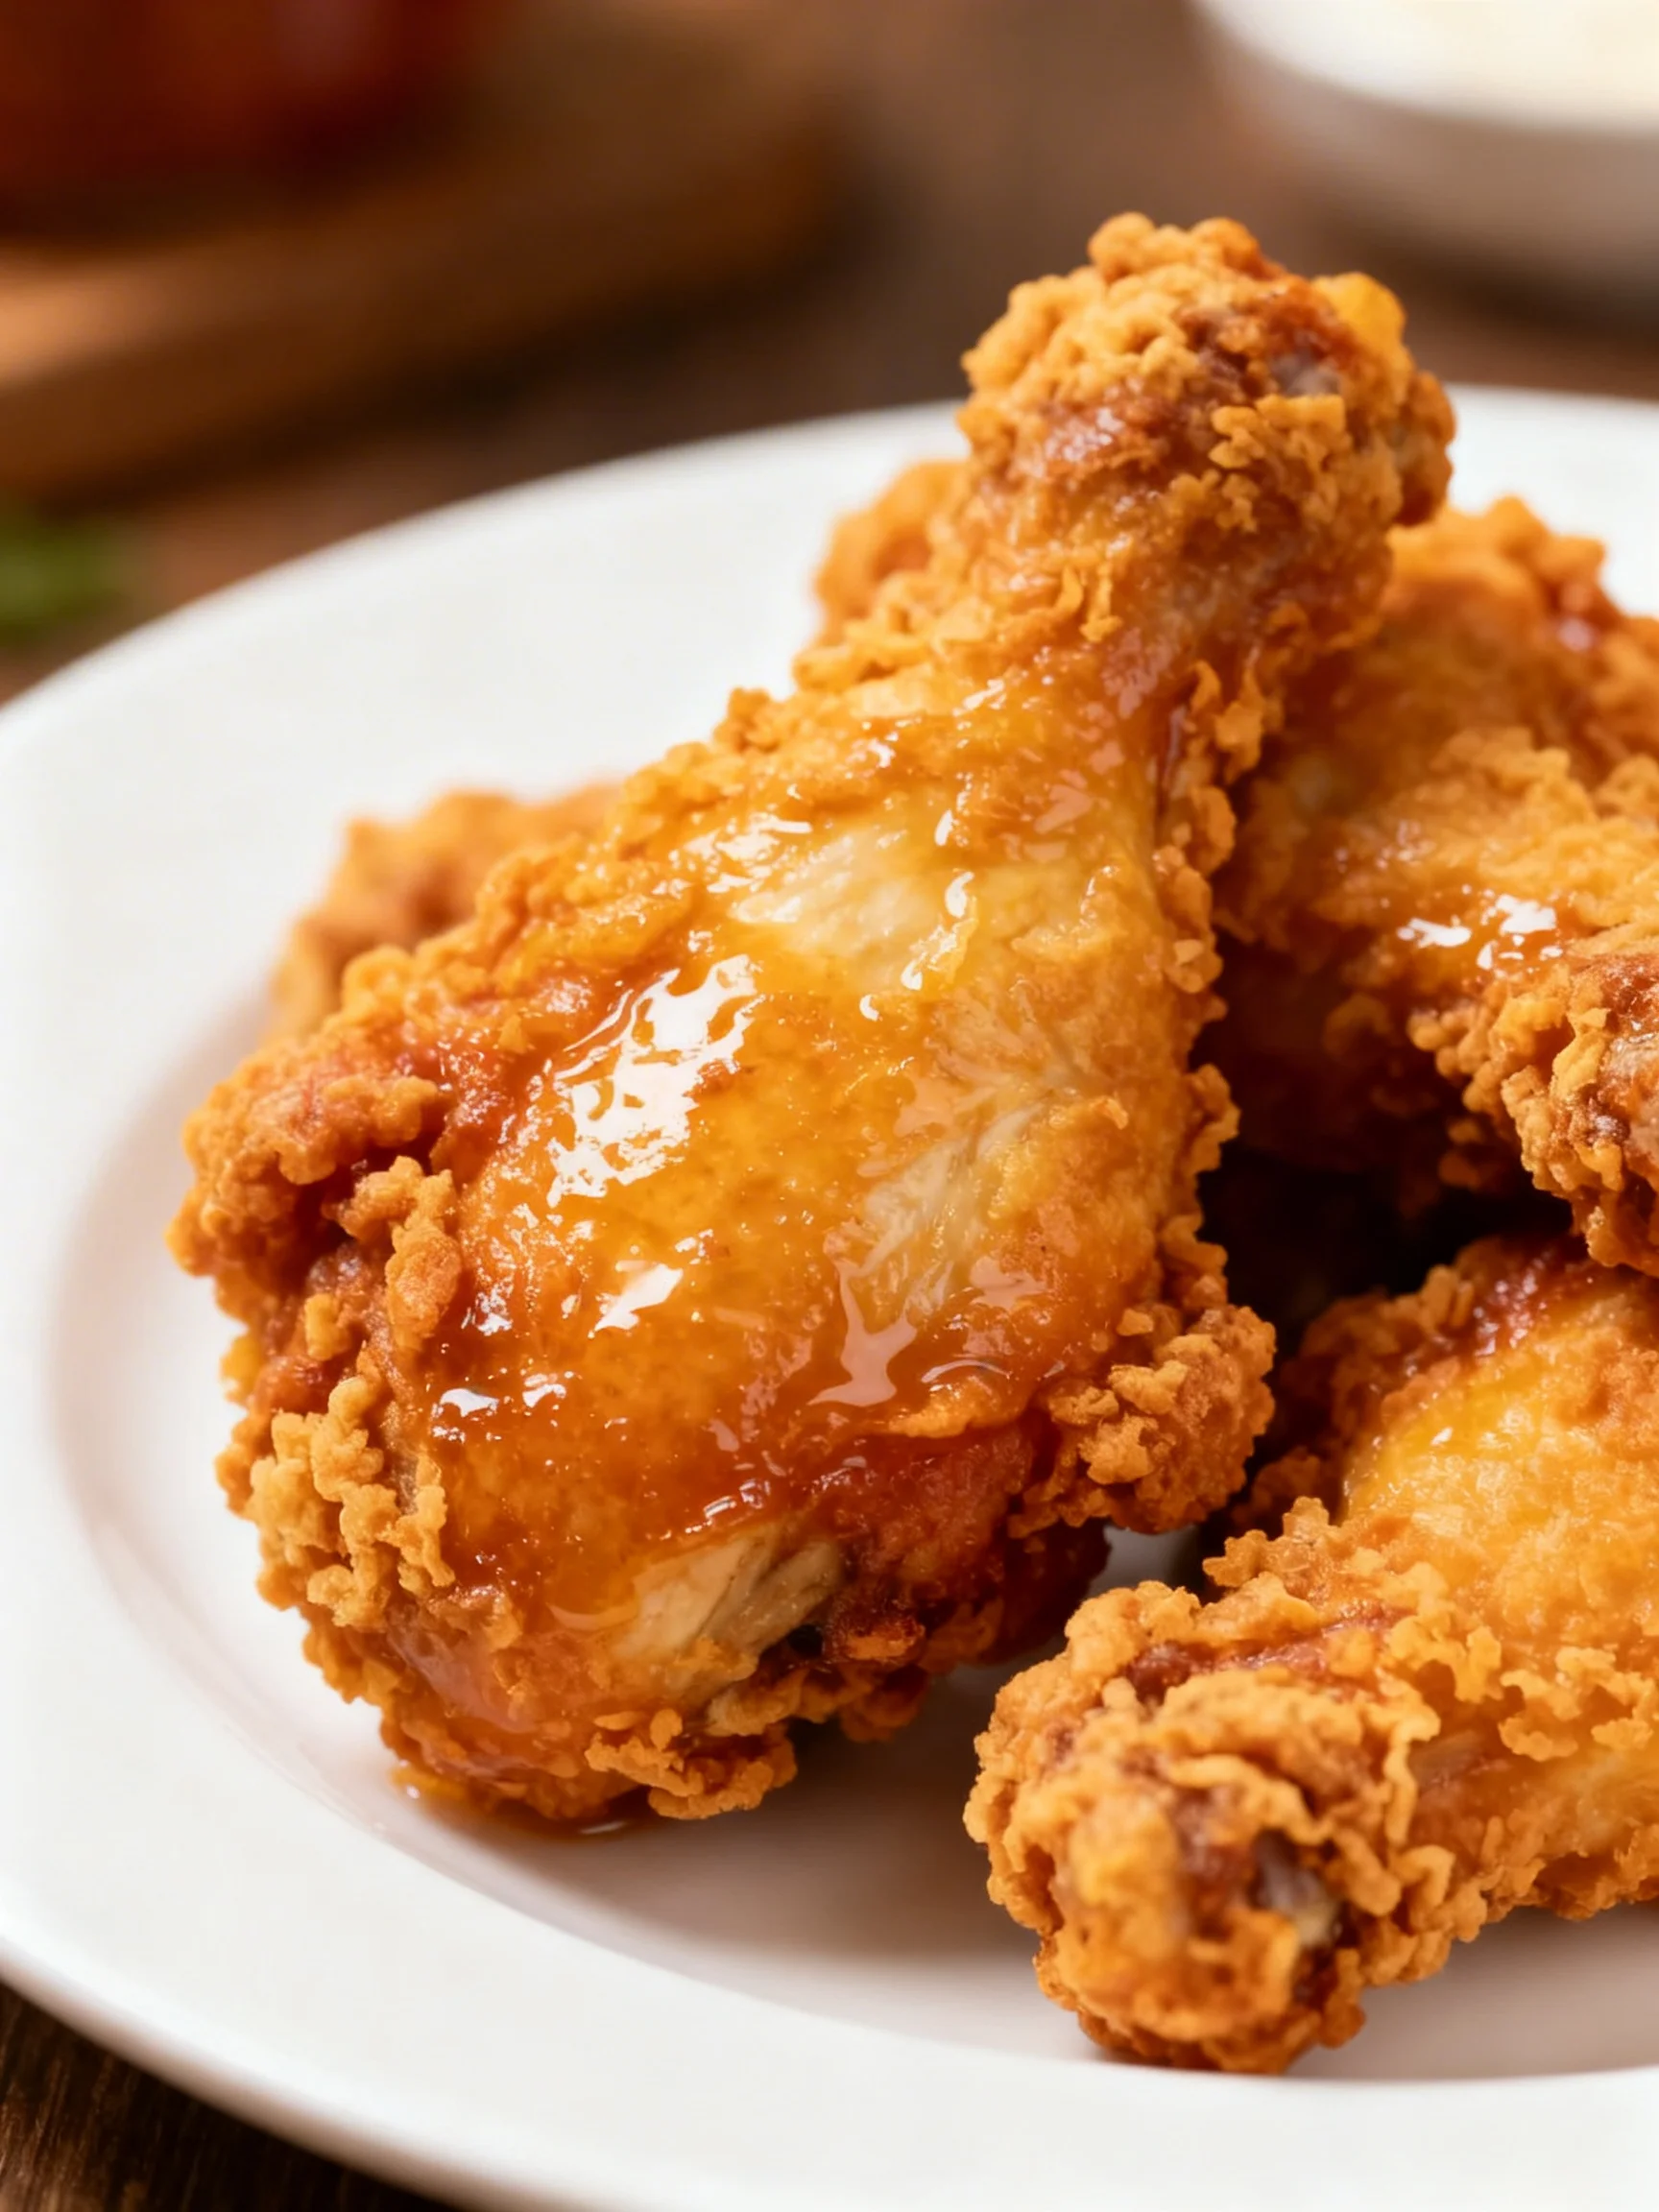
Crispy, juicy, and packed with flavor, achieving The Best Buttermilk Fried Chicken is a culinary goal worth mastering. This recipe delivers that perfect golden crust and tender interior every time, a result I’ve perfected through countless batches in my own kitchen. The secret lies in a well-seasoned buttermilk brine and a double-dredge technique that locks in moisture and creates an incredibly crunchy exterior.
Ingredients
Quality ingredients are the foundation of great fried chicken. Using full-fat buttermilk and fresh, bone-in chicken ensures maximum flavor and juiciness. The blend of herbs and spices creates a complex, savory crust that’s far superior to any store-bought mix.
- 8 pieces of bone in, skin on chicken (thighs and legs preferred)
- 2 cups buttermilk
- 2 cups all-purpose flour
- 1½ teaspoon garlic powder
- 1½ teaspoon paprika
- 1½ teaspoon onion powder
- 1½ teaspoon salt
- 1½ teaspoon dried thyme
- 1½ teaspoon dried basil
- 1 teaspoon salt
- 1 teaspoon ground black pepper
- 1 teaspoon garlic powder
- 1 teaspoon dried mustard
- 1 teaspoon cayenne pepper
- 1 tablespoon baking powder
- ½ teaspoon paprika
- 4 cups Vegetable oil (enough for frying)
Timing
| Prep Time | 15 minutes (plus 4-12 hours marinating) |
| Cook Time | 20-25 minutes |
| Total Time | 35-40 minutes (active time) |
Context: While the marinating time is essential for flavor, the active cooking process is surprisingly quick, making this a fantastic weekend project or a special dinner centerpiece. Unlike some recipes that require a lengthy brine, this buttermilk soak efficiently tenderizes the chicken in as little as four hours.
Step-by-Step Instructions
Step 1 — Marinate the Chicken
Place the chicken pieces in a large bowl or resealable bag. Pour the buttermilk over the chicken, ensuring every piece is fully submerged. Cover the bowl or seal the bag and refrigerate for at least 4 hours, or ideally overnight. This buttermilk brine is the key to tender, juicy meat; the lactic acid gently breaks down proteins without making the texture mushy.
Step 2 — Prepare the Dredging Station
In a large, shallow dish (a pie plate works perfectly), whisk together the all-purpose flour, 1½ teaspoons each of garlic powder, paprika, onion powder, salt, dried thyme, and dried basil. Then add the second set of seasonings: 1 teaspoon each of salt, black pepper, garlic powder, dried mustard, and cayenne pepper. Finally, whisk in the tablespoon of baking powder and the remaining ½ teaspoon of paprika. The baking powder is a pro tip—it creates tiny bubbles for an extra-crispy, airy crust.
Step 3 — Dredge the Chicken
Remove one piece of chicken from the buttermilk, letting the excess drip off. Dredge it thoroughly in the seasoned flour mixture, pressing firmly to ensure a thick, even coating. Shake off any loose flour. For the crispiest crust possible, I’ve found that a double-dredge is essential: dip the floured piece back into the buttermilk for a moment, then coat it in the flour mixture a second time. Place the coated piece on a wire rack.
Step 4 — Heat the Oil
Pour the vegetable oil into a large, heavy-bottomed pot or Dutch oven until it’s about 2 inches deep. Attach a deep-fry or candy thermometer to the side. Heat the oil over medium-high heat to 350°F (175°C). Maintaining this consistent temperature is crucial; if the oil is too cool, the chicken will be greasy, and if it’s too hot, the outside will burn before the inside cooks through.
Step 5 — Fry the Chicken
Carefully lower 3-4 pieces of chicken into the hot oil using tongs, being careful not to overcrowd the pot, which would cause the temperature to drop. Fry for 12-15 minutes, turning occasionally, until the coating is a deep, golden brown and the internal temperature of the chicken reaches 165°F (74°C) for white meat and 175°F (80°C) for dark meat. (Pro tip: Use an instant-read thermometer for perfect doneness every time.)
Step 6 — Drain and Rest
Once cooked, transfer the fried chicken pieces to a clean wire rack set over a baking sheet—never place them directly on paper towels, as this can trap steam and make the bottom crust soggy. Let the chicken rest for at least 5-10 minutes before serving. This resting period allows the juices to redistribute throughout the meat, ensuring every bite of your buttermilk fried chicken is incredibly moist and flavorful.
Nutritional Information
| Calories | ~480 |
| Protein | 38g |
| Carbohydrates | 28g |
| Fat | 24g |
| Fiber | 2g |
| Sodium | ~950mg |
Note: Estimates are per serving (one piece of chicken) based on typical ingredients and preparation. Values may vary depending on specific cuts, oil absorption, and exact seasoning amounts. This classic buttermilk fried chicken recipe is high in protein, providing a satisfying and hearty meal.
Healthier Alternatives
- Air Fryer Method — For a lower-fat version, spray the double-dredged chicken with oil and air fry at 400°F for 20-25 minutes, flipping halfway. The crust will be less shatteringly crisp but still deliciously crunchy.
- Gluten-Free Flour — Swap the all-purpose flour for a 1:1 gluten-free blend to make this recipe celiac-friendly without sacrificing the essential crispy coating.
- Greek Yogurt Marinade — Use full-fat plain Greek yogurt thinned with a splash of water instead of buttermilk. It offers similar tang and tenderizing power with more protein and less lactose.
- Skinless Chicken — Opt for skinless, bone-in pieces to significantly reduce the overall fat content while still benefiting from the juicy, flavorful meat.
- Herb-Forward Seasoning — Reduce the salt by half and amplify flavor with extra dried herbs like oregano, sage, or a pinch of smoked paprika for a lower-sodium option.
- Avocado or Peanut Oil — These oils have higher smoke points and contain healthier monounsaturated fats, making them a better choice for high-heat frying.
Serving Suggestions
- Serve your hot buttermilk fried chicken on a platter with classic Southern sides like creamy coleslaw, buttery mashed potatoes, and honey-drizzled cornbread.
- For a picnic or casual gathering, pair with chilled potato salad, pickles, and watermelon slices for the perfect sweet and savory balance.
- Elevate a weeknight dinner by plating the chicken over a bed of fluffy waffles with a side of spicy maple syrup for a beloved sweet-and-savory combination.
- Create a hearty salad by slicing cooled chicken and placing it atop a mix of crisp romaine, cherry tomatoes, red onion, and a creamy ranch or blue cheese dressing.
- For beverage pairings, a crisp lager, sweet iced tea, or a tart lemonade beautifully cuts through the richness of the fried chicken.
This dish is incredibly versatile. In the summer, it’s perfect for outdoor feasts, while in cooler months, it makes a comforting centerpiece for a family dinner. Leftovers are excellent for meal prep, easily incorporated into sandwiches or salads the next day.
Common Mistakes to Avoid
- Mistake: Skipping the marinating time. Fix: The buttermilk brine is non-negotiable for tender meat. Commit to at least 4 hours, or the chicken won’t be as juicy.
- Mistake: Not letting excess buttermilk drip off before dredging. Fix: In Step 3, let each piece drain for a few seconds over the bowl. Too much liquid creates a gummy, pasty flour coating instead of a crisp one.
- Mistake: Frying at the wrong oil temperature. Fix: Use a thermometer religiously. If the oil dips below 325°F when you add chicken, wait for it to come back to 350°F before adding more pieces.
- Mistake: Overcrowding the pot. Fix: Frying too many pieces at once steams the chicken, leading to a greasy, soft crust. Fry in small batches for the best golden fried chicken.
- Mistake: Relying on color alone to determine doneness. Fix: Always use an instant-read thermometer. The internal temperature must reach 165°F for white meat and 175°F for dark meat to be safely cooked.
- Mistake: Letting fried chicken rest on paper towels. Fix: As noted in Step 6, always use a wire rack. Paper towels trap steam and create a soggy bottom, ruining your perfect crunch.
- Mistake: Seasoning only the flour. Fix: For deeply flavorful meat, add a teaspoon of salt and pepper directly to the buttermilk marinade along with the dried herbs.
Storing Tips
- Fridge: Allow chicken to cool completely on a wire rack. Store in an airtight container in the refrigerator for up to 4 days. The crust will soften but will still be tasty.
- Freezer: For longer storage, freeze cooled chicken pieces in a single layer on a baking sheet, then transfer to a freezer-safe bag or container for up to 3 months. This prevents freezer burn and preserves about 95% of the quality.
- Reheat: To restore crispness, reheat in a 375°F oven or toaster oven for 10-15 minutes until hot throughout. For frozen chicken, bake from frozen at 350°F for 20-25 minutes. Avoid microwaving, as it turns the crust rubbery.
Proper storage is key to enjoying your homemade fried chicken later. For meal prep, I’ve found that reheating in an air fryer for 5-7 minutes at 375°F works wonders to revive the crispy texture. Always ensure reheated chicken reaches an internal temperature of 165°F, as recommended by food safety guidelines.
Conclusion
Mastering this recipe means achieving that elusive combination of a shatteringly crisp crust and supremely juicy meat every single time. It’s a crowd-pleasing classic perfect for any gathering. For more delicious chicken dinners, try this Greek Chicken Gyros with Lemon-Herb Marinade or this Grilled Chicken Orzo Salad. Give this buttermilk fried chicken recipe a try and share your results in the comments!
Frequently Asked Questions
How many servings does this buttermilk fried chicken recipe make?
This recipe yields 8 servings, assuming one piece of bone-in chicken per person. For a heartier meal with multiple sides, it can comfortably serve 4-6 people. I always recommend making a full batch, as leftovers store and reheat beautifully, as detailed in the Storing Tips section.
Can I use boneless chicken for this fried chicken recipe?
Yes, boneless chicken thighs or breasts can be used. The cooking time will be shorter—fry for 6-10 minutes until golden brown and the internal temperature reaches 165°F. Be aware that boneless pieces cook faster and can dry out more easily, so I’ve found that thighs hold up better than breasts due to their higher fat content.
Why did my fried chicken coating fall off during frying?
This usually happens because the oil temperature was too low when the chicken was added, causing the coating to soak up oil instead of sealing quickly. According to professional frying standards, always ensure your oil is at a steady 350°F. Additionally, make sure to shake off excess flour after dredging, as loose flour can create a weak layer that separates from the chicken.
PrintThe Best Buttermilk Fried Chicken
Ingredients
- 8 pieces of bone in, skin on chicken ( thighs and legs preferred)
- 2 cups buttermilk
- 2 cups all-purpose flour
- 1½ teaspoon garlic powder
- 1½ teaspoon paprika
- 1½ teaspoon onion powder
- 1½ teaspoon salt
- 1½ teaspoon dried thyme
- 1½ teaspoon dried basil
- 1 teaspoon salt
- 1 teaspoon ground black pepper
- 1 teaspoon garlic powder
- 1 teaspoon dried mustard
- 1 teaspoon cayenne pepper
- 1 tablespoon baking powder
- ½ teaspoon paprika
- 4 cups Vegetable oil (enough for frying)
Instructions
- Place the chicken pieces in a large bowl and season with salt, pepper, garlic powder, dried mustard, and paprika. Mix well to ensure the chicken is evenly coated. Pour the buttermilk over the chicken and stir to combine. Ensure the chicken is thoroughly coated with the buttermilk mixture.
- Refrigerate the marinated chicken for at least 1 hour, but for the best results, let it marinate overnight.
- In a shallow dish, whisk together the flour, baking powder, salt, garlic powder, paprika, dried basil, dried thyme, onion powder, and cayenne pepper.
- Heat vegetable oil in a deep fryer or large pot to around 340°F. The goal is to achieve a crispy, golden-brown exterior without burning, while ensuring the chicken is cooked through.
- Take each piece of chicken out of the marinade, dredge it in the flour mixture, and ensure it's well coated.
- Carefully place the chicken pieces into the hot oil, frying 4 or 5 pieces at a time without overcrowding. Turn the pieces as needed and fry until they are golden brown and cooked through, approximately 15 minutes per piece. The internal temperature of the chicken should reach 170°F. Using a candy thermometer in the oil is recommended to maintain the temperature around 340°F, as it may drop when you add the chicken.
- Once fried, let the chicken drain on a wire rack to keep it crispy.