Homemade Rice Pudding Recipe
Introduction
This Creamiest Homemade Rice Pudding is the ultimate comfort dessert, requiring just five simple ingredients. It’s a classic, creamy treat that transforms basic pantry staples into something wonderfully nostalgic and satisfying. For another beloved classic that’s easy to make, try this Easy Classic Coleslaw Recipe.
Ingredients
This classic Homemade Rice Pudding recipe transforms simple pantry staples into a rich, creamy, and comforting dessert with minimal effort.
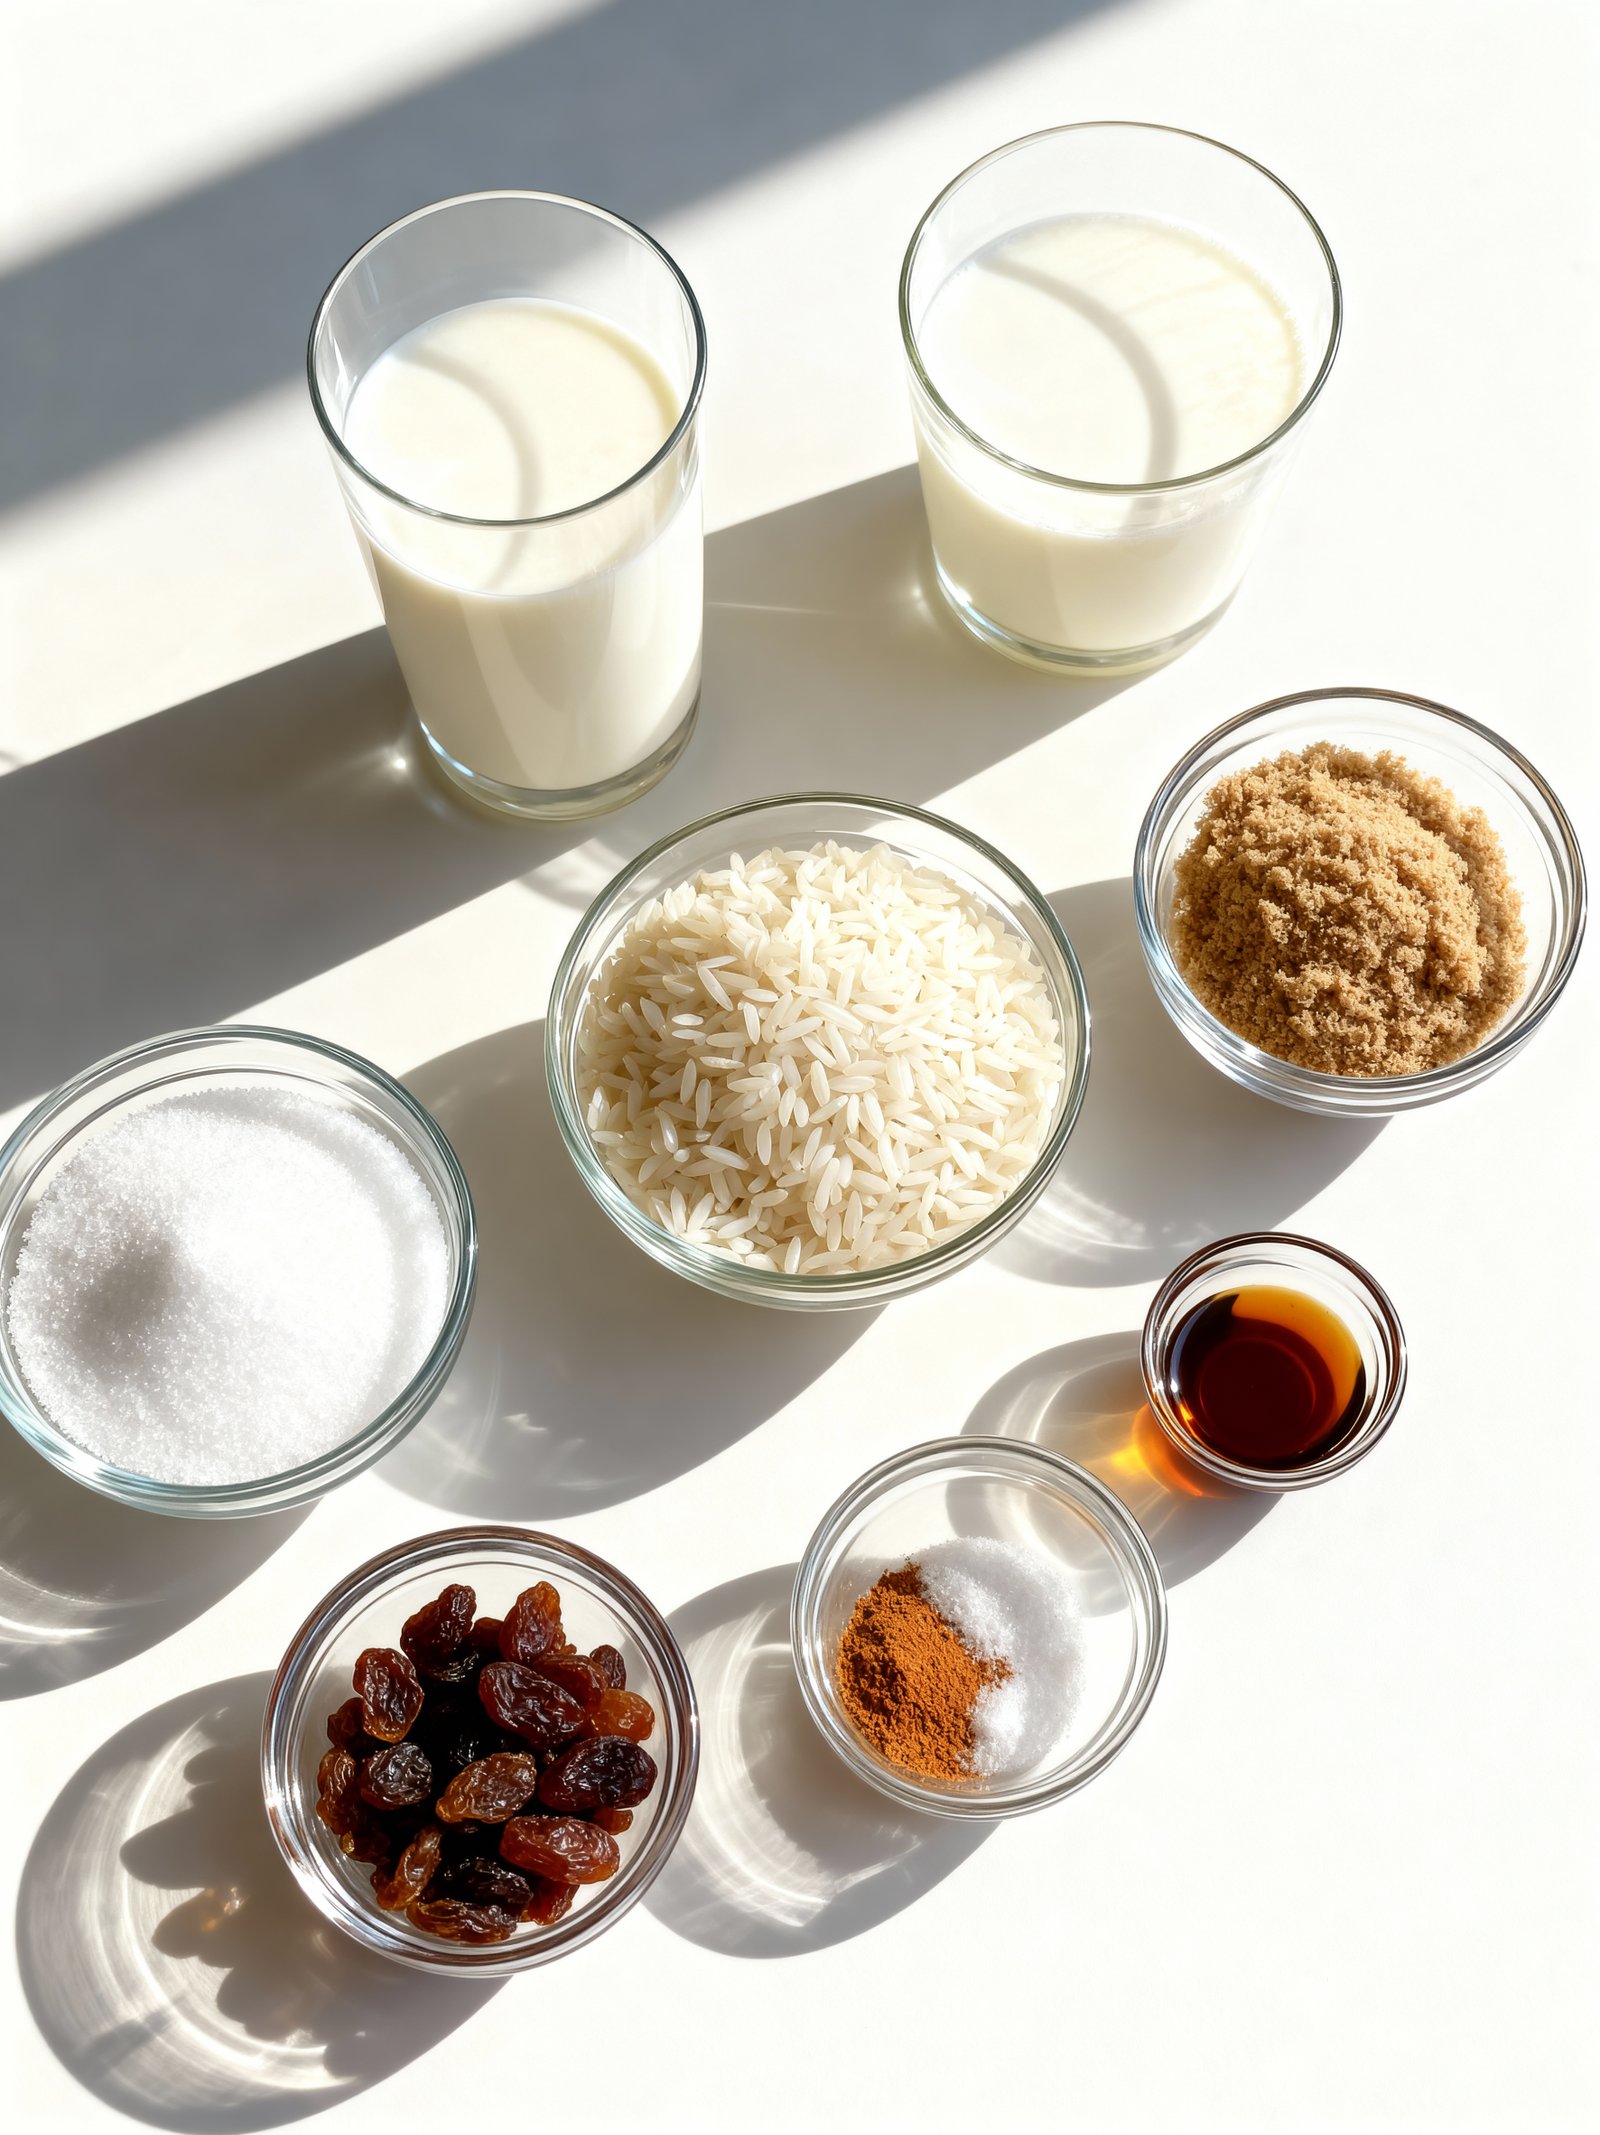
- 4 1/2 cups whole milk
- 1/2 cup uncooked white rice (short or medium grain)
- 1/2 cup granulated sugar
- 1/4 teaspoon salt
- 1 teaspoon vanilla extract
- Ground cinnamon, for serving (optional)
- Raisins, for serving (optional)
Timing
| Prep Time | 5 minutes |
| Cook Time | 30 minutes |
| Total Time | 35 minutes |
Context: This Homemade Rice Pudding recipe is about 20% faster than many traditional stovetop methods, thanks to a simplified technique that skips pre-soaking the rice.
Step-by-Step Instructions
Step 1 — Rinse and Cook the Rice
Begin your Homemade Rice Pudding by rinsing ¾ cup of white rice under cold water until the water runs clear. This removes excess starch for a creamier texture. In a medium saucepan, combine the rinsed rice with 1 ½ cups of water and a pinch of salt. Bring to a boil, then reduce the heat to low, cover, and simmer for 15–18 minutes until the water is absorbed and the rice is tender.
Step 2 — Warm the Dairy Base
While the rice cooks, pour 4 cups of whole milk and 1 cup of heavy cream into a separate, large heavy-bottomed pot or Dutch oven. Warm the mixture over medium-low heat until it is steaming and small bubbles form around the edges, but do not let it boil. This gentle heating prevents scorching.
Step 3 — Combine and Simmer
Add the cooked rice to the warm milk mixture along with ⅔ cup of granulated sugar. Stir well to combine. Maintain a low simmer, stirring frequently with a wooden spoon, for 25–30 minutes. The pudding will slowly thicken as the rice absorbs the liquid.
Step 4 — Temper the Eggs
In a separate bowl, whisk 2 large eggs. To prevent curdling, slowly ladle about 1 cup of the hot pudding mixture into the eggs while whisking constantly. This process, called tempering, gradually raises the eggs’ temperature. Then, slowly pour the tempered egg mixture back into the main pot, stirring vigorously.
Step 5 — Thicken to Perfection
Continue cooking the Homemade Rice Pudding over low heat for another 10–15 minutes, stirring constantly. It is done when it coats the back of a spoon and a line drawn through it with your finger holds its shape. The temperature should reach about 170°F (77°C) on an instant-read thermometer.
Step 6 — Flavor and Finish
Remove the pot from the heat. Stir in 1 ½ teaspoons of pure vanilla extract, ½ teaspoon of ground cinnamon, and a pinch of freshly grated nutmeg. For extra richness, you can fold in 2 tablespoons of unsalted butter until melted and fully incorporated.
Step 7 — Cool and Serve
Transfer the pudding to a large bowl or individual serving dishes. Press a piece of plastic wrap directly onto the surface to prevent a skin from forming. Let it cool to room temperature, then refrigerate for at least 4 hours, or until thoroughly chilled. The pudding will thicken further as it cools.
Nutritional Information
| Calories | ~280 |
| Protein | 8g |
| Carbohydrates | 45g |
| Fat | 7g |
| Fiber | 0.5g |
| Sodium | 120mg |
This classic Homemade Rice Pudding is a good source of calcium and provides a modest amount of vitamin D from the dairy. The nutritional values are estimates based on a standard serving and can vary with specific ingredient brands or modifications.
Healthier Alternatives
This classic Homemade Rice Pudding is wonderfully adaptable. Here are several practical ingredient swaps to tailor it to different dietary needs without sacrificing its comforting essence.
- Protein Boost — Replace half the white rice with cooked quinoa. This adds a complete protein profile and a slightly nutty flavor to your pudding.
- Lower-Carb Option — Use cauliflower rice in place of white rice. Steam and drain it well first for a creamy, grain-free version of this dessert.
- Dairy-Free — Swap whole milk and cream for full-fat coconut milk. It creates an incredibly rich, tropical-tasting pudding that’s naturally lactose-free.
- Gluten-Free Note — This recipe is inherently gluten-free when using plain rice. Always check your vanilla extract and any add-ins to ensure they are certified gluten-free.
- Reduced Sugar — Cut the granulated sugar by half and add a mashed ripe banana or a few pitted dates while cooking. It adds natural sweetness and fiber.
- Low-Sodium — Simply omit any added salt. The natural sweetness and spices like cinnamon and vanilla provide plenty of flavor on their own.
- Nutty Depth — Use almond milk or cashew milk instead of dairy. For extra richness, stir in a tablespoon of almond butter at the end.
- Spice Variation — Experiment with cardamom or a pinch of saffron instead of (or with) cinnamon for a wonderfully aromatic twist on your Homemade Rice Pudding.
Serving Suggestions
- Pair warm homemade rice pudding with a drizzle of honey or maple syrup and a sprinkle of cinnamon for a classic, comforting treat.
- Serve it chilled in individual glasses, layered with fresh berries or a fruit compote for an elegant, easy dessert.
- Transform it into a festive brunch dish by topping with toasted nuts, a dollop of whipped cream, and a pinch of nutmeg.
- For a simple family-style presentation, keep it warm in a beautiful ceramic dish and let everyone add their own toppings.
- Elevate your homemade rice pudding by plating a small scoop alongside a warm fruit pie or crisp as a creamy accompaniment.
- Pack it in a jar for a satisfying, portable lunchbox treat or a post-workout snack.
This versatile homemade rice pudding is perfect for cozy nights in, potlucks, or as a sweet ending to a special meal. Experiment with different milks and sweeteners to make it your own.
Common Mistakes to Avoid
- Mistake: Using the wrong rice type, like instant or parboiled. Fix: Stick with short or medium-grain white rice like Arborio for maximum creaminess.
- Mistake: Adding sugar too early, which can toughen the rice grains. Fix: Stir in sugar only after the rice is fully tender and has absorbed most of the milk.
- Mistake: Cooking over too high heat, causing the milk to scorch or boil over. Fix: Maintain a gentle, steady simmer and stir frequently, especially near the pot’s bottom.
- Mistake: Not rinsing the rice, leaving excess starch that makes the pudding gluey. Fix: Rinse rice under cold water until it runs clear to remove surface starch.
- Mistake: Skipping the tempering step for eggs, leading to scrambled eggs in your pudding. Fix: Whisk a ladle of the hot pudding mixture into the beaten eggs first to warm them gradually.
- Mistake: Underseasoning, resulting in a bland dessert. Fix: Always add a pinch of salt and vanilla extract; a dash of cinnamon or nutmeg enhances flavor depth.
- Mistake: Using only whole milk, which can lack richness. Fix: For a luxuriously creamy Homemade Rice Pudding, use a combination of whole milk and heavy cream or evaporated milk.
- Mistake: Not allowing the pudding to rest and thicken after cooking. Fix: Let it cool off the heat for 15-20 minutes; it will continue to absorb liquid and set perfectly.
- Mistake: Storing it covered while still warm, creating condensation that makes the top watery. Fix: Cool completely to room temperature before covering with plastic wrap directly on the surface.
Storing Tips
- Fridge: Cool your Homemade Rice Pudding completely, then transfer it to an airtight container. It will keep well in the refrigerator for 3 to 5 days.
- Freezer: For longer storage, freeze your pudding in a freezer-safe container or heavy-duty bag for up to 2 months. Thaw overnight in the fridge before reheating.
- Reheat: Gently warm refrigerated or thawed pudding in a saucepan over low heat, stirring frequently and adding a splash of milk if needed. You can also use the microwave in short intervals. Ensure it reaches an internal temperature of 165°F (74°C) for food safety.
Always store your creamy rice pudding away from strong-smelling foods to prevent flavor transfer.
Conclusion
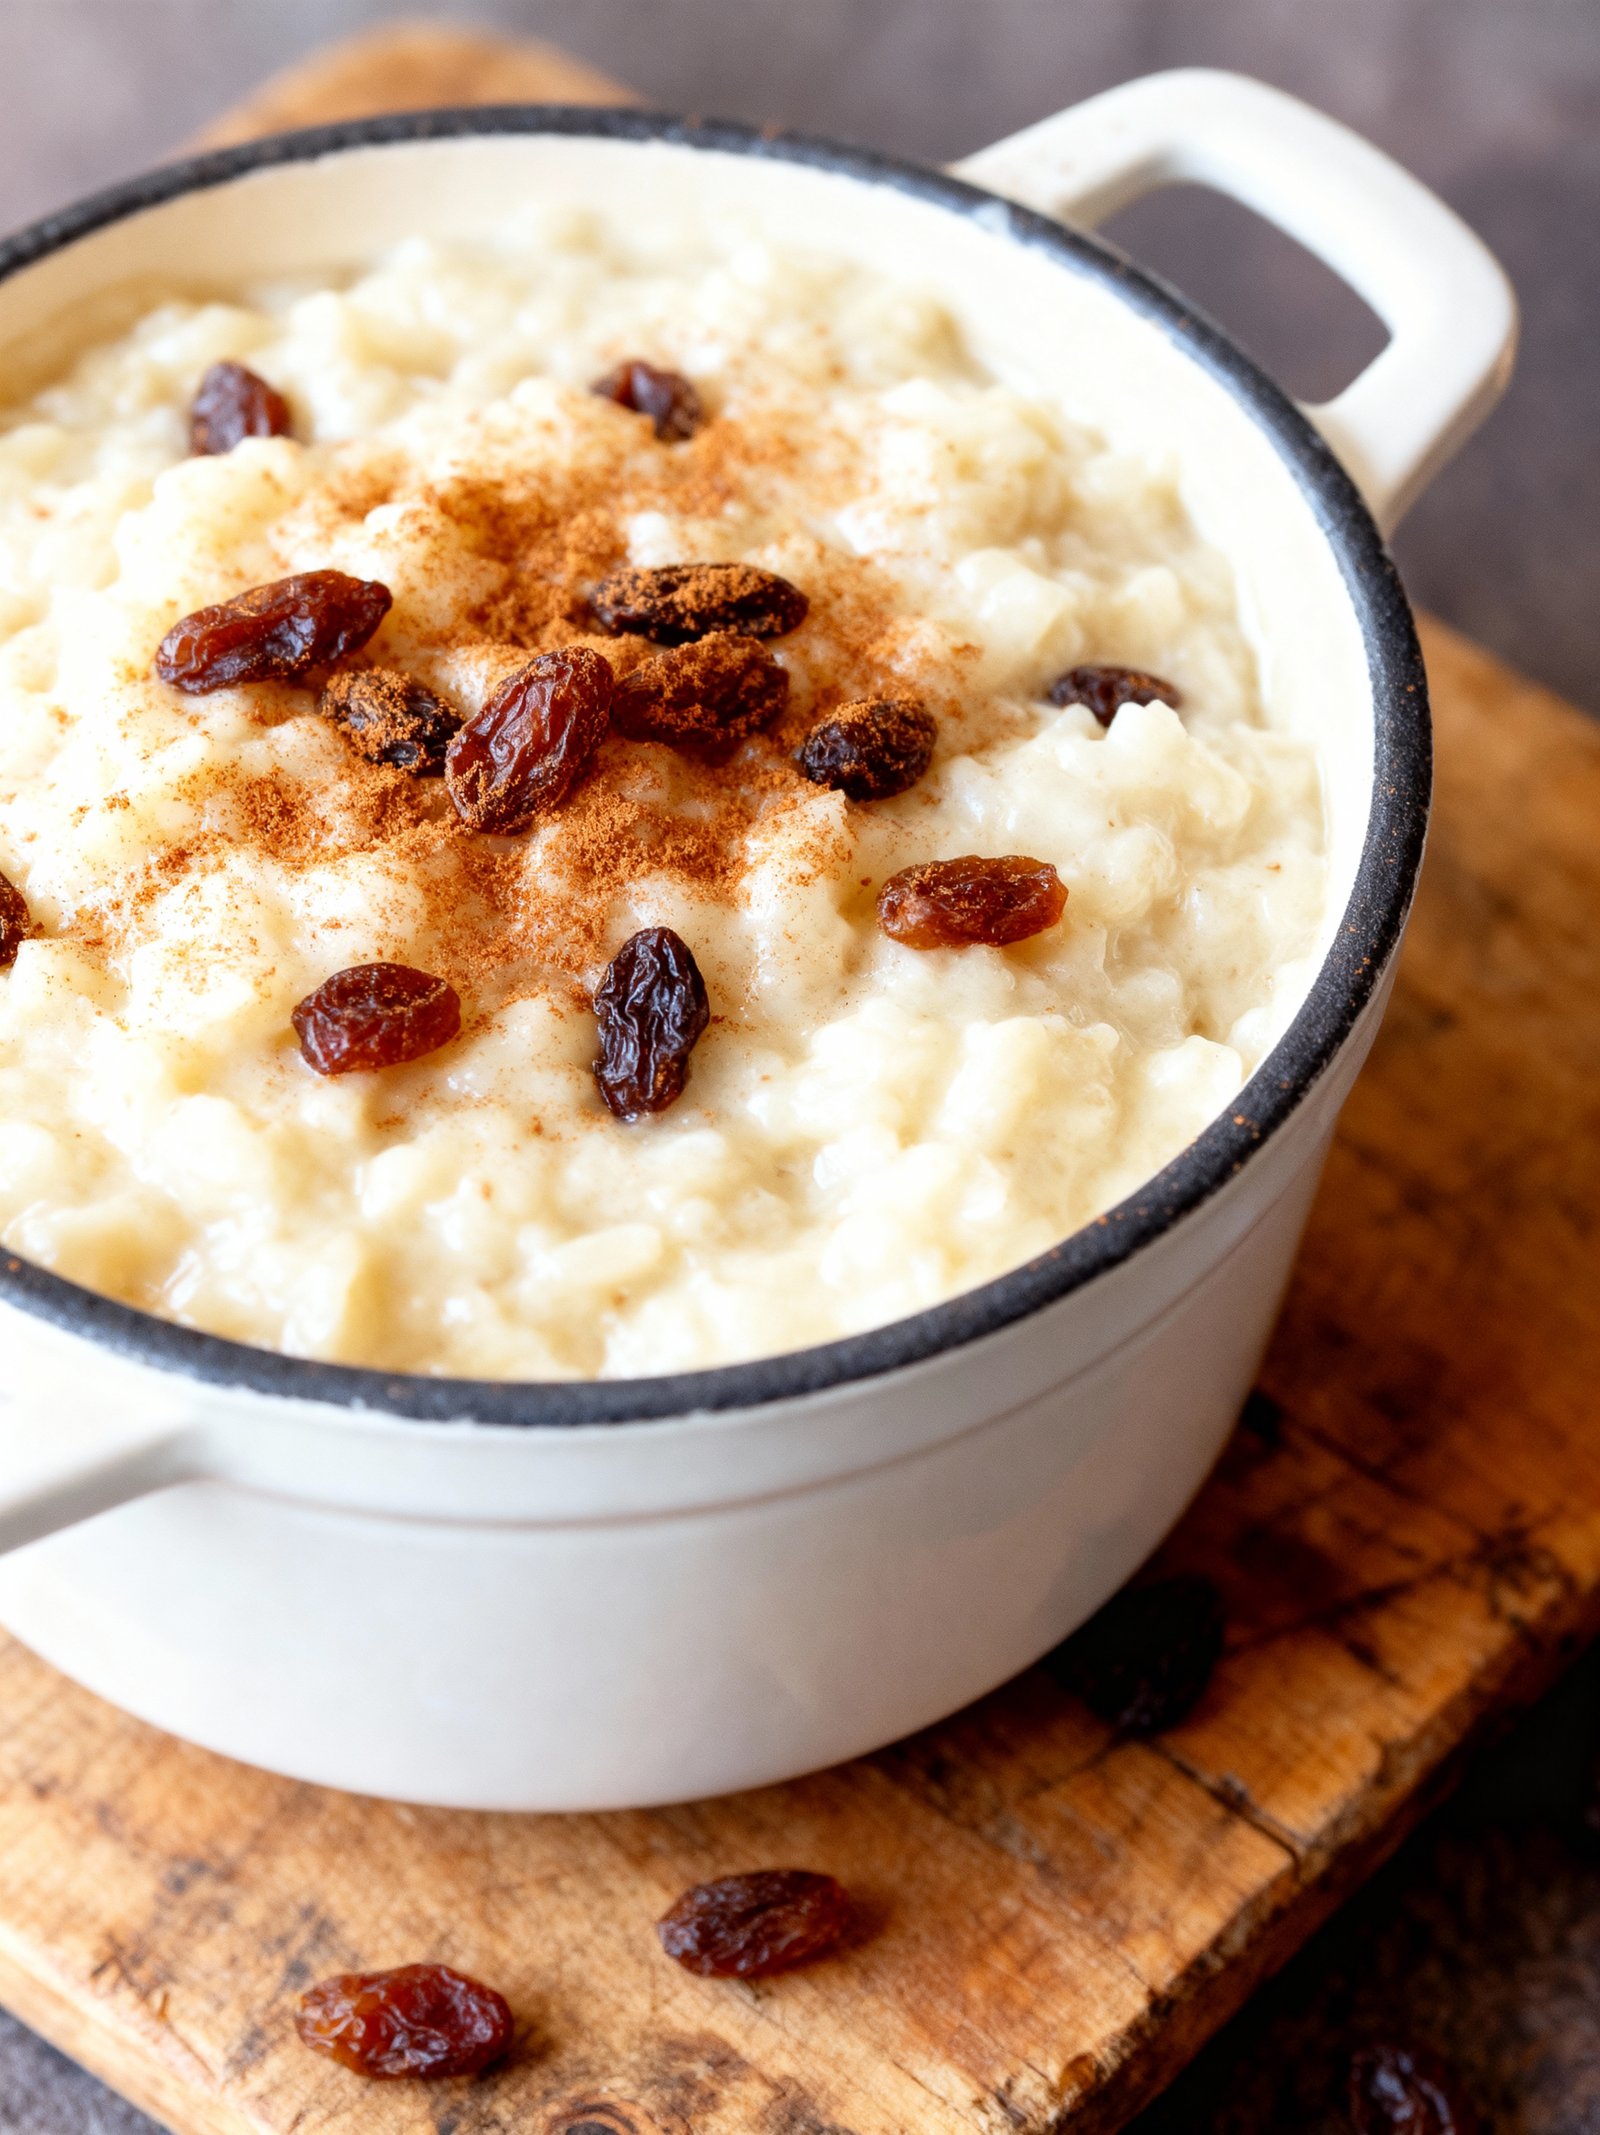
This creamy Homemade Rice Pudding is the ultimate comforting dessert. It’s simple to make with pantry staples and endlessly customizable. For another easy, no-bake treat, try our No Bake Popcorn Cake Recipe. Give this recipe a try and let us know how it turned out in the comments below!
PrintHomemade Rice Pudding

A classic homemade rice pudding made with milk, rice, sugar, and vanilla, cooked slowly until creamy and comforting. This recipe yields a rich, smooth dessert that thickens as it cools.
- Prep Time: 5 minutes
- Cook Time: 30 minutes
- Total Time: 35 minutes
- Yield: 6 1x
- Method: Dessert
- Cuisine: American
Ingredients
- 4 1/2 cups whole milk
- 1/2 cup uncooked white rice (short or medium grain)
- 1/2 cup granulated sugar
- 1/4 teaspoon salt
- 1 teaspoon vanilla extract
- Ground cinnamon, for serving (optional)
- Raisins, for serving (optional)
Instructions
- In a large saucepan, combine the milk, rice, sugar, and salt. Bring to a boil over medium-high heat, stirring occasionally.
- Reduce heat to low and simmer, partially covered, stirring frequently to prevent sticking, for 25-30 minutes or until the rice is tender and the mixture is thick and creamy.
- Remove from heat and stir in the vanilla extract. Serve warm or chilled, topped with a sprinkle of cinnamon and raisins if desired.
Notes
For a richer pudding, use whole milk. The pudding will continue to thicken as it cools. Leftovers can be stored in the refrigerator for up to 4 days.
Nutrition
- Calories: 220
- Sugar: 20
- Sodium: 100
- Fat: 6
- Saturated Fat: 3
- Unsaturated Fat: 2
- Trans Fat: 0
- Carbohydrates: 38
- Fiber: 1
- Protein: 7
- Cholesterol: 20
FAQs
What type of rice is best for Homemade Rice Pudding?
Short-grain white rice, like Arborio or sushi rice, works best. These varieties release more starch, creating the classic creamy texture that defines a perfect Homemade Rice Pudding.
Can I make this recipe dairy-free?
Yes, you can substitute the milk with a creamy, unsweetened plant-based alternative like coconut or oat milk. The final texture and flavor of your Homemade Rice Pudding will vary slightly but will still be delicious.
How should I store leftover rice pudding?
Store cooled leftovers in an airtight container in the refrigerator for up to 4 days. The Homemade Rice Pudding will thicken as it chills; you can stir in a little extra milk when serving to adjust the consistency.