Strawberry Crunch Bars Recipe
Introduction
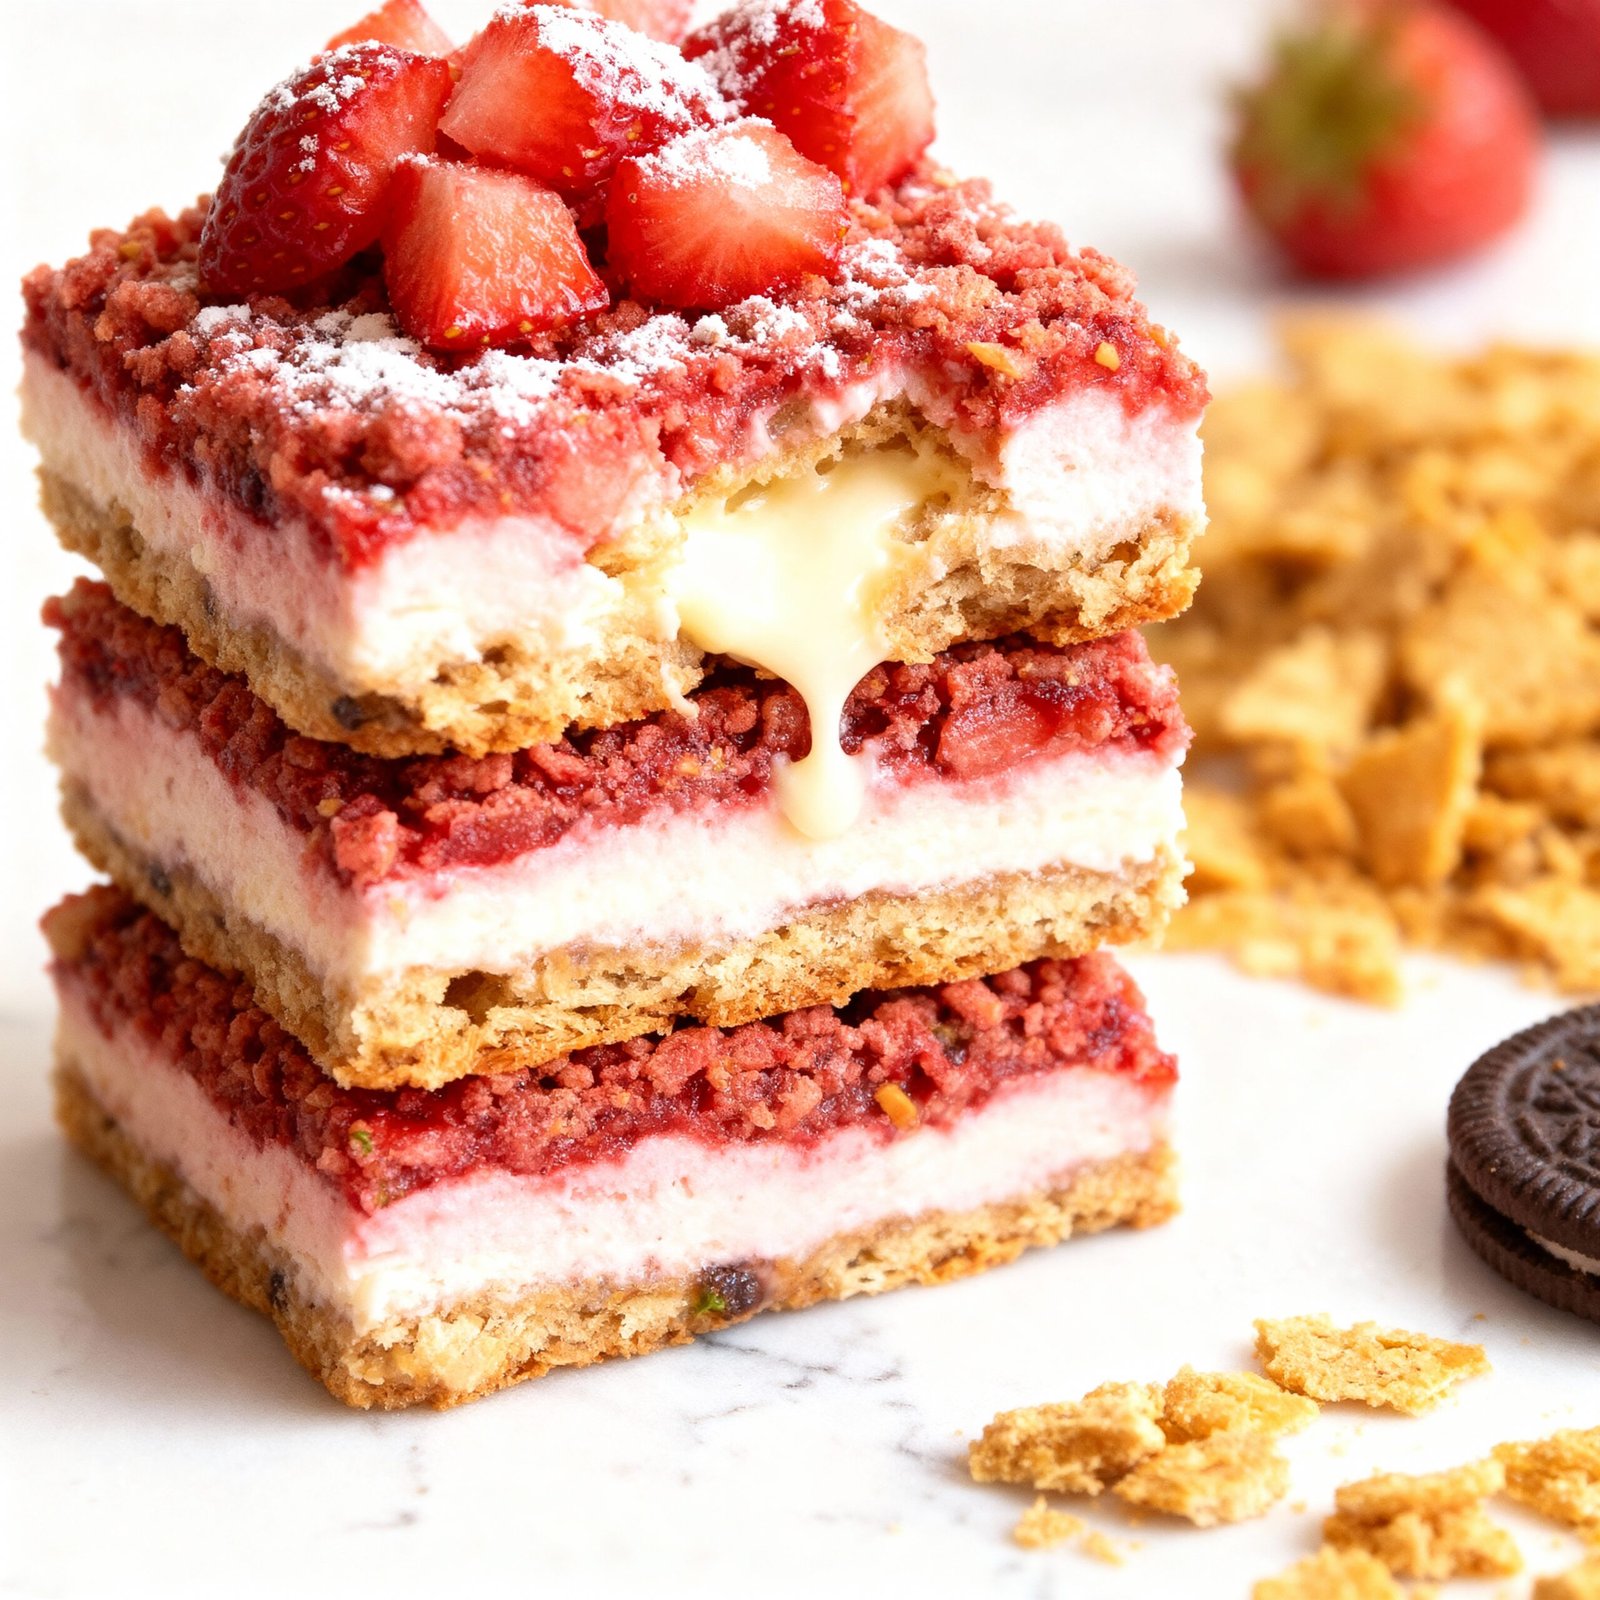
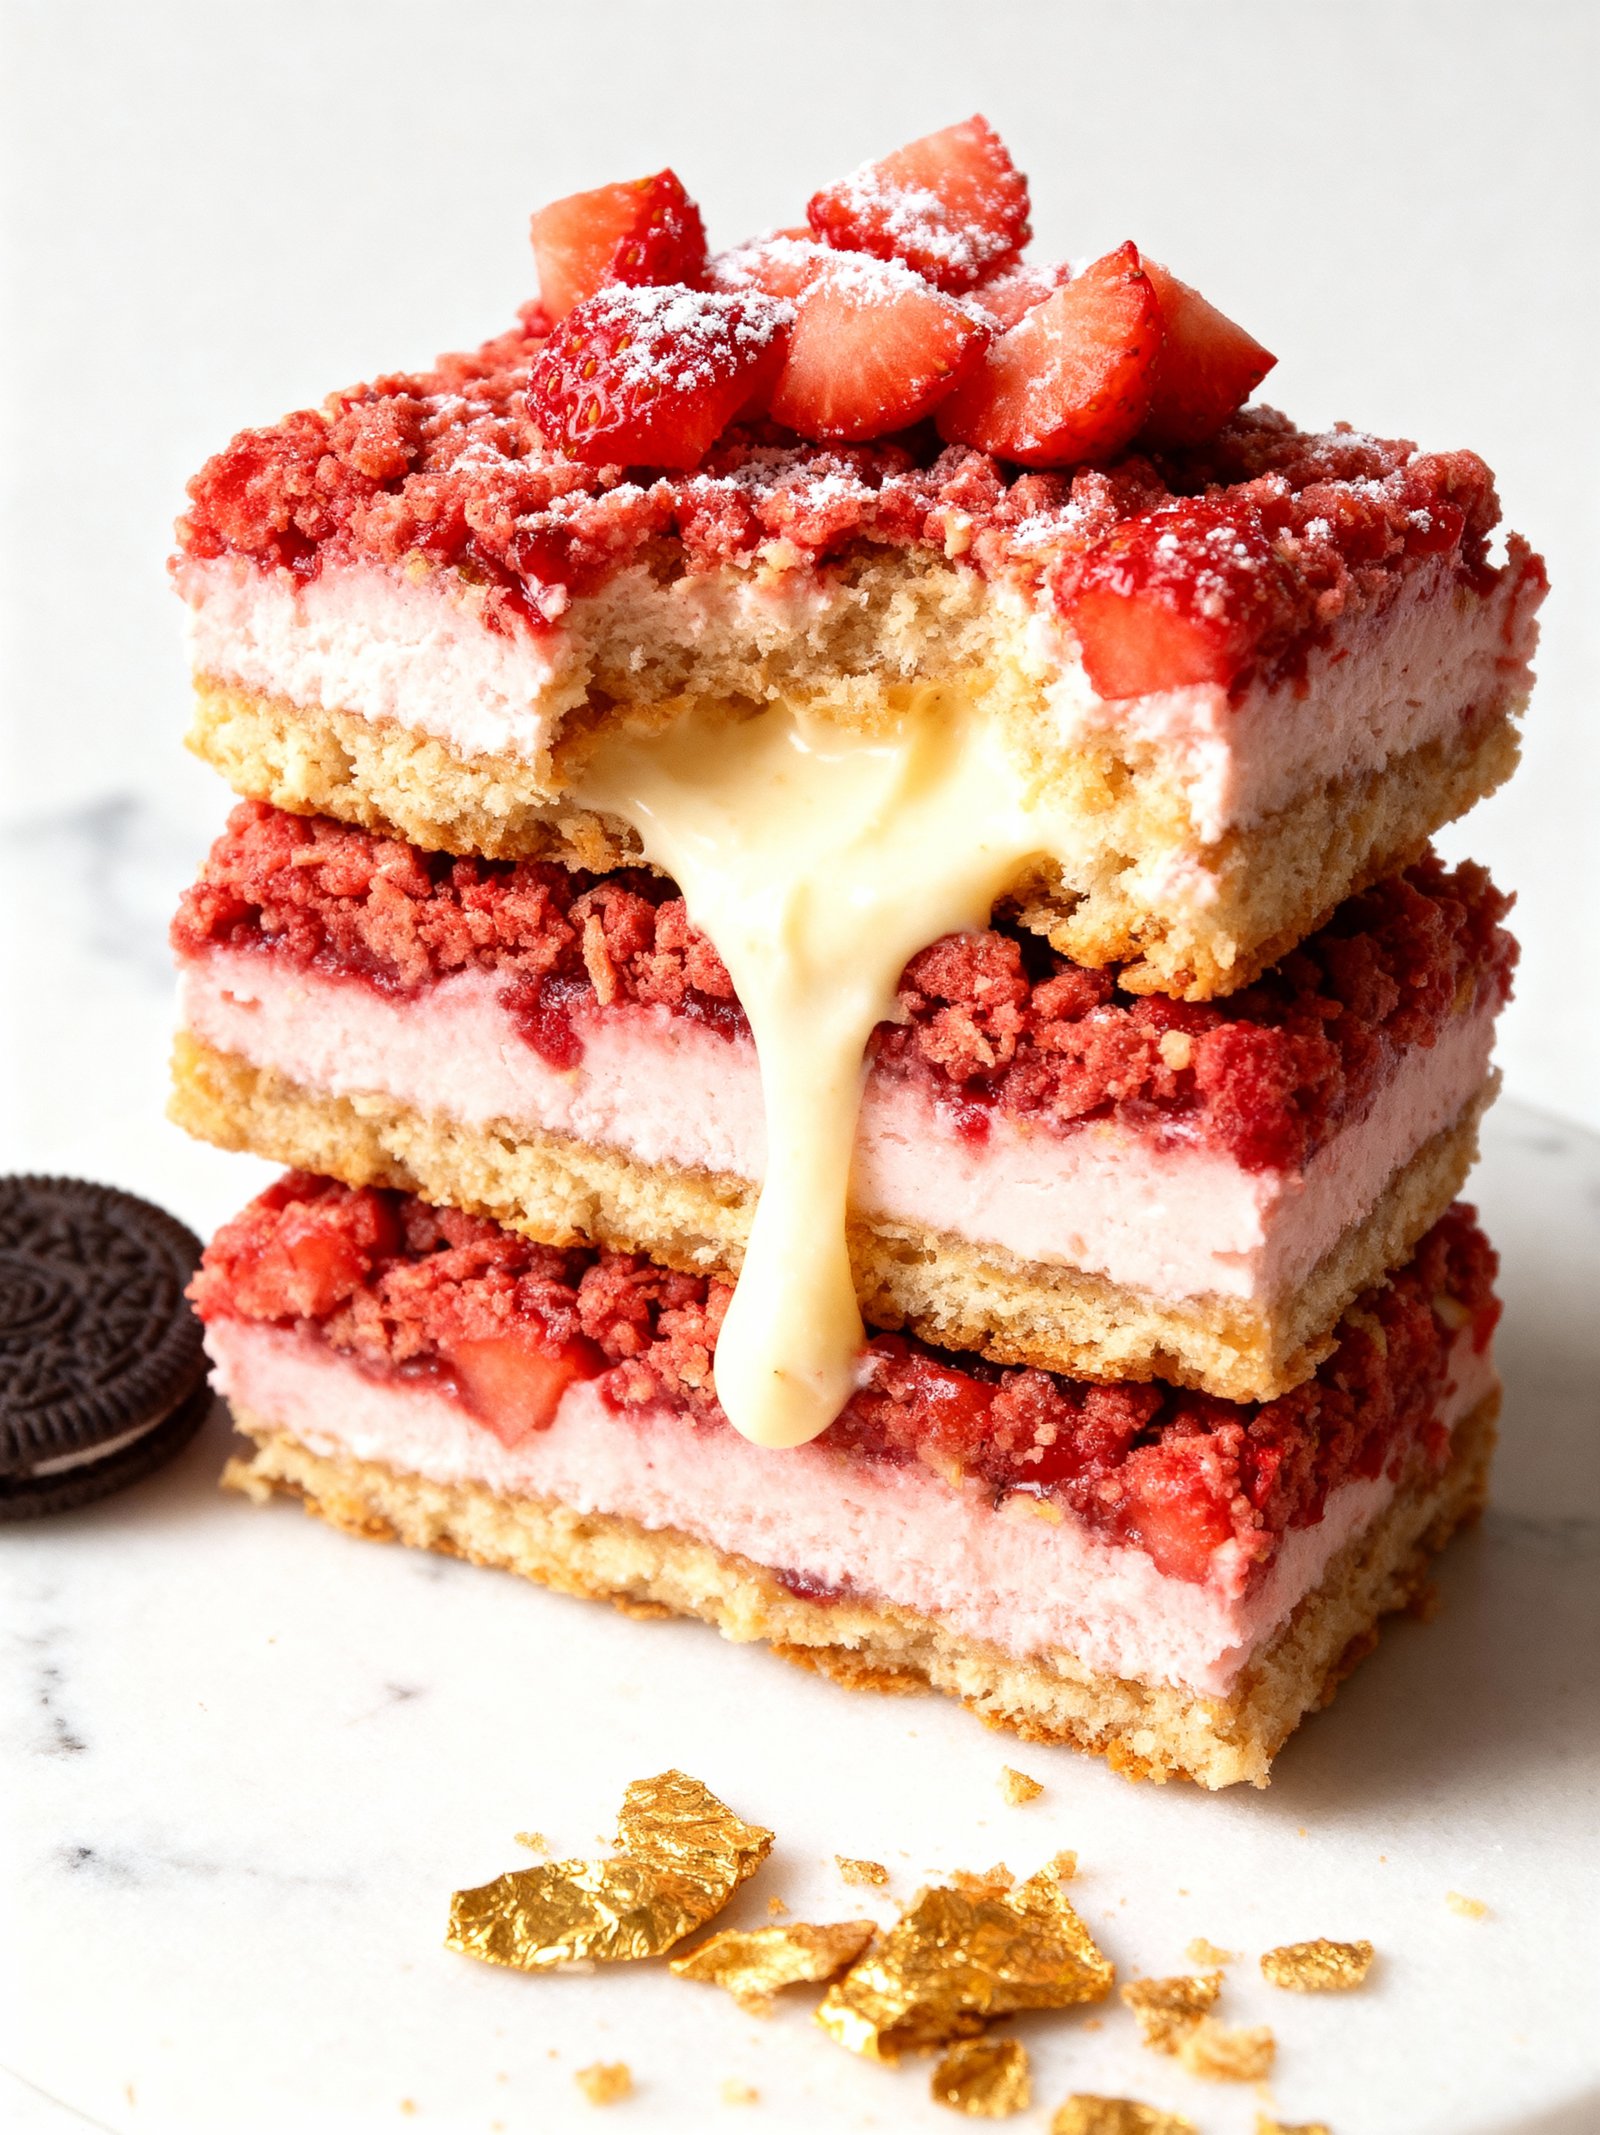
These easy Strawberry Crunch Bars are the perfect no-fuss dessert with just five simple ingredients. They feature a creamy strawberry filling and a golden crumb topping for a delightful treat. For more strawberry-inspired desserts, try the Strawberry Earthquake Cake Recipe or the Strawberry Shortcake Cheesecake Recipe.
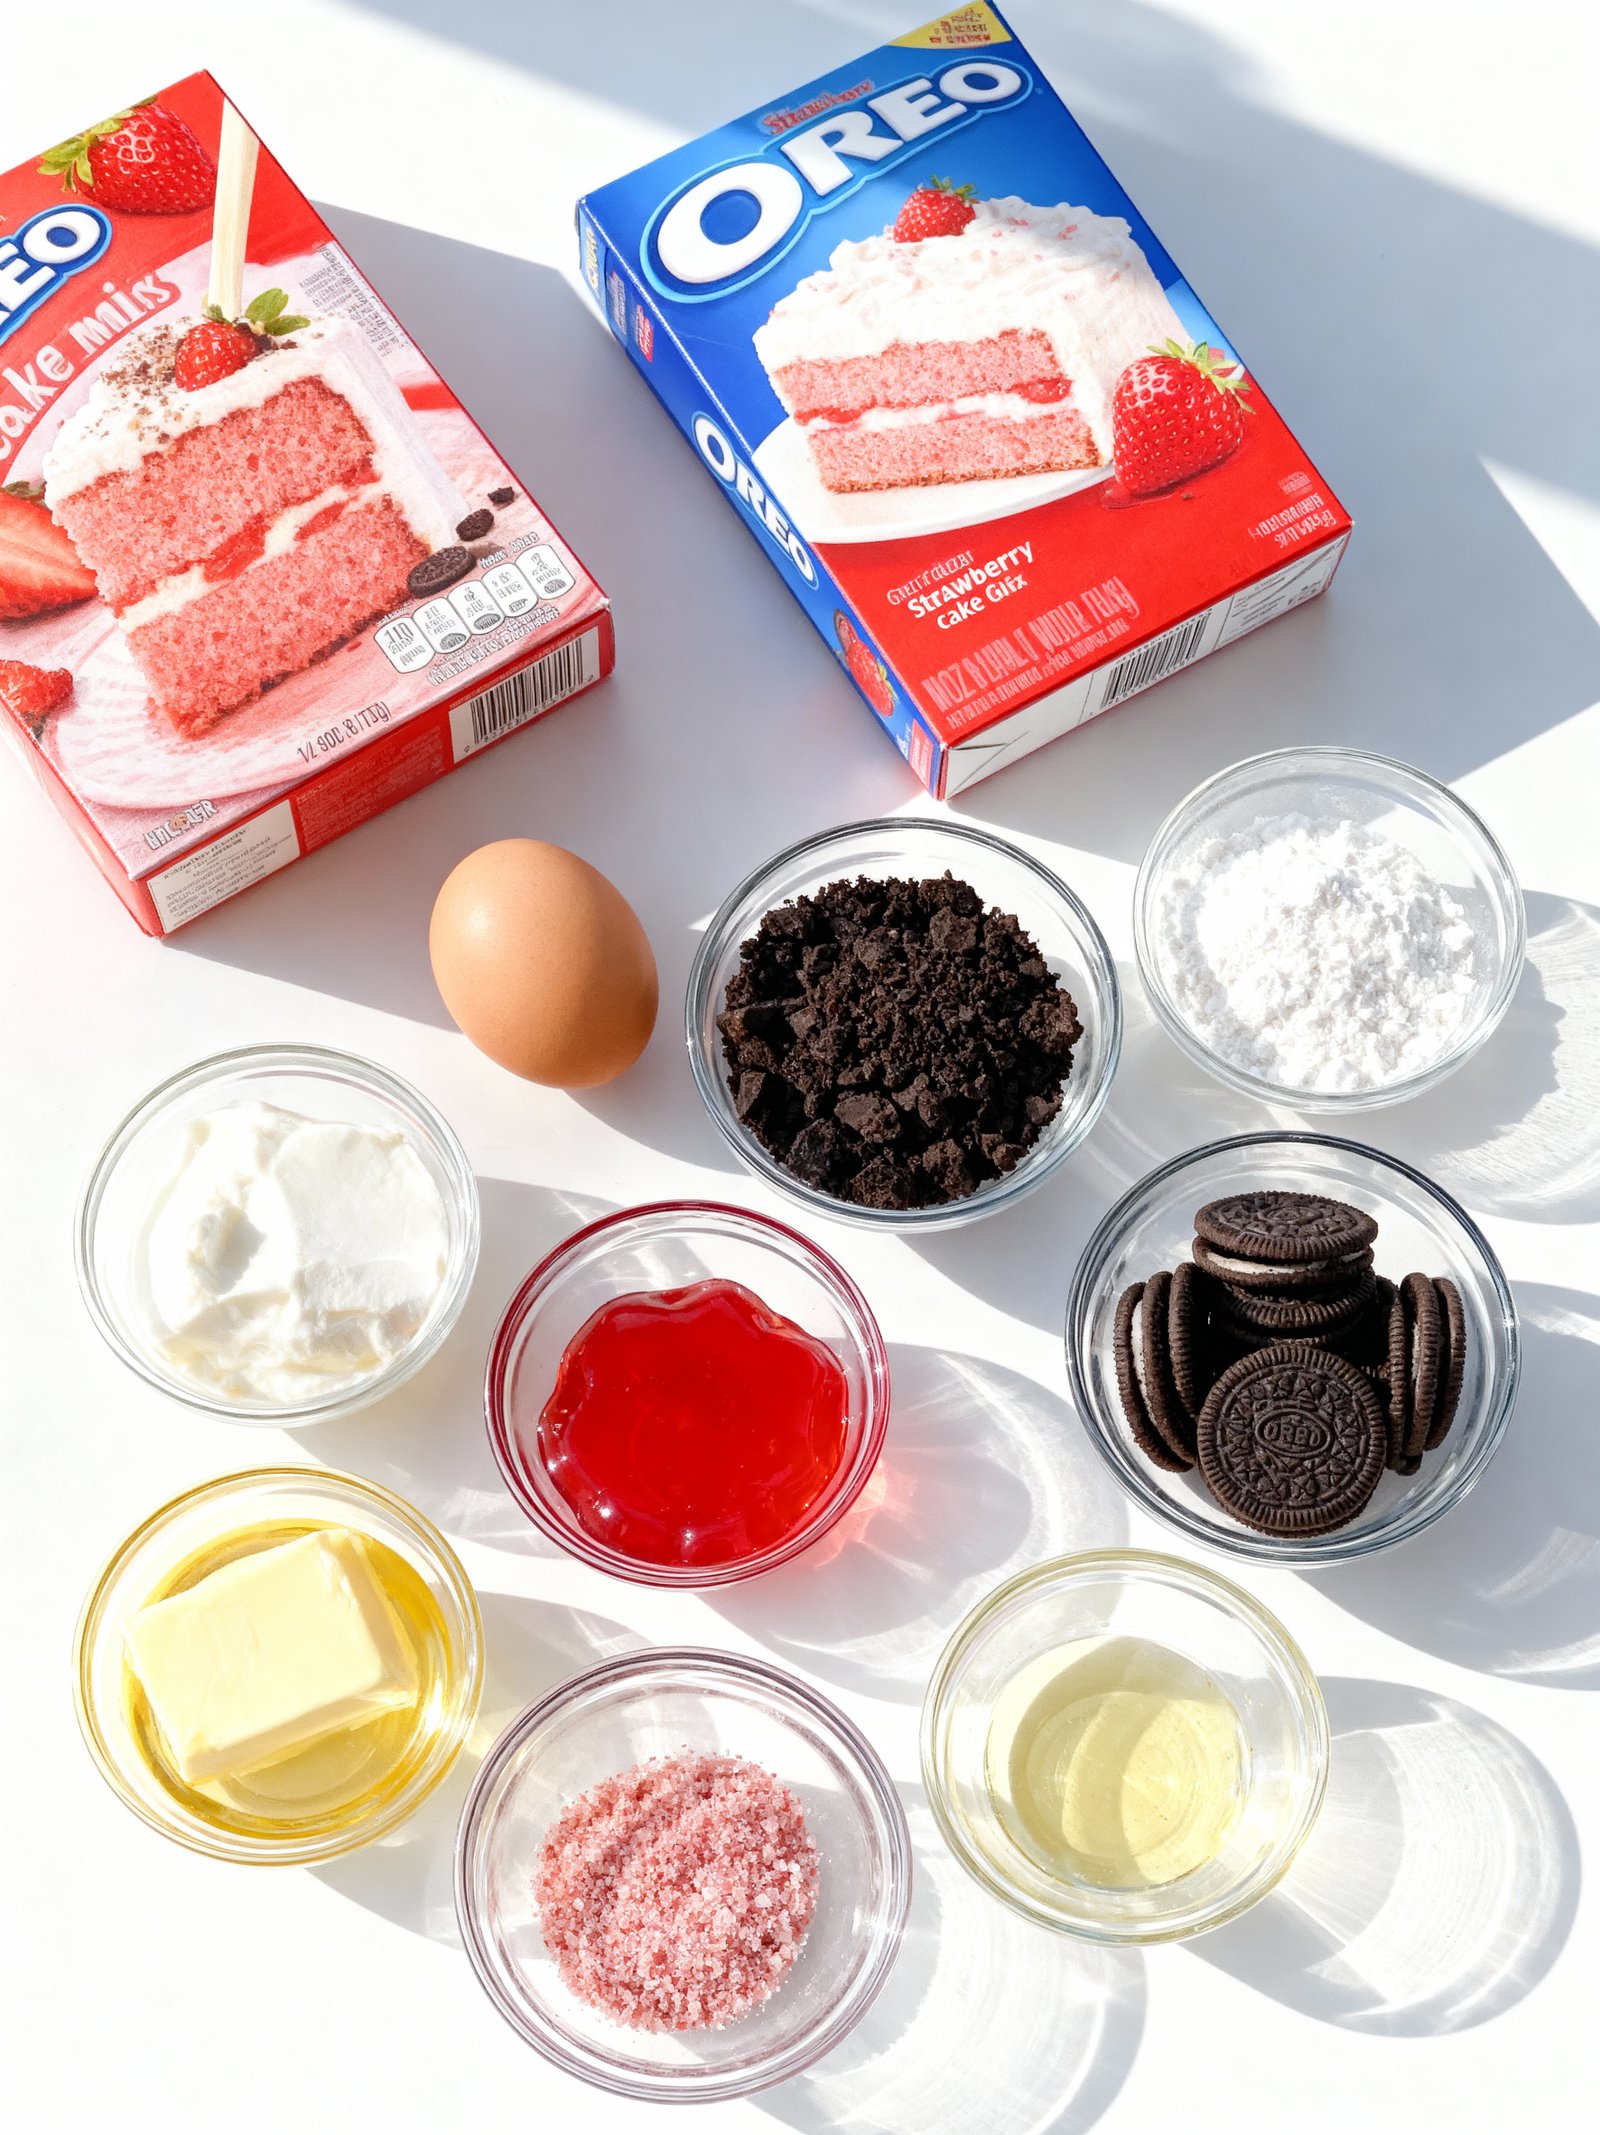
Ingredients
These Strawberry Crunch Bars combine a buttery cake mix base with creamy cheesecake filling and a vibrant strawberry gelatin topping for a dessert that’s both nostalgic and irresistibly fresh.
- 1 box strawberry cake mix
- 1/2 cup (8 Tbsp) unsalted butter, melted
- 1 large egg
- 8 oz cream cheese, softened
- 1 1/4 cups heavy whipping cream
- 1 cup confectioners’ sugar
- 2 tsp pure vanilla extract
- 18-20 Golden Oreos, coarsely crushed
- 3 oz (1 small box/85g) strawberry gelatin powder
- 1/4 cup unsalted butter, melted
Timing
| Prep Time | 15 minutes |
| Cook Time | 30 minutes |
| Total Time | 45 minutes |
Context: These Strawberry Crunch Bars are about 20% faster to make than similar dessert bar recipes.
Step-by-Step Instructions
Step 1 — Prepare the Crust
Combine graham cracker crumbs, melted butter, and sugar in a medium bowl until the mixture resembles wet sand. Press this firmly and evenly into the bottom of a parchment-lined 9×9-inch baking pan. Use the bottom of a measuring cup to compact the crust for a solid base.
Step 2 — Make the Strawberry Filling
In a separate bowl, whisk together sweetened condensed milk, strawberry gelatin powder, and finely chopped fresh or freeze-dried strawberries until fully combined. The mixture will be thick and vibrant pink.
For an intense strawberry flavor, use freeze-dried strawberry powder instead of fresh berries to avoid adding extra moisture to the filling.
Step 3 — Assemble the Layers
Pour the strawberry filling over the prepared crust and spread it into an even layer with a spatula. Ensure the filling reaches all corners for uniform bars.
Step 4 — Create the Crunch Topping
In a small bowl, mix crushed golden Oreos or vanilla cookies with melted butter and a tablespoon of strawberry gelatin powder. The topping should be crumbly but hold together when pressed.
For extra crunch, add finely chopped nuts or toasted oats to the topping mixture.
Step 5 — Add the Topping and Chill
Sprinkle the crunch topping evenly over the strawberry layer, gently pressing it down so it adheres. Cover the pan with plastic wrap and refrigerate for at least 4 hours, or until completely set.
For faster setting, place the Strawberry Crunch Bars in the freezer for 1-2 hours instead of the refrigerator.
Step 6 — Slice and Serve
Once fully chilled and firm, lift the bars from the pan using the parchment paper overhang. Use a sharp knife dipped in hot water to cleanly slice into squares.
For neat cuts, wipe the knife clean between each slice. Serve chilled for the best texture and flavor.
Nutritional Information
| Calories | 285 |
| Protein | 3g |
| Carbohydrates | 38g |
| Fat | 14g |
| Fiber | 1g |
| Sodium | 180mg |
Note: Estimates based on typical ingredients and serving size.
Healthier Alternatives
- Protein Powder — Add vanilla or unflavored protein powder to the crust for a protein boost without altering the strawberry flavor.
- Almond Flour — Replace all-purpose flour with almond flour for a gluten-free, lower-carb option with a nutty taste.
- Coconut Oil — Use coconut oil instead of butter for a dairy-free version that adds a subtle tropical note.
- Sugar-Free Sweetener — Swap granulated sugar with monk fruit or erythritol to reduce carbs and keep sweetness.
- Greek Yogurt — Mix Greek yogurt into the strawberry layer for extra protein and a tangy contrast to the crunch.
- Low-Sodium Butter — Opt for unsalted or low-sodium butter to cut sodium while maintaining the buttery crust.
- Oat Flour — Use oat flour as a gluten-free, fiber-rich alternative to all-purpose flour for a heartier texture.
- Fresh Strawberries — Replace preserves with mashed fresh strawberries to reduce added sugars and enhance natural fruit flavor.
Serving Suggestions
- Pair these Strawberry Crunch Bars with a scoop of vanilla ice cream for a classic dessert combination.
- Serve them as a sweet treat at a summer picnic or barbecue.
- Offer them alongside a cup of coffee or tea for an afternoon snack.
- Create a dessert platter by cutting the bars into smaller, bite-sized pieces.
- For a special occasion, garnish with fresh mint leaves and a dusting of powdered sugar.
- Pack them in a lunchbox for a delightful midday energy boost.
These Strawberry Crunch Bars are wonderfully versatile and can be dressed up or down to suit any event, from a casual family gathering to a more formal party.
Common Mistakes to Avoid
- Mistake: Using fresh strawberries, which release too much water. Fix: Opt for freeze-dried strawberry powder for intense flavor without sogginess.
- Mistake: Overmixing the crust and topping, making it tough. Fix: Mix just until combined to maintain a tender, crumbly texture.
- Mistake: Skipping the chill time for the crust before baking. Fix: Chill the pressed crust for 15 minutes to prevent shrinkage and ensure flakiness.
- Mistake: Spreading the strawberry layer unevenly. Fix: Use an offset spatula to create a level layer for consistent baking.
- Mistake: Cutting Strawberry Crunch Bars while still warm. Fix: Cool completely, then chill for cleaner slices that hold their shape.
- Mistake: Substituting butter with margarine in the crunch. Fix: Use real, cold butter for the richest flavor and perfect crumb structure.
- Mistake: Baking in a glass pan, which heats unevenly. Fix: Use a light-colored metal pan for even browning and ideal texture.
- Mistake: Overbaking, resulting in dry, hard bars. Fix: Bake just until the edges are golden; the center will firm up as it cools.
- Mistake: Not pressing the base layer firmly enough. Fix: Press the crust firmly and evenly into the pan to create a solid foundation.
- Mistake: Storing Strawberry Crunch Bars at room temperature. Fix: Refrigerate in an airtight container to keep them fresh and firm.
Storing Tips
- Fridge: Store Strawberry Crunch Bars in an airtight container in the refrigerator for up to 5 days. Keep them chilled to maintain freshness and food safety.
- Freezer: Wrap individual Strawberry Crunch Bars tightly in plastic wrap and place in a freezer-safe container or bag. Freeze for up to 3 months. Thaw in the refrigerator before serving.
- Reheat: For a warm treat, reheat Strawberry Crunch Bars in a preheated 350°F oven for 5–8 minutes, or until warmed through. Ensure the internal temperature reaches at least 165°F for food safety if containing perishable ingredients.
Proper storage helps keep your Strawberry Crunch Bars delicious and safe to enjoy later.
Conclusion
We hope you love these easy Strawberry Crunch Bars as much as we do! Give this recipe a try and let us know how it turned out in the comments. For more fruity treats, check out our Strawberry Earthquake Cake Recipe or Strawberry Crunch Cake Recipe. Don’t forget to subscribe for more delicious recipes!
PrintStrawberry Crunch Bars

Delicious strawberry bars featuring a chewy strawberry cake mix base, creamy whipped cream cheese frosting, and a crunchy topping made with Golden Oreos and strawberry gelatin powder.
- Prep Time: 15 minutes
- Cook Time: 25 minutes
- Total Time: 40 minutes
- Yield: 12-16 bars 1x
- Method: Dessert
- Cuisine: American
Ingredients
- 1 box strawberry cake mix
- 1/2 cup (8 Tbsp) unsalted butter, melted
- 1 large egg
- 8 oz cream cheese, softened
- 1 1/4 cups heavy whipping cream
- 1 cup confectioners' sugar
- 2 tsp pure vanilla extract
- 18–20 Golden Oreos, coarsely crushed
- 3 oz (1 small box/85g) strawberry gelatin powder
- 1/4 cup unsalted butter, melted
Instructions
- Preheat oven to 350°F. Line a 13×9 inch light metal baking pan with foil or parchment, extending the sides over the edges. Spray with cooking spray.
- In a large bowl, combine the strawberry cake mix powder (dry, do not prepare according to package directions), 1/2 cup melted butter, and 1 egg with a rubber spatula until a soft dough forms.
- Spread the dough evenly into the prepared pan using your hands to form an even layer. Bake for 20-25 minutes or until a toothpick inserted near the center comes out clean. Cool completely.
- While cooling, prepare the whipped cream cheese frosting by blending softened cream cheese, 1 1/4 cups heavy whipping cream, confectioners' sugar, and vanilla extract until smooth and fluffy.
- Spread the frosting evenly over the cooled cake base.
- For the topping, combine coarsely crushed Golden Oreos, strawberry gelatin powder (dry), and 1/4 cup melted butter in a bowl, stirring until combined.
- Sprinkle the crunch topping evenly over the frosting.
- Refrigerate until ready to serve. Cut into bars and enjoy.
Notes
Do not prepare the cake mix according to package directions – use only the dry powder mixed with butter and egg for the proper chewy, fudgy texture. Crush the Oreos coarsely and include the filling – do not remove it. The crunch topping can be made ahead and stored in a covered container at room temperature for up to one week.
Nutrition
- Calories: 385
- Sugar: 38
- Sodium: 310
- Fat: 20
- Saturated Fat: 12
- Unsaturated Fat: 7
- Trans Fat: 0
- Carbohydrates: 48
- Fiber: 0
- Protein: 5
- Cholesterol: 55
FAQs
Can I use frozen strawberries for Strawberry Crunch Bars?
Yes, you can use frozen strawberries. Thaw them first and drain any excess liquid to prevent the bars from becoming soggy. This substitution works well for these Strawberry Crunch Bars.
How should I store Strawberry Crunch Bars?
Store them in an airtight container at room temperature for up to 2 days. For longer freshness, keep them in the refrigerator for up to a week.
Can I make Strawberry Crunch Bars gluten-free?
Yes, simply use a gluten-free flour blend in the crust and topping. Ensure your oats are certified gluten-free if needed.
One Comment