No Bake Peppermint Oreo Truffles Recipe
Introduction
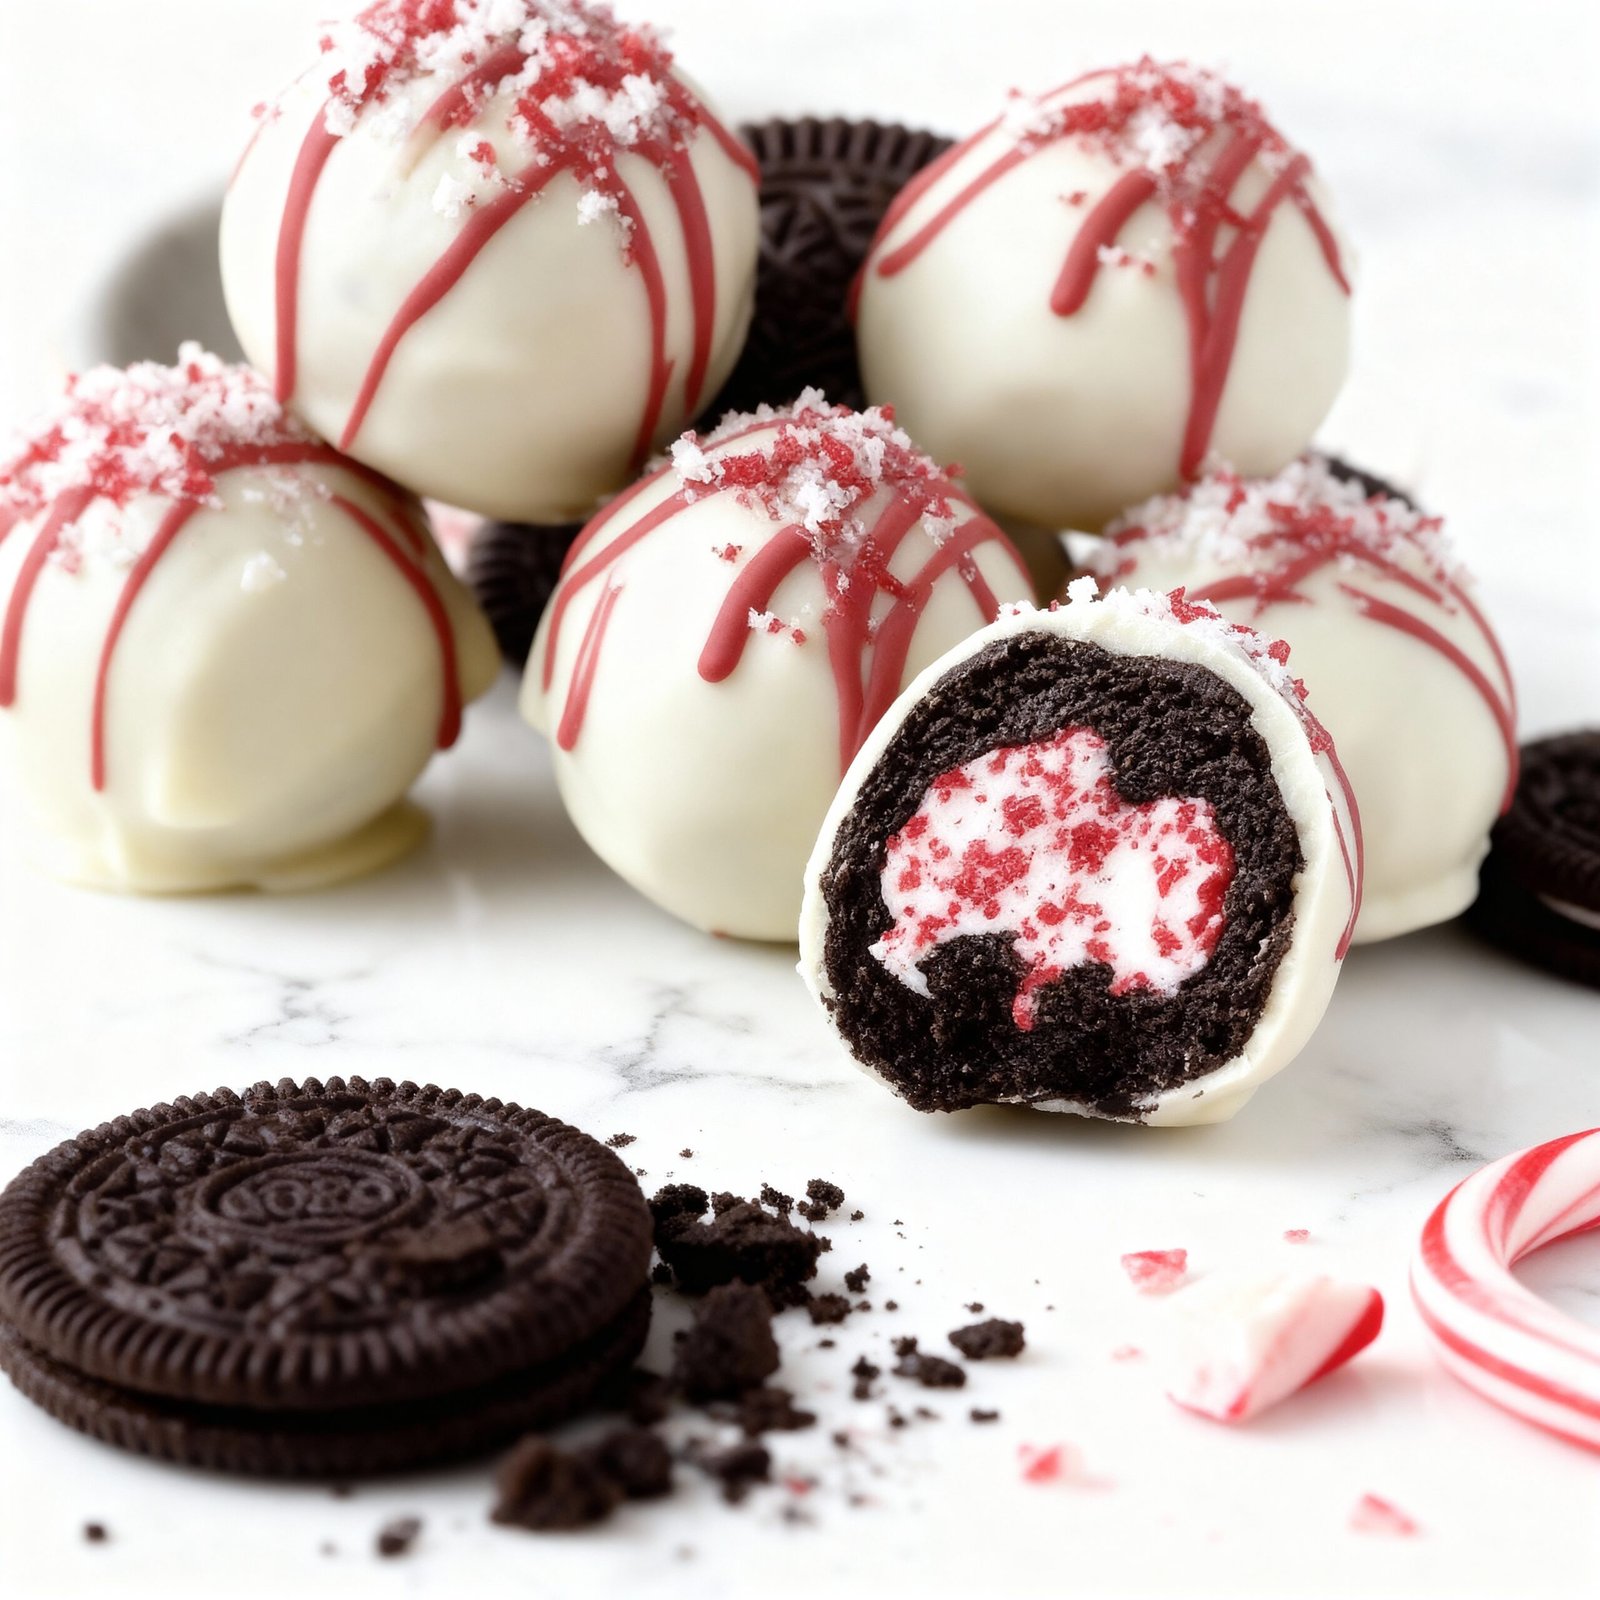
These Easy No-Bake Peppermint Oreo Truffles are the perfect festive treat that requires zero oven time. With a creamy Oreo filling and refreshing peppermint coating, they’re ideal for holiday parties and edible gifts. If you love simple no-bake desserts, you might also enjoy this No Bake Caramel Crunch Butterfinger Truffles Recipe or this Peppermint Mocha Fudge Recipe.
Ingredients
These festive truffles combine the cool crunch of peppermint with rich chocolate and creamy Oreo filling for an irresistible holiday treat that requires zero oven time.
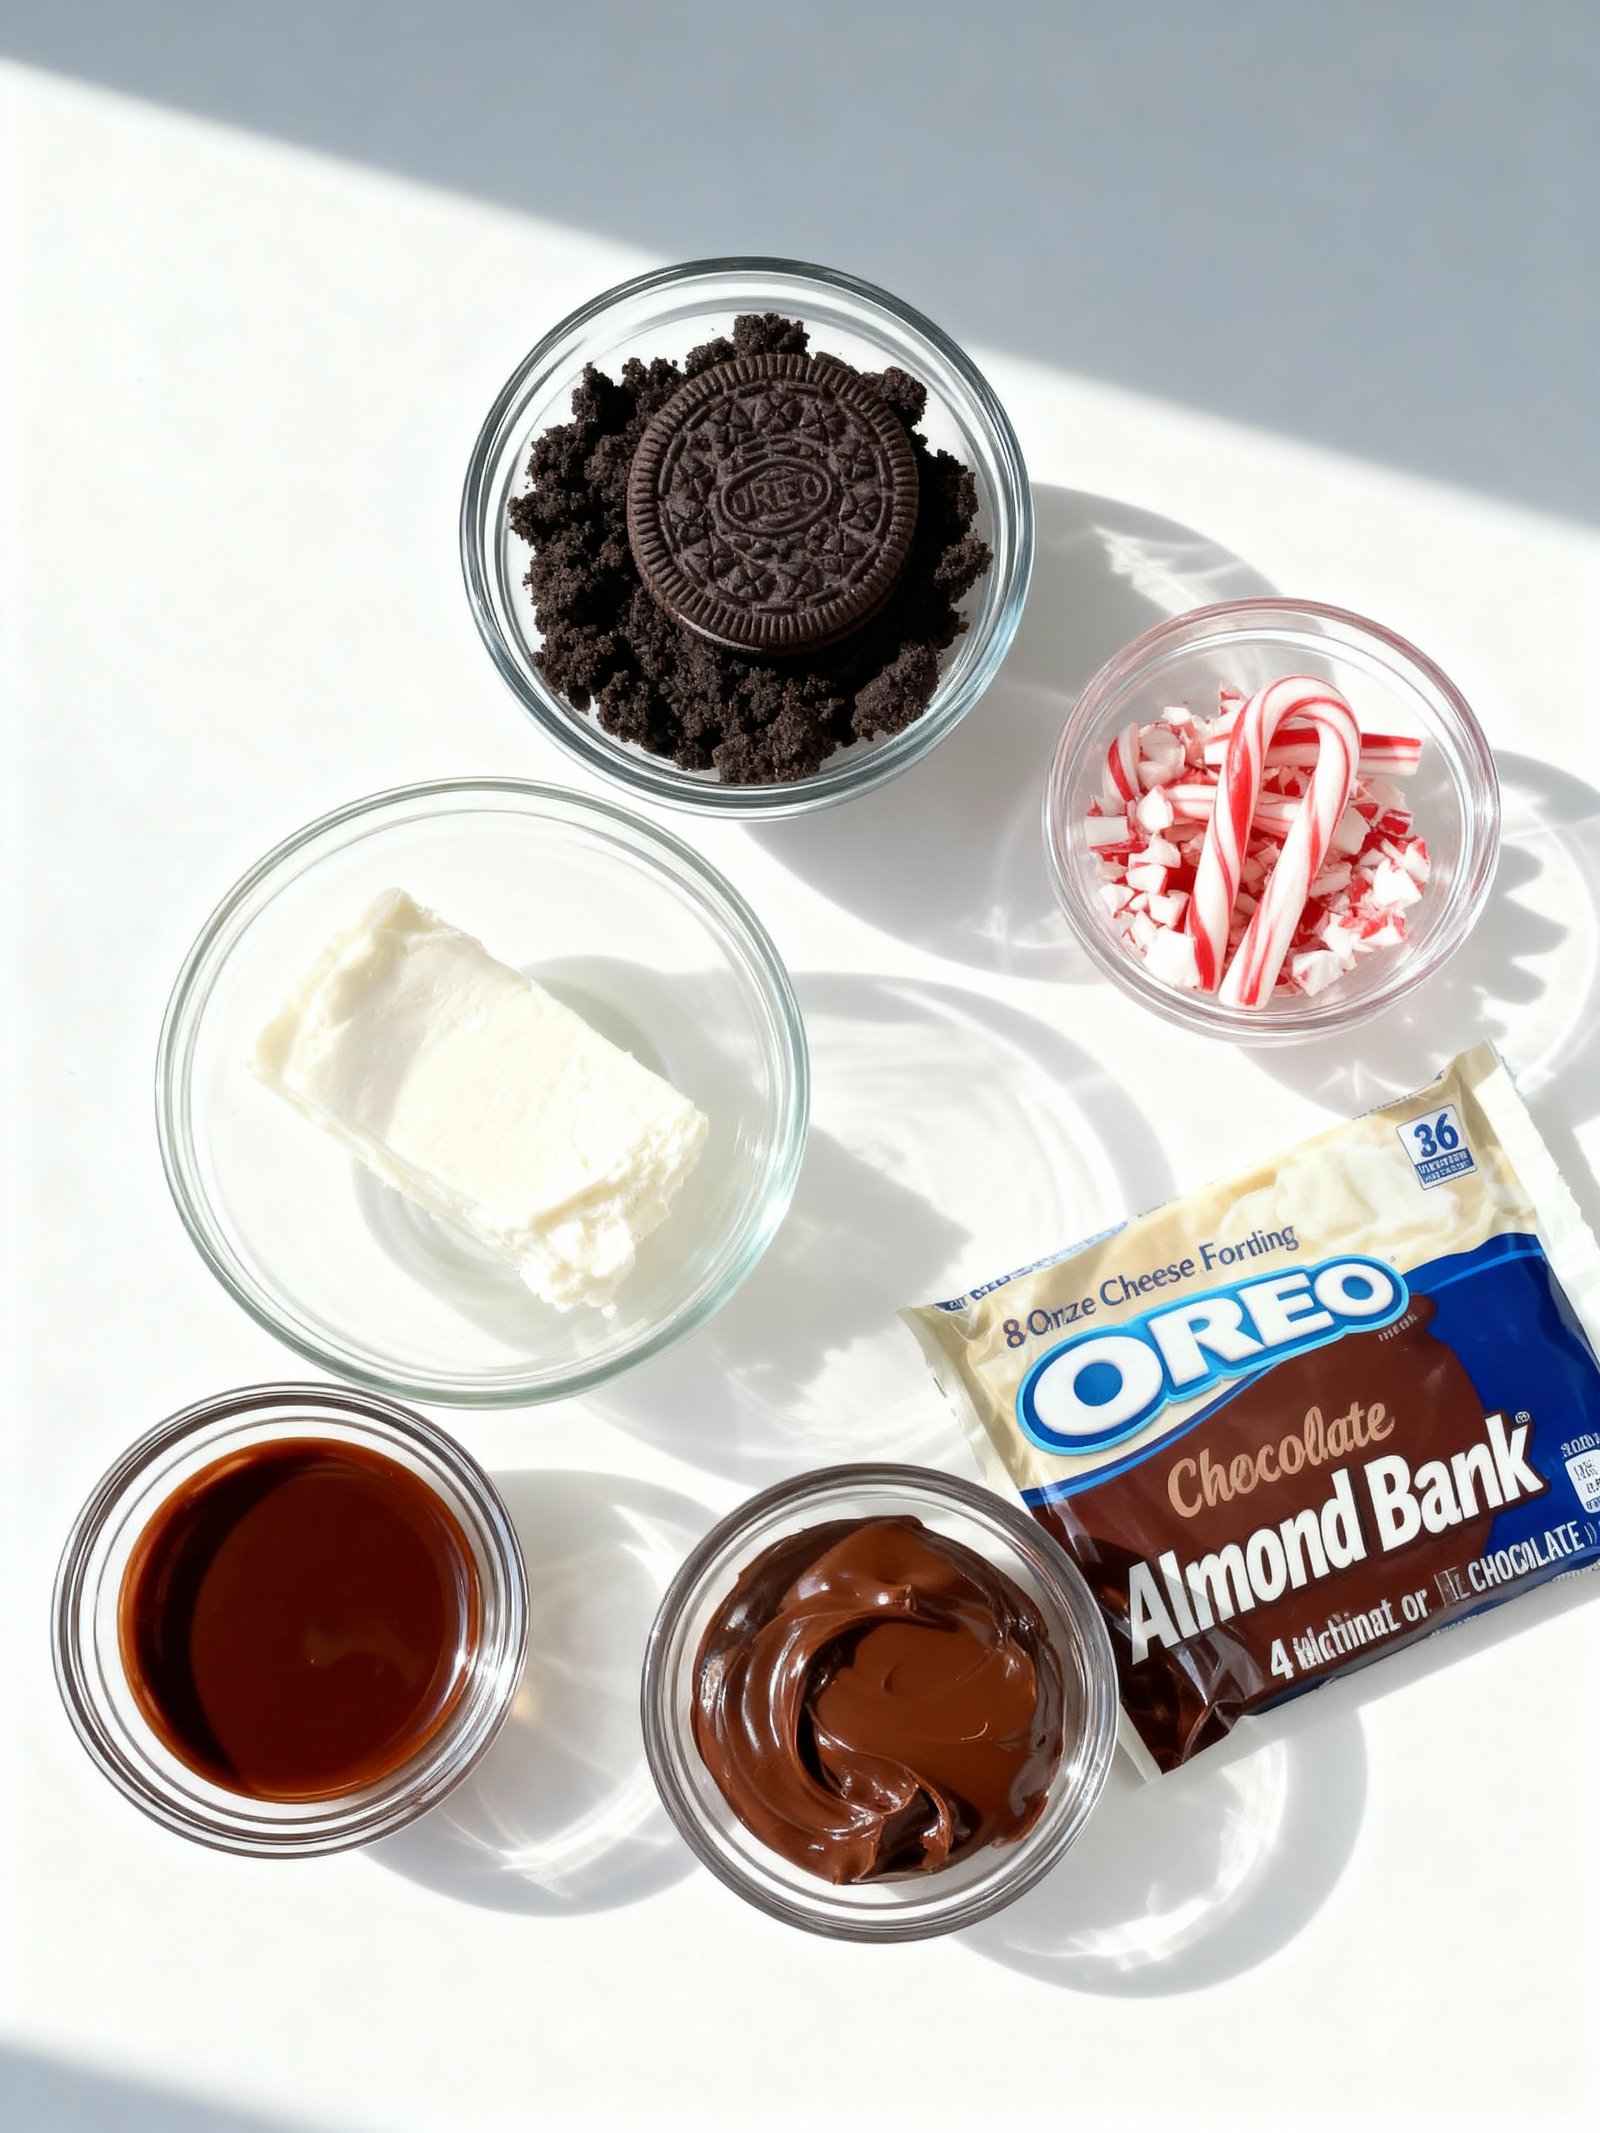
- 1 package Oreo cookies (about 36 cookies)
- 8 ounces cream cheese, softened
- 4 candy canes, crushed
- 1 package chocolate almond bark or melting chocolate (about 12 ounces)
Timing
| Prep Time | 25 minutes |
| Cook Time | 0 minutes |
| Total Time | 25 minutes |
Context: These No Bake Peppermint Oreo Truffles are about 20% faster than similar recipes that require baking or extended chilling.
Step-by-Step Instructions
Step 1 — Crush the Oreos
Place the Oreos in a food processor and pulse until fine crumbs form. For best texture, ensure no large cookie chunks remain. If you don’t have a food processor, place cookies in a sealed plastic bag and crush with a rolling pin.
Step 2 — Mix with Cream Cheese
Transfer the Oreo crumbs to a medium bowl. Add softened cream cheese and mix thoroughly until fully combined and a uniform dough forms. The mixture should hold together when pressed.
Step 3 — Form the Truffle Balls
Scoop about 1 tablespoon of the mixture and roll between your palms to form 1-inch balls. Place them on a parchment-lined baking sheet. If the mixture sticks, chill it for 15 minutes or lightly dampen your hands.
Step 4 — Chill the Balls
Refrigerate the truffle balls for at least 30 minutes until firm. This step is crucial for preventing them from falling apart during coating. For faster setting, you can freeze for 15 minutes.
Step 5 — Melt the Coating
Melt candy melts or chocolate chips in a microwave-safe bowl in 30-second intervals, stirring between each, until smooth. For optimal dipping consistency, the coating should be fluid but not overly hot.
Step 6 — Coat the Truffles
Using a fork or dipping tool, submerge each chilled truffle ball in the melted coating. Tap gently against the bowl edge to remove excess coating, then return to the parchment-lined sheet.
Step 7 — Add Peppermint Topping
While the coating is still wet, sprinkle crushed peppermint candies or candy canes over the top. Work quickly before the coating sets to ensure the topping adheres properly.
Step 8 — Set Completely
Allow the No Bake Peppermint Oreo Truffles to set at room temperature until the coating hardens, about 1-2 hours. For faster setting, refrigerate for 20-30 minutes. The coating should be firm to the touch when ready.
Step 9 — Serve and Store
Once fully set, transfer the truffles to an airtight container. Store in the refrigerator for up to 2 weeks. For best texture, let sit at room temperature for 10 minutes before serving.
Nutritional Information
| Calories | 180 |
| Protein | 2g |
| Carbohydrates | 22g |
| Fat | 10g |
| Fiber | 1g |
| Sodium | 120mg |
Note: Estimates based on typical ingredients and serving size.
Healthier Alternatives
- Protein Powder Cream Cheese — Mix Greek yogurt with vanilla protein powder for a high-protein, lower-fat filling with subtle vanilla notes.
- Almond Flour Coating — Use finely ground almond flour instead of crushed Oreos for a gluten-free, lower-carb exterior with nutty flavor.
- Coconut Cream Filling — Substitute cream cheese with chilled coconut cream for a rich dairy-free alternative that complements peppermint.
- Dark Chocolate Coating — Opt for sugar-free dark chocolate melts to reduce sugar content while enhancing the chocolate intensity.
- Natural Sweetener — Replace powdered sugar with monk fruit or erythritol in the filling for a low-glycemic option without sacrificing sweetness.
- Gluten-Free Cookies — Use gluten-free chocolate sandwich cookies to maintain the classic texture while making the recipe celiac-friendly.
- Low-Sodium Option — Choose no-salt-added cookie alternatives and unsweetened chocolate to significantly reduce sodium levels.

Serving Suggestions
- Pair with hot chocolate or coffee for a cozy winter treat
- Serve alongside other holiday desserts like gingerbread cookies
- Arrange on a festive platter with crushed candy cane garnish
- Package in decorative boxes as edible holiday gifts
- Display on tiered stands for parties and gatherings
- Chill thoroughly before serving for perfect texture
These No Bake Peppermint Oreo Truffles make excellent additions to holiday dessert tables and are perfect for potlucks where you need something impressive but easy to prepare.
Common Mistakes to Avoid
- Mistake: Using room temperature cream cheese, which makes the mixture too soft. Fix: Use cold cream cheese straight from the fridge for easier rolling and a firmer texture.
- Mistake: Over-processing the Oreo crumbs into a fine powder, reducing texture. Fix: Pulse just until coarse crumbs form for the best truffle bite.
- Mistake: Adding liquid peppermint extract directly, creating a bitter taste. Fix: Use pure peppermint extract and measure precisely—start with ½ teaspoon.
- Mistake: Skipping the chilling step before dipping, causing the coating to crack. Fix: Chill rolled balls for at least 1 hour so they hold their shape when coated.
- Mistake: Melting chocolate at high heat, leading to a thick, clumpy coating. Fix: Melt coating chocolate slowly using a double boiler or in 20-second microwave bursts.
- Mistake: Dipping truffles with warm hands, which melts the exterior. Fix: Use a fork or dipping tools to keep the chocolate shell intact.
- Mistake: Storing finished No Bake Peppermint Oreo Truffles at room temperature. Fix: Refrigerate in an airtight container to maintain freshness and prevent softening.
- Mistake: Rolling truffles in large, uneven sizes that are hard to coat. Fix: Use a small cookie scoop for consistently sized, one-bite truffles.
- Mistake: Garnishing with wet candy canes that make the chocolate sweat. Fix: Ensure crushed candy canes are completely dry before sprinkling on melted chocolate.
Storing Tips
- Fridge: Store No Bake Peppermint Oreo Truffles in an airtight container in the refrigerator for up to 1 week. Keep them at or below 40°F for food safety.
- Freezer: Place truffles in a freezer-safe airtight container or heavy-duty freezer bag for up to 3 months. Thaw in the refrigerator before serving.
- Reheat: If chilled too firm, let sit at room temperature for 10-15 minutes. Do not microwave, as this can melt the coating.
Proper storage keeps your No Bake Peppermint Oreo Truffles fresh and delicious for holiday snacking or gifting.
Conclusion
These No Bake Peppermint Oreo Truffles are the perfect easy holiday treat. Give them a try and let us know what you think in the comments! For more festive desserts, check out our Christmas Cookie Lasagna Recipe and Grinch Cookies Recipe. Don’t forget to subscribe for more quick recipes!
PrintNo Bake Peppermint Oreo Truffles

Delicious no-bake peppermint truffles made with crushed Oreos, cream cheese, crushed candy canes, and coated in melted chocolate for a festive treat.
- Prep Time: 15 minutes
- Cook Time: 0 minutes
- Total Time: 1 hour 15 minutes (including chilling)
- Yield: 24 truffles 1x
- Method: Dessert
- Cuisine: American
Ingredients
- 1 package Oreo cookies (about 36 cookies)
- 8 ounces cream cheese, softened
- 4 candy canes, crushed
- 1 package chocolate almond bark or melting chocolate (about 12 ounces)
Instructions
- Crush the Oreo cookies finely using a food processor or placing them in a bag and crushing with a rolling pin.
- In a bowl, mix the crushed Oreos with softened cream cheese until well combined.
- Fold in the crushed candy canes.
- Shape the mixture into small truffle-sized balls and place them on a baking sheet lined with parchment paper.
- Chill the balls in the refrigerator for about 1 hour to firm up.
- Melt the chocolate almond bark according to package instructions.
- Dip each truffle into the melted chocolate, coating completely, and place back on the parchment paper.
- Sprinkle extra crushed candy canes on top if desired.
- Allow the chocolate coating to set at room temperature or refrigerate until firm.
Notes
Use softened cream cheese for easy mixing. Crushing Oreos finely helps the mixture come together. You can substitute peppermint extract for candy canes if preferred.
Nutrition
- Calories: 150
- Sugar: 12g
- Sodium: 90mg
- Fat: 8g
- Saturated Fat: 5g
- Unsaturated Fat: 3g
- Trans Fat: 0g
- Carbohydrates: 18g
- Fiber: 1g
- Protein: 1g
- Cholesterol: 10mg
FAQs
How long do No Bake Peppermint Oreo Truffles need to set in the fridge?
They need at least 30 minutes to firm up. For best results, chill them for 1-2 hours before serving.
Can I make these No Bake Peppermint Oreo Truffles ahead of time?
Yes, you can prepare them up to 3 days in advance. Store them in an airtight container in the refrigerator.
What is the best way to melt the chocolate for coating these truffles?
Use a double boiler or microwave in short bursts, stirring frequently. Properly melted chocolate ensures a smooth coating for your No Bake Peppermint Oreo Truffles.


One Comment