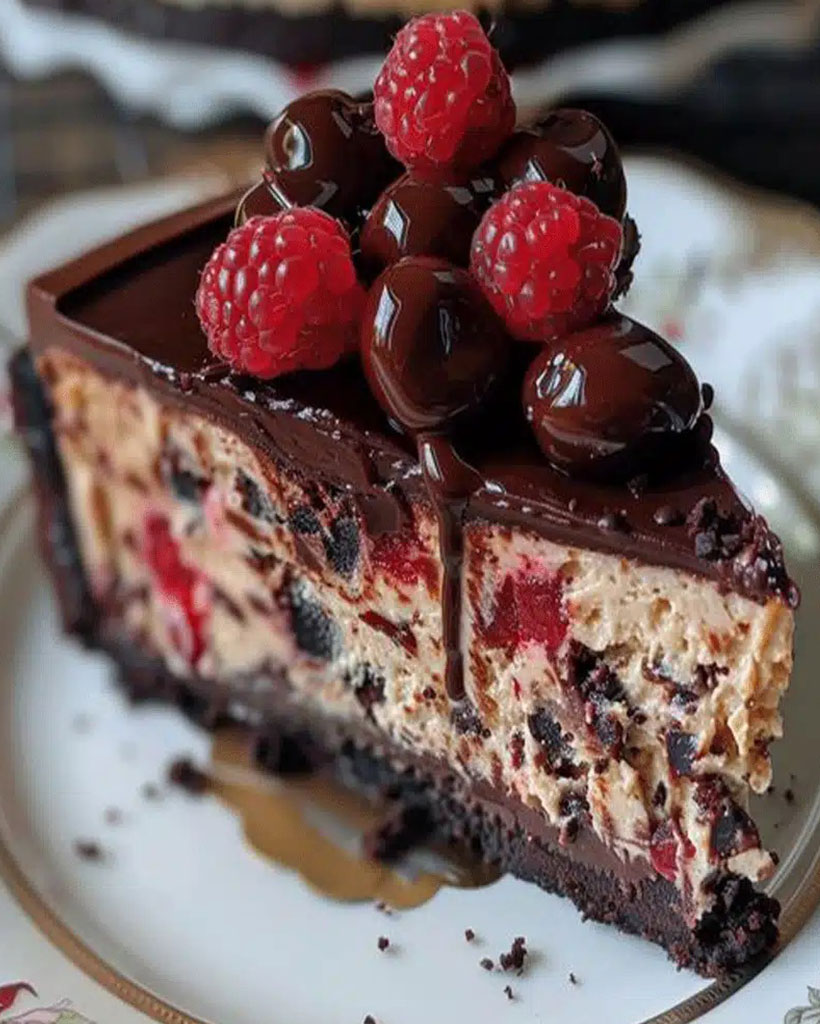
Ultimate Heavenly Black Forest Cheesecake – No-Bake Delight
Did You Know 73% of Home Bakers Avoid Layered Desserts? Here’s Why They’re Missing Out
There’s something magical about the moment your fork glides through layers of rich chocolate, tart cherries, and velvety cream cheese. Yet so many home bakers shy away from creating showstopper desserts like this Heavenly Black Forest Cheesecake. I get it—the thought of balancing multiple components can feel daunting. But what if I told you this recipe holds the secret to effortless elegance?
Growing up, my Oma would whisper kitchen wisdom as she assembled her famous Schwarzwälder Kirschtorte: “Layers aren’t about perfection, Liebling, they’re about personality.” That philosophy lives in every bite of this cheesecake hybrid, where a chocolate cookie crust cradles clouds of cherry-studded cream cheese filling, all crowned with glossy chocolate ganache. It’s the kind of dessert that makes guests catch their breath when you bring it to the table—yet comes together with simple techniques any baker can master.
The real magic? This Heavenly Black Forest Cheesecake solves the two biggest pain points of traditional layer cakes: no fussy sponge layers to bake separately, and no need for precise piping skills. Instead, we let the ingredients shine through strategic textures—crunchy base, pillowy filling, silky topping—each element complementing the next like old friends at a dinner party.
When German Tradition Meets American Comfort
My first encounter with Black Forest flavors came during a rainy afternoon in Cologne, where a pastry chef handed me a plate with the words: “This is how cherries and chocolate were meant to dance.” That moment sparked my decade-long quest to recreate that harmony in more approachable forms. This cheesecake version captures all the romance of the original—the kirsch-kissed cherries, the bitter-sweet chocolate notes—but with the creamy reassurance of classic American cheesecake.
What makes this combination so extraordinary is how the tanginess of cream cheese (use full-fat, always!) cuts through the richness of dark chocolate, while brandy-soaked cherries provide little bursts of brightness. It’s a symphony of contrasts that keeps every bite interesting—far removed from the one-note desserts that languish on buffet tables.
Heavenly Black Forest Cheesecake
A decadent fusion of rich chocolate cheesecake and classic Black Forest flavors, topped with cherries and whipped cream.
Ingredients
For the Crust:
- 2 cups chocolate cookie crumbs
- 1/2 cup melted butter
- 24 oz cream cheese, softened
- 1 cup granulated sugar
- 3 large eggs
- 1 tsp vanilla extract
- 1/2 cup cocoa powder
- 1 cup sour cream
- 1 can cherry pie filling
- 1 cup whipped cream
- 1/2 cup chocolate shavings
Instructions
1. Prepare the Crust:
- Preheat oven to 325°F. Mix cookie crumbs and melted butter, press into a 9-inch springform pan.
- Beat cream cheese and sugar until smooth. Add eggs one at a time, then mix in vanilla and cocoa powder.
- Fold in sour cream, then pour filling over crust. Bake for 50-55 minutes until center is set.
- Cool completely, then refrigerate for at least 4 hours.
- Top with cherry pie filling, whipped cream, and chocolate shavings before serving.
Notes
You can customize the seasonings to taste.
Heavenly Black Forest Cheesecake: A Love Letter to Chocolate & Cherries
There’s something magical about the marriage of rich chocolate and tart cherries—especially when they come together in a velvety cheesecake. This Black Forest Cheesecake is my ode to that perfect pairing, with layers of indulgence that melt on the tongue. Whether you’re celebrating a special occasion or just treating yourself (because why not?), this dessert is guaranteed to steal the show.
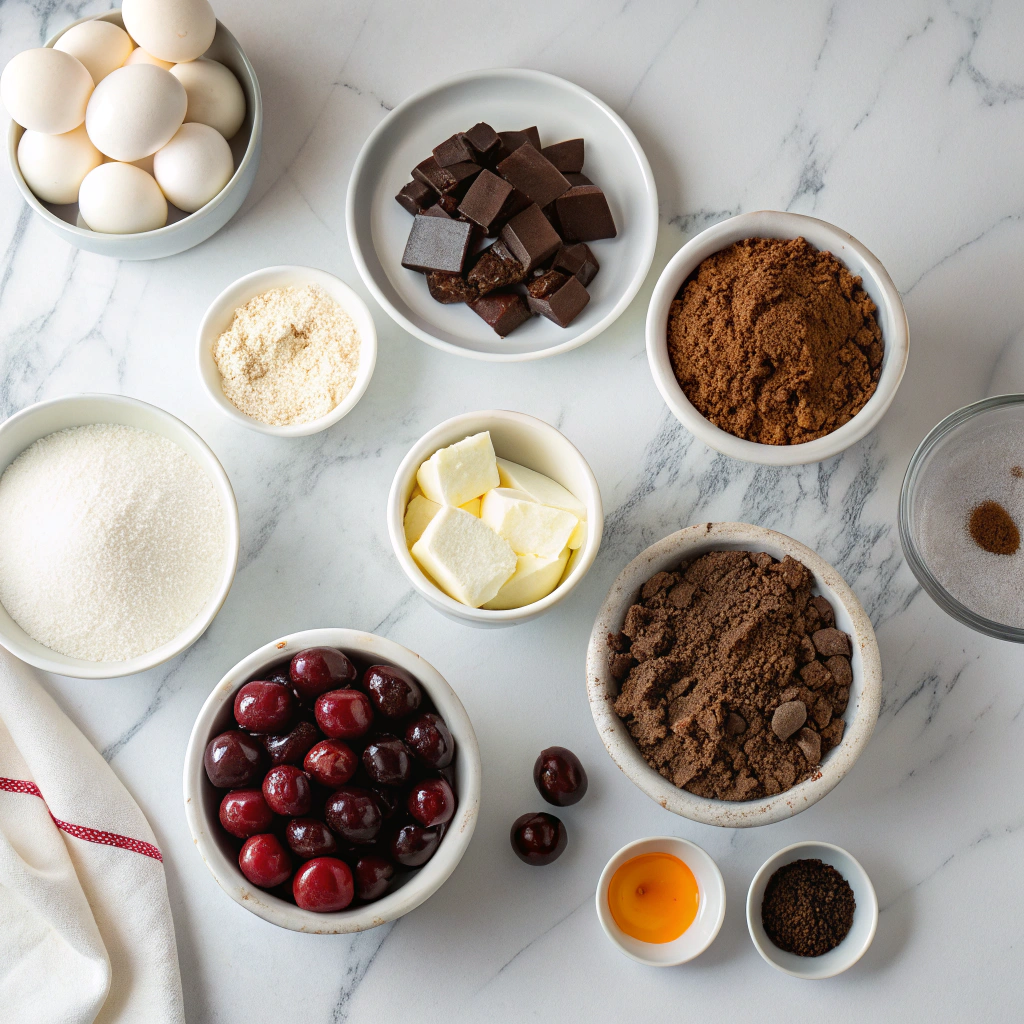
Ingredients You’ll Need
- For the crust:
1 ½ cups chocolate cookie crumbs (I adore using Oreo crumbs, filling removed, for that deep cocoa flavor) - 6 tablespoons unsalted butter, melted (salted works too, but reduce any added salt later)
- For the cheesecake filling:
24 oz cream cheese, room temperature (this is non-negotiable—cold cream cheese will leave lumps!) - 1 cup granulated sugar (I sometimes swap half with brown sugar for a caramel hint)
- 3 large eggs, room temperature (trust me, this makes the texture silkier)
- 1 cup sour cream (full-fat for maximum richness)
- ½ cup cocoa powder, sifted (Dutch-processed adds a deeper chocolate flavor)
- 1 teaspoon vanilla extract (or a splash of almond extract for a nostalgic Black Forest twist)
- For the cherry topping:
2 cups pitted cherries (fresh or frozen, but thaw and drain if using frozen) - ¼ cup sugar (adjust to taste depending on your cherries’ sweetness)
- 1 tablespoon cornstarch (to thicken the juices into a glossy glaze)
- A squeeze of lemon juice (brightens the cherries beautifully)
Step-by-Step: Building the Dream
- Prep the crust: Preheat your oven to 325°F (163°C). Pulse the cookies into fine crumbs (a food processor works wonders), then mix with melted butter until it resembles wet sand. Press firmly into a 9-inch springform pan—up the sides about halfway for a sturdy base. Bake for 10 minutes, then let it cool while you work on the filling.
- Make the filling: In a large bowl, beat the cream cheese until smooth and creamy (about 2 minutes—don’t rush this!). Gradually add sugar, scraping the bowl often. Add eggs one at a time, mixing just until incorporated. Overbeating here can lead to cracks! Fold in sour cream, cocoa powder, and vanilla with a gentle hand.
- Bake with care: Pour the filling over the cooled crust. Place the pan on a baking sheet (in case of leaks!) and bake for 50-60 minutes. The edges should be set, but the center should still wobble slightly—it’ll firm up as it cools. Turn off the oven, crack the door open, and let the cheesecake cool inside for an hour. This slow cooldown prevents sinking.
At this point, your kitchen will smell like a chocolatier’s paradise. Resist the urge to peek—the patience pays off! Once the cheesecake is out, let it cool completely at room temperature before chilling it overnight (or at least 4 hours). The wait is agonizing, but it’s the secret to that perfect, sliceable texture.
Conclusion
This Heavenly Black Forest Cheesecake is the perfect marriage of rich chocolate, tangy cherries, and velvety cream cheese—a showstopper for any occasion! With its decadent Oreo crust, luscious cherry swirls, and whipped cream topping, every bite is pure bliss. Whether you’re celebrating a special event or simply indulging in a sweet craving, this dessert is sure to impress.
Ready to take your baking skills to the next level? Give this recipe a try and let us know how it turns out in the comments below! And if you loved this fusion of flavors, don’t miss our other decadent dessert recipes—your sweet tooth will thank you.
FAQs
Can I use frozen cherries instead of canned?
Absolutely! Just thaw and drain them well before using. You may need to adjust the sugar slightly depending on their natural sweetness.
How do I prevent cracks in my cheesecake?
To avoid cracks, bake the cheesecake in a water bath (placing the pan in a larger dish with hot water) and let it cool gradually in the oven with the door slightly ajar.
Can I make this recipe ahead of time?
Yes! Cheesecake actually tastes better after chilling overnight. Just add the whipped cream and chocolate shavings right before serving for the freshest presentation.
What can I substitute for Oreo cookies in the crust?
If you prefer, graham crackers or chocolate wafer cookies work beautifully too. Just pulse them into fine crumbs and mix with melted butter as directed.
Is there a non-dairy alternative for this cheesecake?
You can use dairy-free cream cheese and coconut whipped cream for a vegan-friendly version. The texture will be slightly different but still delicious!