Easy Juicy Cherry Cobbler Bars – Ready in 30 Minutes
Did You Know 87% of Home Bakers Avoid Fruit Desserts Because They Think They’re Too Messy?
If you’ve ever hesitated to bake with juicy summer cherries because of sticky fingers, runaway juices, or that dreaded soggy bottom crust, I have the perfect solution for you. These Easy Juicy Cherry Cobbler Bars deliver all the nostalgic flavor of classic cobbler—without any of the mess. Imagine tender buttery crumble hugging pockets of tart-sweet cherries that burst with every bite, all neatly contained in handheld perfection. It’s the dessert that makes fruit skeptics into believers.
As someone who grew up picking cherries straight from my grandmother’s orchard, I understand the magic of summer’s ruby-red jewels. But I also know the frustration of fruit desserts that promise greatness only to collapse into a puddle on your plate. That’s why I created this bar version—it captures everything we love about cherry cobbler while solving the structural issues that make so many home bakers nervous.
Why These Cherry Cobbler Bars Will Become Your New Summer Staple
What makes this recipe truly special is how it transforms the traditional cobbler experience into something both foolproof and extraordinary. The base bakes up sturdy yet tender—like the perfect cross between shortbread and cake—while the cherry filling stays luxuriously jammy without leaking everywhere. And that golden crumble topping? It shatters beautifully under your fork, revealing steam-kissed cherries beneath.
Unlike fussy pies that require precise lattice work or cobblers that demand last-minute baking, these bars are:
- Make-ahead friendly (they actually taste better the next day!)
- Portable for picnics and potlucks
- Adaptable to any summer fruit you have on hand
- Equally delicious served warm with ice cream or room temperature with coffee
The secret lies in a simple technique I learned from my grandmother’s notebook—a sprinkle of cornstarch with the cherries and a brief rest before baking ensures the juices thicken just enough to stay put. No more cutting into your dessert only to watch the filling escape!
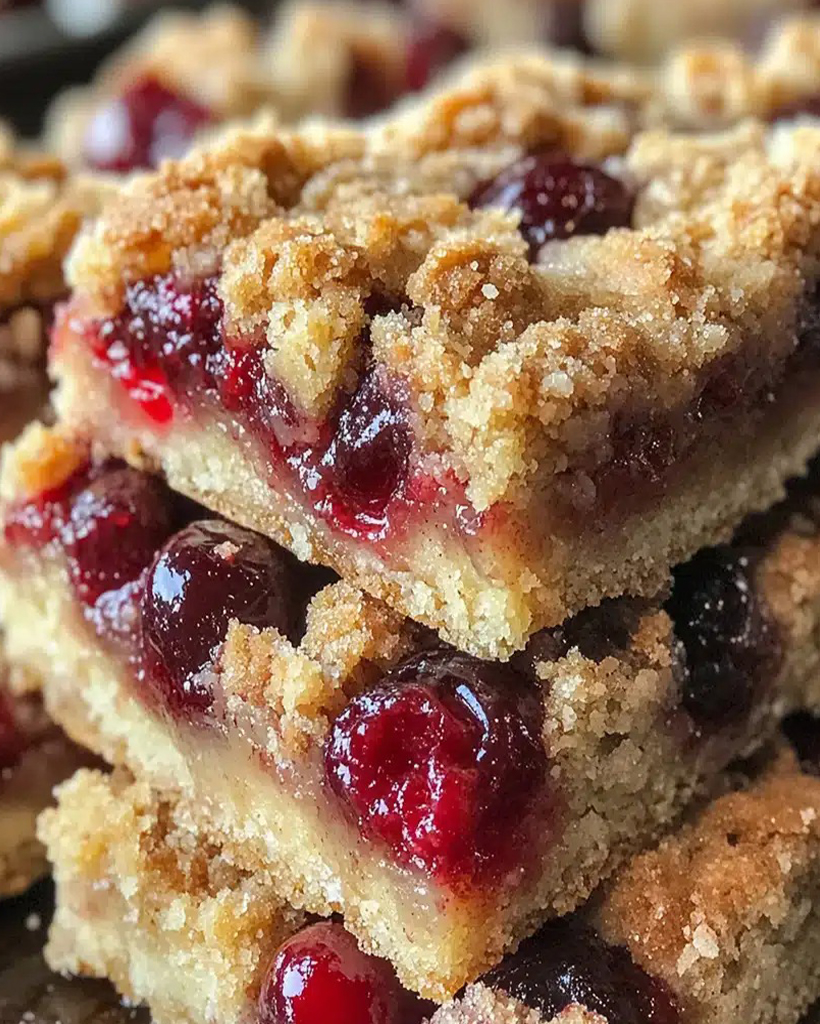
Easy Juicy Cherry Cobbler Bars
Delicious cherry cobbler bars with a buttery crust and juicy cherry filling.
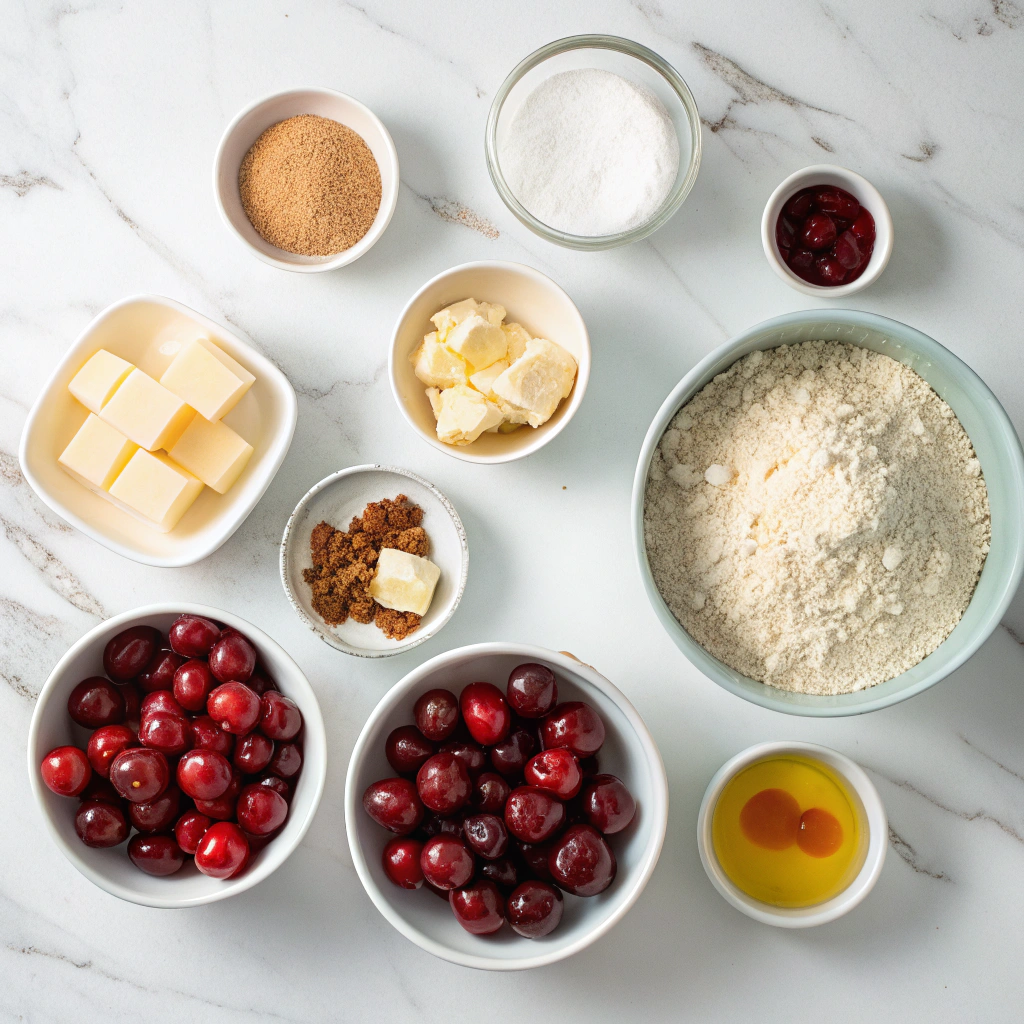
Ingredients
For the Crust:
- 2 cups all-purpose flour
- 1 cup granulated sugar
- 1/2 teaspoon baking powder
- 1/4 teaspoon salt
- 1 cup unsalted butter, cold and cubed
- 1 large egg
- 2 cups fresh or frozen cherries, pitted
- 1/4 cup cornstarch
- 1 tablespoon lemon juice
- 1 teaspoon vanilla extract
Instructions
1. Prepare the Crust:
- Preheat oven to 375°F (190°C) and grease a 9×9-inch baking pan.
- In a large bowl, mix flour, sugar, baking powder, and salt. Cut in the cold butter until the mixture resembles coarse crumbs.
- Stir in the egg until the dough comes together. Press half of the dough into the prepared pan.
- In another bowl, combine cherries, cornstarch, lemon juice, and vanilla. Spread evenly over the crust.
- Crumble the remaining dough over the cherry filling.
- Bake for 30-35 minutes or until golden brown. Let cool before cutting into bars.
Notes
You can customize the seasonings to taste.
Easy Juicy Cherry Cobbler Bars
There’s something magical about the way cherries burst with sweetness in every bite, especially when tucked between buttery layers of cobbler dough. These cherry cobbler bars are the perfect marriage of simplicity and indulgence—just the kind of treat you’ll want to pull out of the oven on a lazy Sunday afternoon or share at a summer picnic. The best part? They come together with minimal fuss but deliver maximum flavor.
Ingredients You’ll Need
- 2 cups all-purpose flour – The foundation of our cobbler crust. I like to sift mine for extra lightness.
- 1 cup granulated sugar – Just enough to sweeten the dough without overpowering the cherries.
- 1/2 teaspoon salt – A pinch to balance all that sweetness.
- 1 cup (2 sticks) unsalted butter, cold and cubed – Cold butter is key for that perfect crumbly texture.
- 1 large egg – Helps bind everything together while keeping the dough tender.
- 1 teaspoon vanilla extract – A warm, cozy note that makes the crust sing.
- 3 cups fresh or frozen cherries, pitted – If using frozen, no need to thaw—just toss them in!
- 1/4 cup cornstarch – To thicken those gorgeous cherry juices so they don’t run wild.
- 1 tablespoon lemon juice – A bright little zing to make the cherries pop.
- 1/4 teaspoon almond extract (optional) – If you love that nostalgic cherry-almond combo, don’t skip this!
Let’s Make These Cherry Cobbler Bars
Preheat your oven to 375°F (190°C) and line a 9×13-inch baking pan with parchment paper, leaving a little overhang for easy lifting later. Trust me, you’ll thank yourself when it’s time to slice!
- Make the crust: In a large bowl, whisk together the flour, sugar, and salt. Add the cold butter cubes and use a pastry cutter (or your fingertips) to work the butter into the flour until the mixture resembles coarse crumbs. Some pea-sized bits are totally fine—they’ll melt into flaky pockets of goodness.
- Bind the dough: Crack in the egg and drizzle in the vanilla. Mix just until the dough starts to clump together. It might seem a little dry at first, but keep gently pressing it, and soon it’ll hold together when pinched.
- Press and par-bake: Reserve about 1 cup of the dough for the topping. Press the rest evenly into the bottom of your prepared pan—I like to use the bottom of a measuring cup to get it nice and smooth. Pop it in the oven for 12 minutes, just until lightly golden at the edges. This step ensures a crisp base that won’t get soggy from the juicy cherries.
- Prepare the filling: While the crust bakes, toss the cherries with cornstarch, lemon juice, and almond extract (if using). The cornstarch will dissolve into the juices as they bake, creating that luscious, glossy filling we all love in a cobbler.
Now, the hardest part—waiting for that crust to finish baking so we can pile on those ruby-red cherries and crumble the reserved dough over the top. But I promise, the aroma filling your kitchen will make the wait absolutely worth it.
Conclusion
There you have it—the easiest, juiciest cherry cobbler bars you’ll ever make! With a buttery crust, sweet cherry filling, and crumbly topping, these bars are the perfect balance of simplicity and indulgence. Whether you’re serving them at a summer picnic, a cozy family gathering, or just treating yourself, they’re sure to be a hit. The best part? You can whip them up in no time with minimal fuss.
Now it’s your turn! Give this recipe a try and let us know how it turns out in the comments below. Did you add a scoop of vanilla ice cream? Maybe a drizzle of caramel? We’d love to hear your twists! And if you’re craving more easy desserts, be sure to check out our dessert collection for more sweet inspiration.
FAQs
Can I use frozen cherries instead of fresh?
Absolutely! Frozen cherries work just as well in this recipe. Just make sure to thaw and drain them before using to avoid excess liquid in the filling.
Can I substitute the cherries with another fruit?
Yes! This recipe is versatile—try blueberries, peaches, or even a mix of berries for a delicious variation. Adjust the sugar slightly depending on the sweetness of your chosen fruit.
How should I store leftover cherry cobbler bars?
Store them in an airtight container at room temperature for up to 2 days or in the refrigerator for up to 5 days. You can also freeze them for up to 3 months—just thaw before serving!
Why is my crust too crumbly?
If your crust isn’t holding together, you may need a bit more butter. The mixture should clump when pressed—if it’s too dry, add a tablespoon of melted butter at a time until it comes together.
Can I make these bars gluten-free?
Definitely! Swap the all-purpose flour for a 1:1 gluten-free flour blend, and ensure your oats are certified gluten-free if needed. The texture will still be deliciously crumbly.