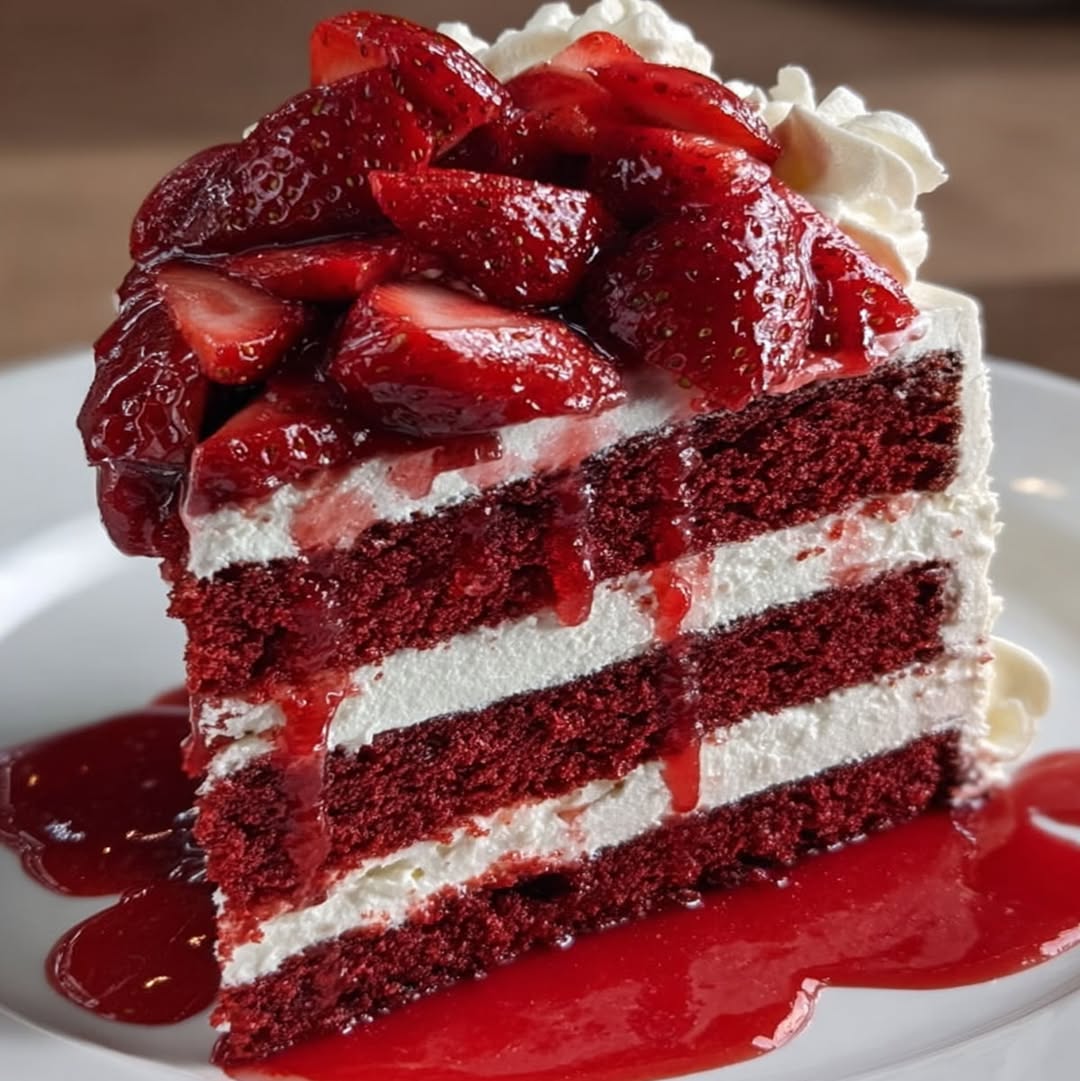
Ultimate Decadent Red Velvet Cake with Cream Cheese Frosting
Did You Know 85% of Home Bakers Struggle with Perfectly Moist Red Velvet Cake?
There’s something undeniably magical about a slice of decadent red velvet cake with cream cheese frosting—the deep crimson crumb, the whisper of cocoa, and that luscious tangy-sweet frosting crowning it all. Yet so many home bakers tell me their red velvet dreams turn out dry, dense, or (heaven forbid!) bland. If you’ve ever faced these struggles, you’re not alone. But today, we’re rewriting that story with a foolproof recipe that delivers velvety texture, balanced flavor, and the kind of moist crumb that’ll have everyone begging for seconds.
The Secret History Behind Red Velvet’s Allure
Before we dive into mixing bowls, let’s talk about why this cake holds such fascination. Contrary to popular belief, red velvet wasn’t born from food coloring marketing gimmicks. Its origins trace back to the 1800s, when natural cocoa (which contains anthocyanins) would react with acidic ingredients like buttermilk to create a subtle reddish hue. The “velvet” comes from the cake’s exceptionally fine, tender crumb—a texture we’ll achieve by mastering the balance between wet and dry ingredients. Modern versions amplify the color for drama, but the soul of this dessert remains in its delicate cocoa flavor and sumptuous mouthfeel.
Why This Decadent Red Velvet Recipe Works Every Time
After testing countless variations (some triumphs, some tragic cake fails), I’ve landed on a formula that nails three crucial elements:
- The Moisture Trinity: Buttermilk, oil, and egg yolks create an ultra-tender crumb that stays moist for days
- Cocoa’s Supporting Role: Just 2 tablespoons of high-quality cocoa powder provides depth without overpowering
- The Vinegar Trick: A splash reacts with baking soda for that signature slight tang and airy rise
And let’s not forget the crowning glory—the cream cheese frosting. We’re using a ratio that’s tangy enough to cut through the sweetness, yet luxuriously smooth for those picture-perfect swirls. But we’ll get to frosting techniques soon—first, let’s gather our ingredients…
Decadent Red Velvet Cake with Cream Cheese Frosting
A classic red velvet cake with rich cream cheese frosting, perfect for special occasions.
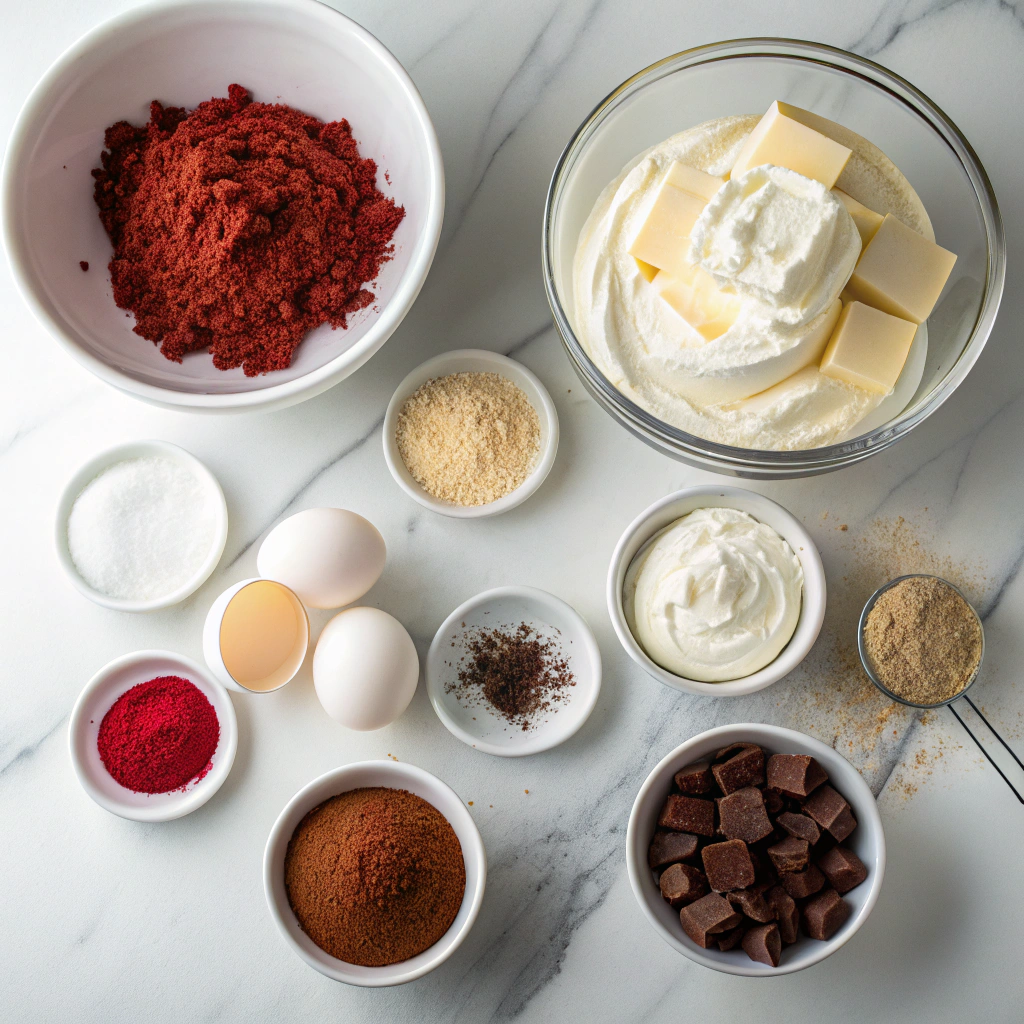
Ingredients
For the Crust:
- 2 1/2 cups all-purpose flour
- 1 1/2 cups granulated sugar
- 1 tsp baking soda
- 1 tsp salt
- 1 tsp cocoa powder
- 1 1/2 cups vegetable oil
- 1 cup buttermilk
- 2 large eggs
- 2 tbsp red food coloring
- 1 tsp vanilla extract
- 1 tsp white vinegar
- 8 oz cream cheese, softened
- 1/2 cup unsalted butter, softened
- 4 cups powdered sugar
- 1 tsp vanilla extract
Instructions
1. Prepare the Crust:
- Preheat oven to 350°F (175°C). Grease and flour two 9-inch round cake pans.
- In a large bowl, whisk together flour, sugar, baking soda, salt, and cocoa powder.
- In another bowl, mix oil, buttermilk, eggs, food coloring, vanilla, and vinegar.
- Combine wet and dry ingredients, mixing until smooth. Divide batter evenly between pans.
- Bake for 25-30 minutes or until a toothpick comes out clean. Cool completely.
- For frosting, beat cream cheese and butter until smooth. Gradually add powdered sugar and vanilla, beating until fluffy.
- Frost cooled cake layers and serve.
Notes
You can customize the seasonings to taste.
The Perfect Red Velvet Cake: A Love Story in Layers
There’s something undeniably romantic about a red velvet cake. That deep crimson crumb, the whisper of cocoa, and that swoon-worthy cream cheese frosting – it’s the kind of dessert that makes ordinary days feel like celebrations. After years of testing recipes (and eating far too many test cakes), I’ve perfected my version that’s moist, flavorful, and oh-so-decadent.
Ingredients You’ll Need
- 2 1/2 cups all-purpose flour – Spoon and level it, friends! Packed flour leads to dense cakes
- 1 1/2 cups granulated sugar – The perfect sweetness to balance the tangy frosting
- 1 tsp baking soda – Our little rising helper
- 1 tsp fine sea salt – Just a pinch to make all the flavors pop
- 2 tbsp cocoa powder – Use the good stuff – Dutch-processed gives that classic red velvet flavor
- 1 1/2 cups vegetable oil – The secret to that melt-in-your-mouth texture
- 2 large eggs – Room temperature, always! Cold eggs don’t play nicely with other ingredients
- 1 cup buttermilk – If you don’t have any, make your own with 1 tbsp vinegar + milk to equal 1 cup
- 2 tbsp red food coloring – I prefer gel for vibrant color without altering texture
- 2 tsp vanilla extract – The good kind, please! No imitation here
- 1 tsp white vinegar – Our secret weapon for the perfect rise
Let’s Bake Some Magic
- Preheat your oven to 350°F (175°C). Grease and line three 8-inch cake pans with parchment paper. I like to trace the bottom of the pan on parchment and cut it out – no wonky layers!
- Whisk dry ingredients together in a large bowl. That’s our flour, sugar, baking soda, salt, and cocoa powder. Take a moment to admire how the cocoa makes little swirls in the flour – this is where the magic begins.
- Mix wet ingredients in another bowl. Combine the oil, eggs, buttermilk, food coloring, vanilla, and vinegar. Pro tip: add the food coloring slowly while mixing to avoid splatters (red-stained counters are hard to explain!).
- Combine carefully by adding the wet ingredients to the dry. Mix just until combined – overmixing leads to tough cakes. The batter will be gloriously red and slightly thick.
- Divide the batter evenly between your prepared pans. I like to use a kitchen scale for perfect layers, but if you’re eyeballing it, aim for about 1 2/3 cups per pan.
- Bake for 25-30 minutes until a toothpick comes out clean. The cakes should spring back when lightly touched. Rotate pans halfway through for even baking.
As your kitchen fills with that unmistakable sweet, slightly chocolatey aroma, resist the urge to peek too often – we want those layers to rise evenly! While they bake and cool, we’ll prepare the crowning glory: that luscious cream cheese frosting…
Conclusion
There’s nothing quite like the rich, velvety texture and deep crimson hue of a homemade red velvet cake, especially when paired with luscious cream cheese frosting. This recipe is a celebration of flavors—sweet, tangy, and utterly indulgent. Whether you’re baking for a special occasion or simply treating yourself, every bite is pure bliss.
Ready to bring this classic dessert to life? Gather your ingredients, preheat that oven, and let the magic unfold. And when you do, we’d love to hear how it turned out! Share your baking triumphs (or even the funny mishaps) in the comments below. Craving more sweet inspiration? Explore our collection of decadent dessert recipes for your next baking adventure.
FAQs
Can I make this cake ahead of time?
Absolutely! Bake the cake layers a day in advance, let them cool completely, then wrap them tightly in plastic wrap and store at room temperature. Frost the cake the next day for the freshest taste.
Why is my red velvet cake not as red as I expected?
The color can vary based on the type of cocoa powder and food coloring used. For a vibrant red, opt for Dutch-process cocoa and a high-quality gel food coloring (liquid dyes may dilute the batter).
Can I substitute the buttermilk?
Yes! Mix 1 cup of milk with 1 tablespoon of lemon juice or vinegar, let it sit for 5 minutes, and voilà—a quick buttermilk substitute. Greek yogurt thinned with a little milk also works well.
How do I store leftovers?
Cover the cake with a cake dome or store slices in an airtight container in the fridge for up to 5 days. Let it sit at room temperature for 20 minutes before serving for the best texture.
Can I freeze red velvet cake?
Definitely! Wrap unfrosted cake layers tightly in plastic wrap and foil, then freeze for up to 3 months. Thaw overnight in the fridge before frosting. Frosted cakes can also be frozen, but the texture may soften slightly.