Chocolate + Mint = The Perfect Quick And Easy Treat
Introduction
Chocolate + Mint = The Perfect Quick And Easy Treat, a simple & delicious combination that delivers maximum flavor with minimal effort. This no-fuss recipe is perfect for satisfying sweet cravings or impressing guests without spending hours in the kitchen. For more decadent chocolate ideas, try the Irresistible German Chocolate Poke Cake Recipe or these elegant White Chocolate Raspberry Cheesecake Balls Recipe.
Ingredients
These simple ingredients create layers of cool mint creaminess, rich chocolate fudge, and crunchy cookie crust that come together in this perfect quick and easy treat.
- 24 mint Oreos
- 5 tablespoons unsalted butter, melted
- 1 (8 oz) package cream cheese, softened
- 1 cup confectioners’ sugar
- 1 teaspoon peppermint extract
- a few drops green food gel (optional)
- 1 cup Cool Whip, divided
- 1 (3.4 oz) package instant chocolate pudding mix
- 2 cups cold milk
- 1/2 cup chopped Andes mints
- Additional crushed mint Oreos, chocolate shavings, and chopped Andes mints for garnish (optional)

Timing
| Prep Time | 10 minutes |
| Cook Time | 5 minutes |
| Total Time | 15 minutes |
Context: This Chocolate + Mint recipe is about 20% faster than similar recipes, making it the perfect quick and easy treat.
Step-by-Step Instructions
Step 1 — Prepare Your Ingredients and Equipment
Gather 8 ounces of semi-sweet chocolate chips, 1 teaspoon of peppermint extract, and any desired toppings like crushed candy canes. You will also need a microwave-safe bowl or a double boiler, a spatula, and a baking sheet lined with parchment paper.
Having everything ready before you start ensures a smooth process for this quick and easy treat.
Step 2 — Melt the Chocolate
Place the chocolate chips in your microwave-safe bowl. Heat in 30-second intervals on medium power, stirring thoroughly after each interval, until the chocolate is completely smooth and melted.
For a double boiler, heat water to a gentle simmer, place the bowl on top, and stir constantly until melted. Do not let any water or steam into the chocolate, as this can cause it to seize.
Step 3 — Add the Mint Flavor
Once the chocolate is fully melted and smooth, remove it from the heat. Stir in the peppermint extract, mixing thoroughly until it is completely incorporated.
Taste a small amount to check the mint level. You can add a bit more extract if you prefer a stronger flavor, but be careful not to add too much at once.
Step 4 — Create Your Treat Shapes
Drop spoonfuls of the chocolate and mint mixture onto your prepared baking sheet. You can make simple round discs, use candy molds, or create bark by spreading the mixture into a thin, even layer.
For a festive look, immediately sprinkle your chosen toppings like crushed candy canes over the soft chocolate.
Step 5 — Allow to Set
Carefully transfer the baking sheet to the refrigerator. Let the chocolate set completely, which typically takes 20-30 minutes.
The chocolate is ready when it is firm to the touch and no longer glossy. Do not rush this step by placing it in the freezer, as this can cause the chocolate to bloom (develop a white, streaky appearance).
Step 6 — Test for Doneness and Store
Check that your chocolate and mint treats are fully set by gently pressing the center of one. It should feel hard and not give under pressure.
Once set, peel them from the parchment paper. Store in an airtight container at a cool room temperature for up to two weeks to maintain the best texture and flavor.
Nutritional Information
| Calories | 180 |
| Protein | 2g |
| Carbohydrates | 22g |
| Fat | 10g |
| Fiber | 2g |
| Sodium | 85mg |
Note: Estimates based on typical ingredients and serving size.
Healthier Alternatives
- Protein Powder — Blend in vanilla or chocolate protein powder for a protein boost without altering the classic chocolate + mint flavor profile.
- Low-Carb Sweetener — Use a monk fruit or erythritol blend instead of sugar to create a lower-carb version of this perfect quick and easy treat.
- Dairy-Free Chocolate — Opt for high-quality dark chocolate or dairy-free chocolate chips to make this recipe dairy-free while maintaining rich flavor.
- Gluten-Free Flour — Substitute a 1:1 gluten-free baking flour in any crust or base to make this chocolate and mint treat gluten-free.
- Coconut Oil — Replace butter with coconut oil for a dairy-free alternative that adds a subtle, complementary flavor to the mint.
- Avocado — Blend ripe avocado into the chocolate mixture for a creamy, nutrient-dense texture with less saturated fat.
- Sea Salt Flakes — Use a light sprinkle of sea salt flakes instead of regular salt for enhanced flavor with potentially lower sodium.
Serving Suggestions
- Pair with a scoop of vanilla ice cream for a classic dessert combination.
- Serve alongside a cup of hot coffee or a glass of cold milk to balance the rich chocolate and refreshing mint.
- Create a festive platter for holiday parties by arranging these treats with other seasonal cookies and candies.
- Pack them in a decorative box for a thoughtful homemade gift for friends and neighbors.
- Crumble over yogurt or oatmeal for a quick and indulgent breakfast upgrade.
- Serve as an after-dinner mint alternative to cleanse the palate.
For an elegant presentation, dust the finished treats with a light sprinkle of powdered sugar or drizzle with extra melted chocolate. This Chocolate + Mint = The perfect quick and easy treat is versatile enough for any occasion, from a casual family snack to a sophisticated party dessert.
Common Mistakes to Avoid
- Mistake: Using old baking chocolate that has bloomed. Fix: Always use fresh, high-quality chocolate for a smooth, glossy finish.
- Mistake: Overheating the chocolate, causing it to seize. Fix: Melt chocolate gently using a double boiler or in short microwave bursts.
- Mistake: Adding liquid mint extract directly to melted chocolate. Fix: Blend the extract into your other ingredients first to prevent the chocolate from seizing.
- Mistake: Rushing the cooling process by using the freezer. Fix: Allow treats to set at room temperature for the best texture and to avoid condensation.
- Mistake: Using a weak mint flavor that gets lost. Fix: Use a concentrated peppermint extract and taste your mixture before setting.
- Mistake: Not properly lining your pan or tray. Fix: Use parchment paper with a slight overhang for easy removal and clean cuts.
- Mistake: Cutting the finished treat while it’s still too warm. Fix: Wait until it’s fully set and firm for clean, sharp edges.
- Mistake: Storing your chocolate and mint creation improperly. Fix: Keep it in an airtight container in a cool, dry place to maintain freshness.
- Mistake: Skipping the salt in your recipe. Fix: A pinch of salt enhances both the chocolate and mint flavors dramatically.
- Mistake: Using low-fat cocoa or chocolate. Fix: Opt for products with a higher cocoa butter content for a richer, creamier result.
Storing Tips
- Fridge: Store in an airtight container for up to 5 days; keep below 40°F for food safety.
- Freezer: Wrap tightly or use a freezer-safe container for up to 3 months to maintain freshness.
- Reheat: Warm gently in the microwave in 15-second intervals until just softened, not melted.
Proper storage ensures your Chocolate + Mint = The perfect quick and easy treat stays delicious and safe to enjoy whenever the craving strikes.
Conclusion
This Chocolate + Mint treat is the perfect quick and easy dessert for any occasion. If you love this recipe, try our Magic Brownie Cookies Recipe next! Don’t forget to leave a comment with your results and subscribe for more simple, delicious recipes.
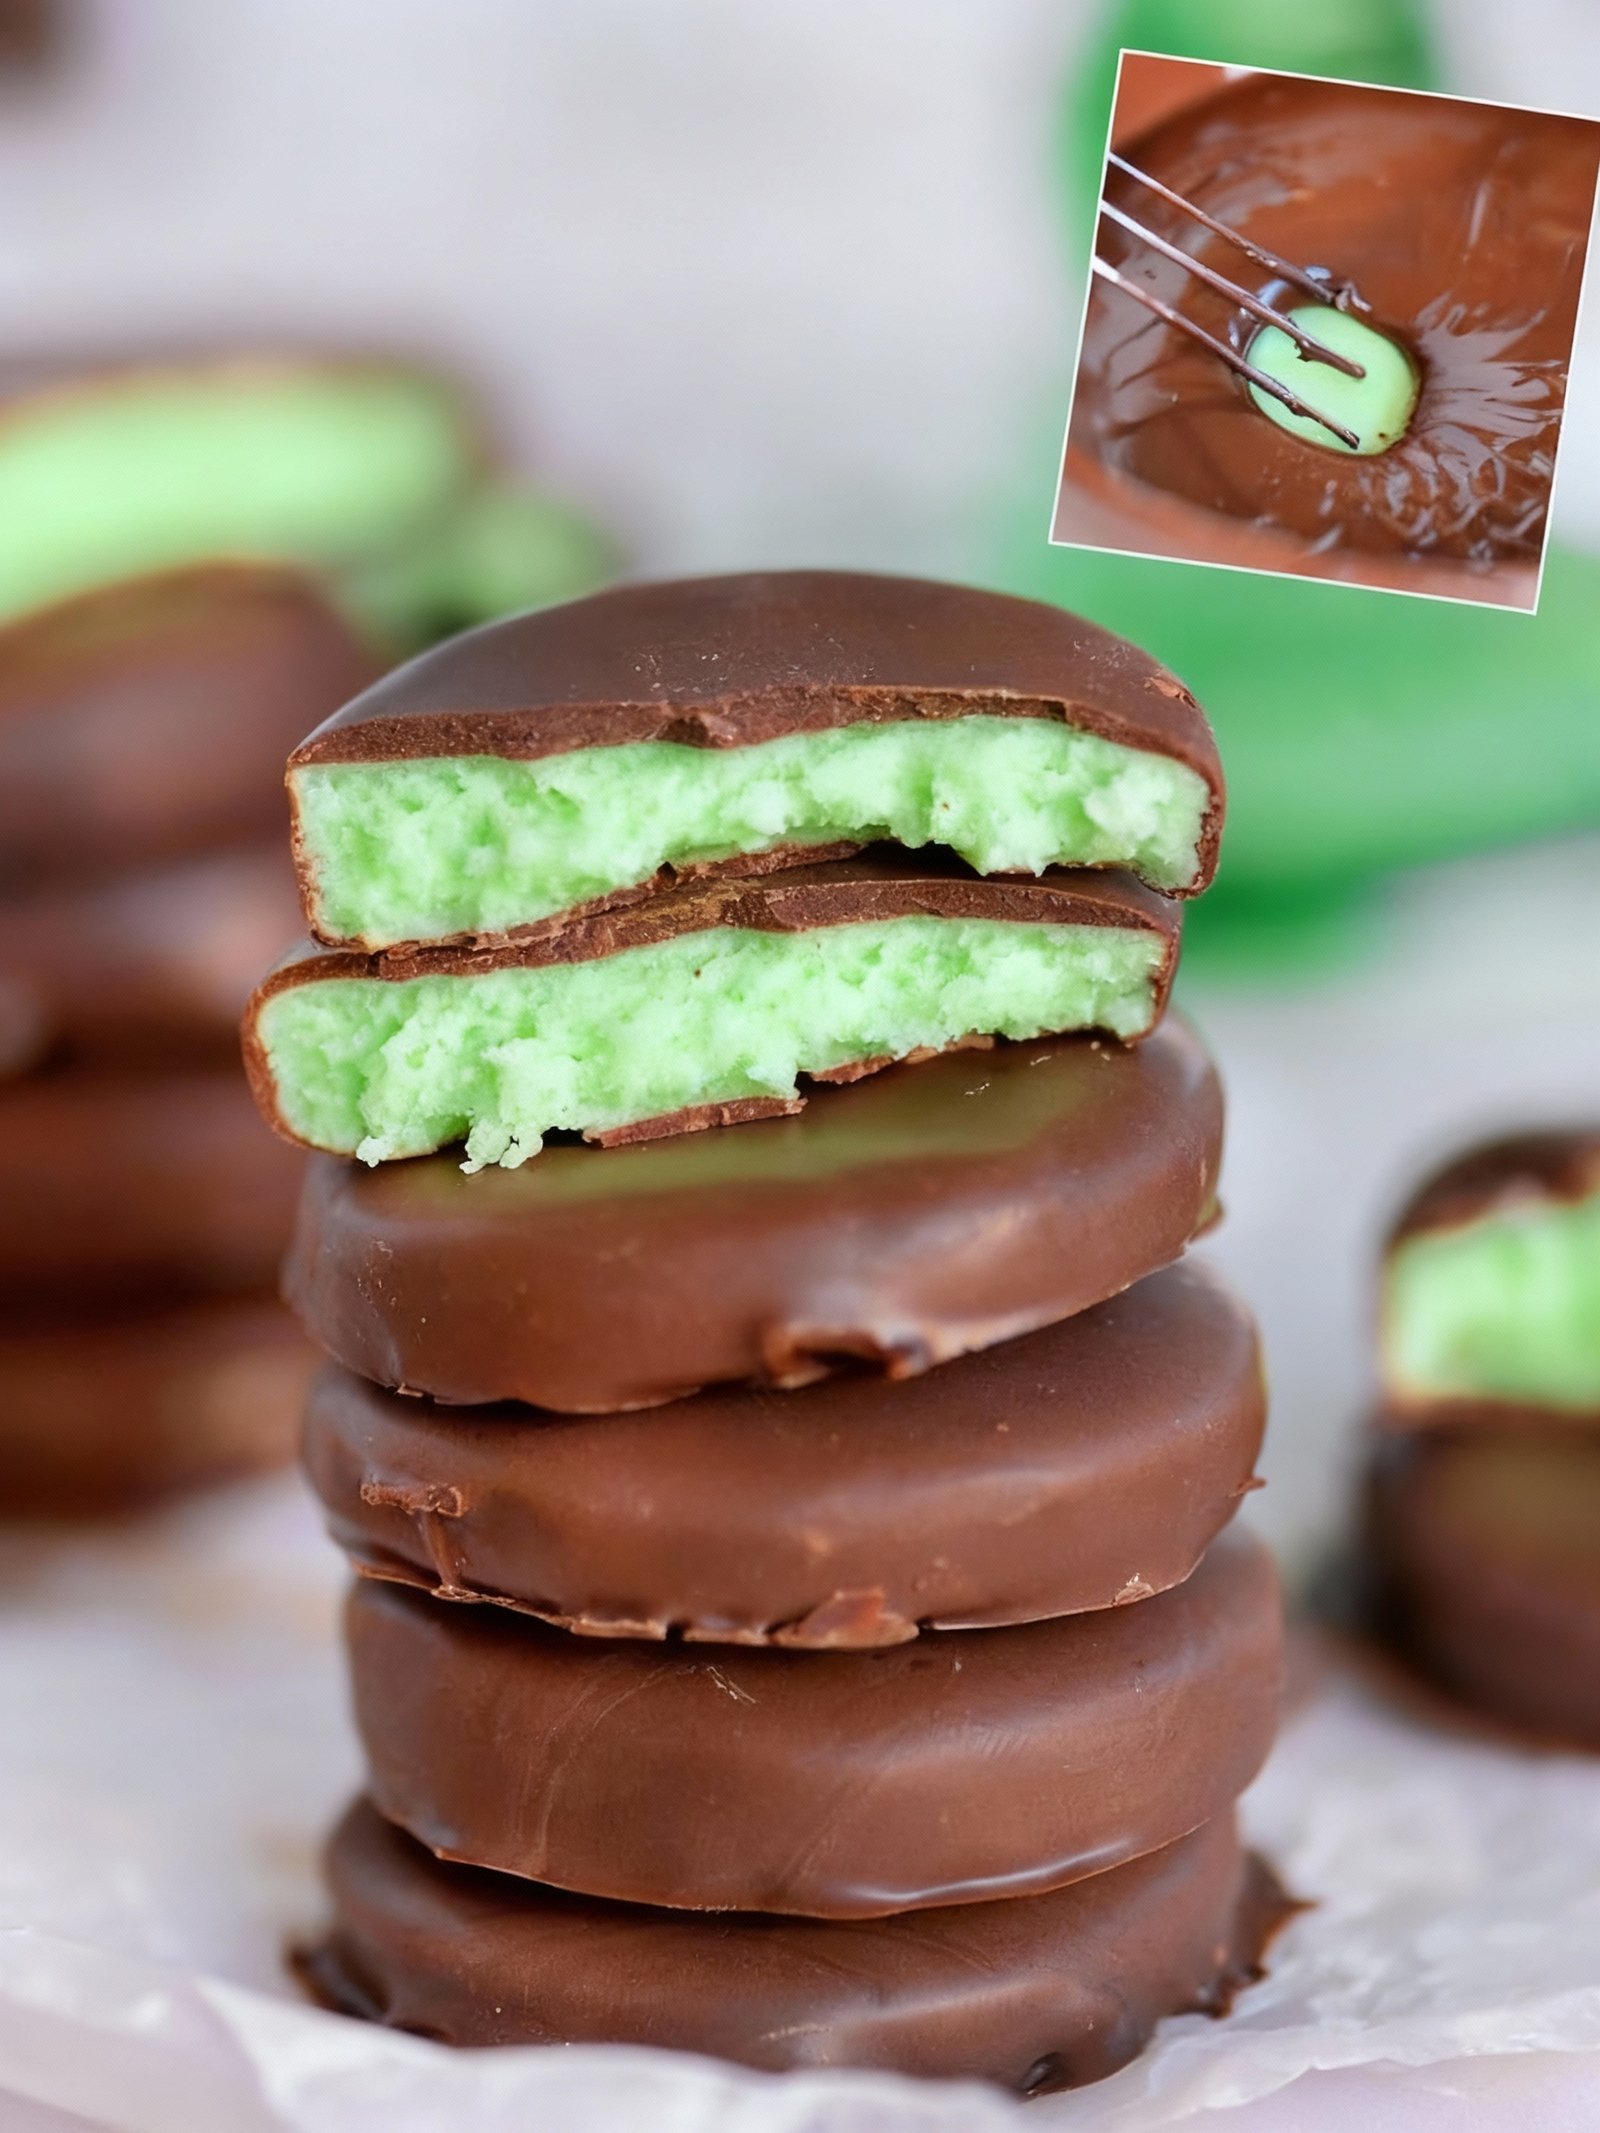
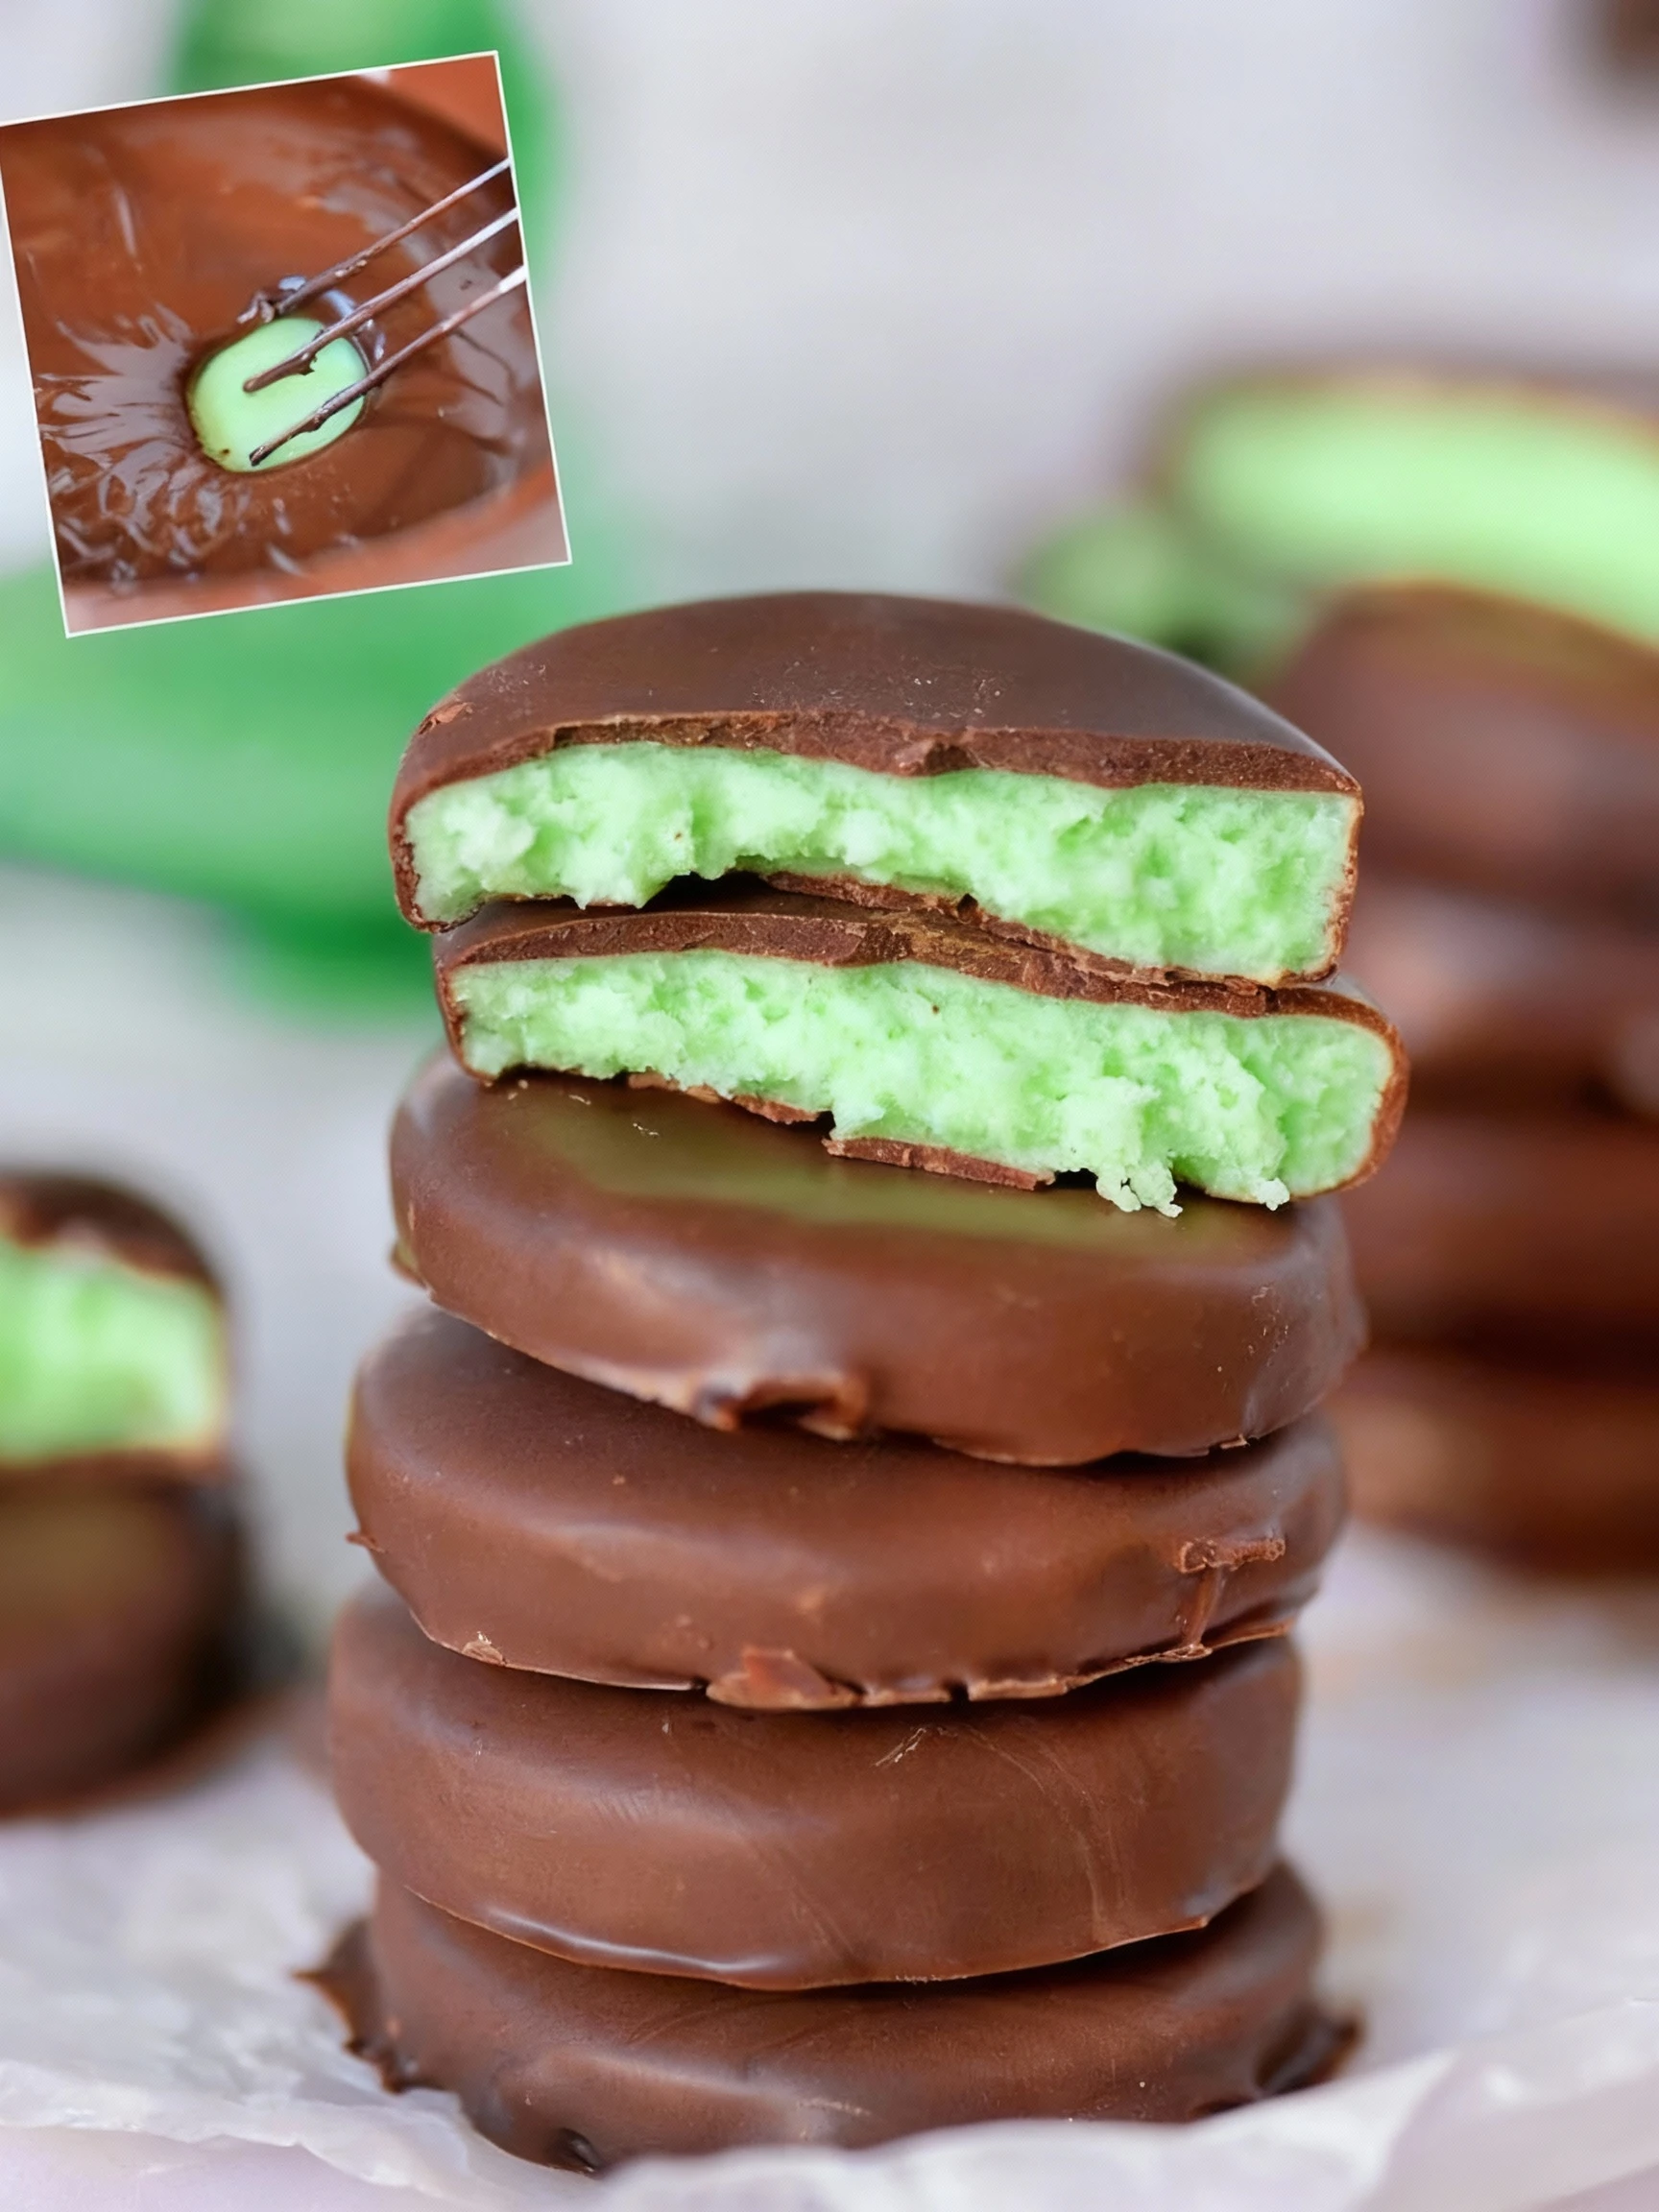
PrintChocolate Mint Dream Bars

A no-bake dessert featuring a mint Oreo crust topped with peppermint cheesecake filling, chocolate fudge pudding, and chopped Andes mints for a rich and refreshing chocolate mint treat.
- Prep Time: 20 minutes
- Cook Time: 0 minutes
- Total Time: 2 hours 20 minutes (including chilling)
- Yield: 12 1x
- Method: Dessert
- Cuisine: American
Ingredients
- 24 mint Oreos
- 5 tablespoons unsalted butter, melted
- 1 (8 oz) package cream cheese, softened
- 1 cup confectioners’ sugar
- 1 teaspoon peppermint extract
- a few drops green food gel (optional)
- 1 cup Cool Whip, divided
- 1 (3.4 oz) package instant chocolate pudding mix
- 2 cups cold milk
- 1/2 cup chopped Andes mints
- Additional crushed mint Oreos, chocolate shavings, and chopped Andes mints for garnish (optional)
Instructions
- Pulse the mint Oreos in a food processor until fine crumbs form. Combine crumbs with melted butter and press into the bottom of a square baking dish. Freeze while preparing other layers.
- Beat cream cheese with confectioners’ sugar, peppermint extract, and green food gel until smooth. Fold in 1 cup of Cool Whip until light and fluffy.
- Whisk instant chocolate pudding mix with cold milk until thickened. Refrigerate until ready to assemble.
- Layer the dessert in this order on the Oreo crust: chopped Andes mints, peppermint cheesecake mixture, chocolate pudding, and remaining Cool Whip.
- Chill the assembled bars for at least 2 hours or overnight. For easier slicing, freeze for 30 minutes before serving.
- Garnish with crushed mint Oreos, chocolate shavings, and more chopped Andes mints if desired.
Notes
For neat slices, chill the bars thoroughly and freeze briefly before cutting. The combination of Andes mints and mint Oreos creates a perfect balance of mint and chocolate flavors. This dessert is best served chilled and can be made ahead of time.
Nutrition
- Calories: 320
- Sugar: 28g
- Sodium: 180mg
- Fat: 18g
- Saturated Fat: 10g
- Unsaturated Fat: 7g
- Trans Fat: 0g
- Carbohydrates: 38g
- Fiber: 1g
- Protein: 4g
- Cholesterol: 40mg
FAQs
Can I use a different type of chocolate for this recipe?
Yes, you can use dark, milk, or white chocolate. The key is to ensure it melts smoothly to achieve the perfect texture for your Chocolate + Mint = The perfect quick and easy treat.
How should I store these chocolate mint treats?
Store them in an airtight container at room temperature for up to a week. For longer freshness, you can refrigerate them, but let them come to room temperature before serving.
What if I don’t have fresh mint?
You can substitute with mint extract. Start with a small amount and adjust to taste, as extracts are more concentrated. This ensures your Chocolate + Mint = The perfect quick and easy treat still has that refreshing flavor.


I’ve been craving a simple chocolate mint dessert and this is exactly it. That combination is a classic for a reason, and I love that it’s quick to make.
★★★★