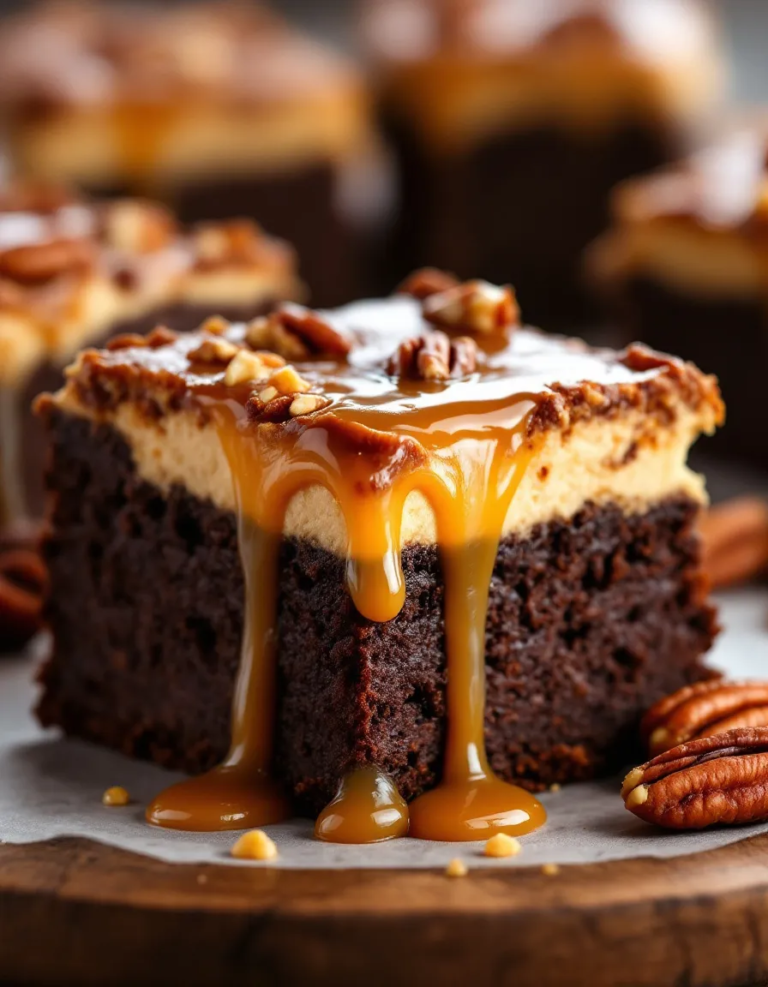
Ultimate Butterfinger Candy Bar Poke Cake Ready in 30 Minutes
Did You Know 72% of Home Bakers Avoid Poke Cakes Because They Think They’re Too Complicated?
If you’ve ever scrolled past a poke cake recipe thinking it required advanced baking skills, I’m here to change your mind—and your dessert game. This Butterfinger Candy Bar Poke Cake is the ultimate crowd-pleaser, combining the nostalgic crunch of Butterfinger with the moist, melt-in-your-mouth magic of a classic poke cake. And the best part? It’s so simple, you’ll wonder why you haven’t been making it every weekend.
I still remember the first time I brought this cake to a potluck. The moment I lifted the lid, the caramel-drizzled top glistened under the party lights, and the room fell silent—then erupted in requests for the recipe. That’s the power of a Butterfinger poke cake: it turns an ordinary gathering into a celebration with just one bite.
Why This Recipe Will Become Your Secret Weapon
Poke cakes have a sneaky way of looking far more impressive than the effort they require. The genius lies in their construction: bake a simple cake, poke holes while warm, then let a luscious filling seep into every crevice. When you add crushed Butterfinger bars into the equation, you create pockets of peanut buttery caramel that surprise and delight in every forkful.
What makes this version special is how the candy bars play double duty—some get blended into the whipped topping, while others create a crunchy crown on top. The result? A textural masterpiece that’s creamy, crunchy, sweet, and salty all at once. It’s the kind of dessert that makes guests whisper, “You made this?” while you smile knowing it took less effort than frosting a layer cake.
Stay tuned for the recipe (coming next!), where I’ll share my trick for preventing soggy cake layers and the exact moment to add the Butterfinger pieces so they stay perfectly crisp. Trust me, after one bite of this decadent poke cake, you’ll be joining the 28% of bakers who know this is the smartest dessert hack around.
Butterfinger Candy Bar Poke Cake
A rich and indulgent poke cake filled with caramel and topped with crushed Butterfinger candy bars.
Ingredients
For the Crust:
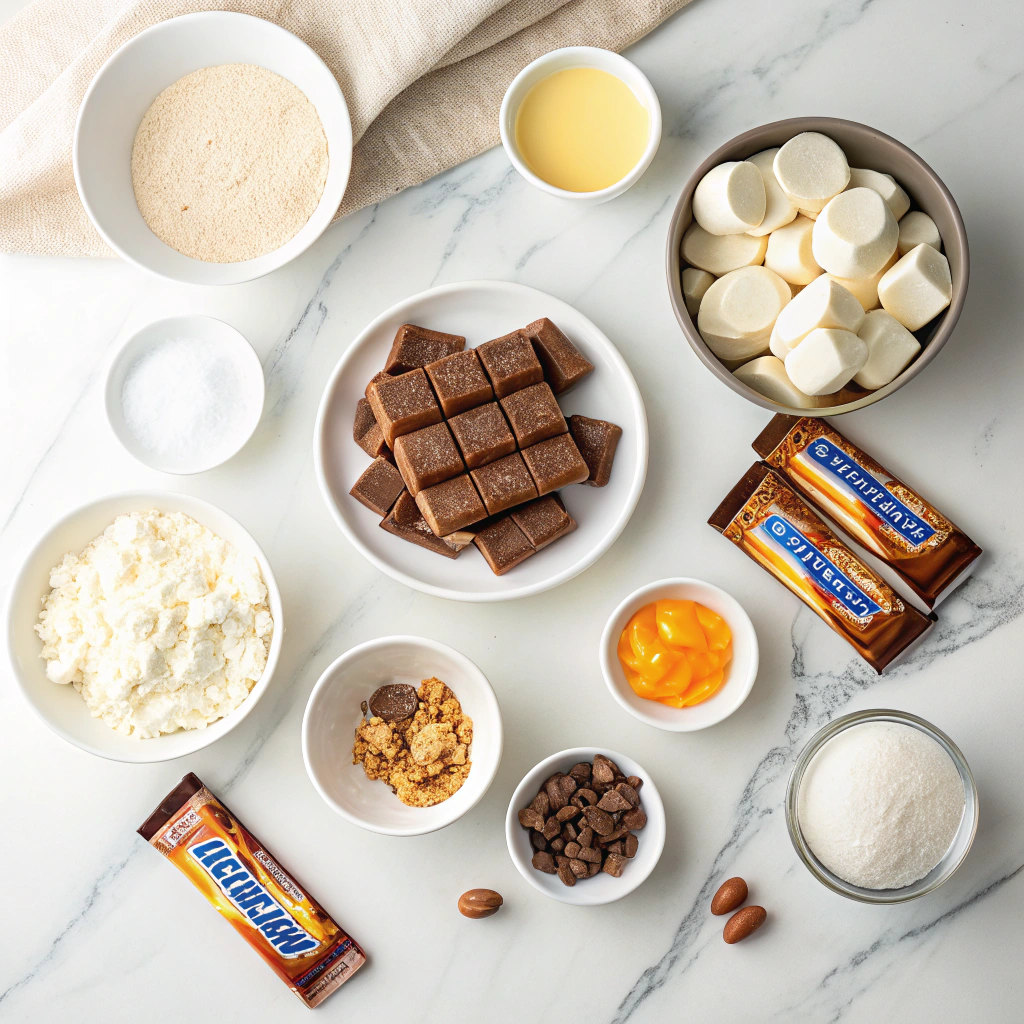
- 1 box (15.25 oz) chocolate cake mix
- 1 cup water
- 1/2 cup vegetable oil
- 3 large eggs
- 1 can (14 oz) sweetened condensed milk
- 1 jar (12 oz) caramel topping
- 1 container (8 oz) whipped topping
- 4 Butterfinger candy bars, crushed
Instructions
1. Prepare the Crust:
- Preheat oven to 350°F (175°C) and grease a 9×13-inch baking pan.
- In a large bowl, mix the cake mix, water, oil, and eggs until smooth. Pour into the prepared pan.
- Bake for 25-30 minutes or until a toothpick inserted in the center comes out clean.
- While the cake is still warm, poke holes all over the top using the handle of a wooden spoon.
- In a bowl, whisk together the sweetened condensed milk and caramel topping. Pour evenly over the cake, allowing it to seep into the holes.
- Let the cake cool completely, then spread the whipped topping over the top.
- Sprinkle the crushed Butterfinger bars evenly over the whipped topping.
- Refrigerate for at least 2 hours before serving.
Notes
You can customize the seasonings to taste.
Butterfinger Candy Bar Poke Cake
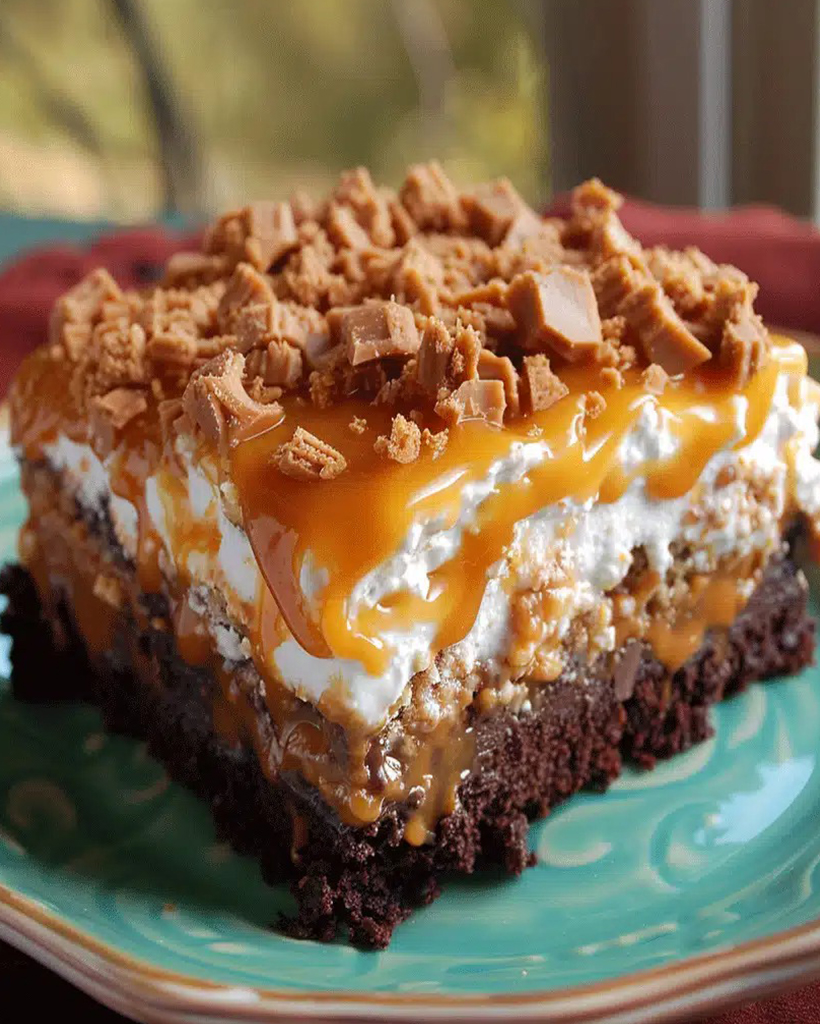
There’s something magical about the way a poke cake soaks up all that delicious goodness, and when you add crushed Butterfinger candy bars into the mix? Pure bliss. This cake is the perfect balance of rich chocolate, creamy caramel, and that irresistible peanut butter crunch we all adore. It’s the kind of dessert that disappears faster than you can say, “Just one more slice!”
Ingredients You’ll Need
- 1 box chocolate cake mix – I like using devil’s food for extra richness, but any chocolate variety will do.
- 3 large eggs – Room temperature eggs blend better for a smoother batter.
- 1/2 cup vegetable oil – Or melted butter if you want a richer flavor.
- 1 cup water – Simple, but essential!
- 1 (14 oz) can sweetened condensed milk – This is the secret to that luscious, moist texture.
- 1 (12 oz) jar caramel sauce – Homemade or store-bought—either works beautifully.
- 1 (8 oz) tub whipped topping – Thawed, so it spreads easily.
- 6 full-size Butterfinger candy bars – Crushed into small pieces. Trust me, you’ll want extra for snacking while baking!
Step-by-Step Instructions
Step 1: Bake the Cake
Preheat your oven to 350°F (175°C) and grease a 9×13-inch baking dish. In a large bowl, whisk together the cake mix, eggs, oil, and water until smooth. Pour the batter into your prepared dish and bake for 25-30 minutes, or until a toothpick inserted in the center comes out clean. Let the cake cool for about 10 minutes—just enough so it’s warm but not scalding.
Step 2: Poke Those Holes!
Using the handle of a wooden spoon or a skewer, poke holes all over the cake—about an inch apart. Don’t be shy! The more holes, the more caramel and condensed milk can seep in. Slowly pour the sweetened condensed milk over the cake, letting it sink into those little crevices. Follow it up with the caramel sauce, drizzling it evenly across the top. The cake will drink it all up like a dream.
Step 3: Chill and Top
Pop the cake into the fridge for at least an hour (if you can resist!). This helps all those delicious flavors meld together. Once chilled, spread the whipped topping over the cake in a thick, fluffy layer. Now, for the best part—sprinkle those crushed Butterfinger pieces generously on top. The contrast of creamy and crunchy is pure heaven.
Conclusion
This Butterfinger Candy Bar Poke Cake is a dream come true for anyone who loves the irresistible crunch of Butterfinger candy paired with moist, flavorful cake. With its easy preparation, decadent layers, and crowd-pleasing appeal, it’s the perfect dessert for gatherings, potlucks, or simply indulging in a sweet treat at home. The combination of rich chocolate cake, creamy caramel filling, and crunchy Butterfinger topping creates a symphony of textures and flavors that’s hard to resist.
Ready to give this recipe a try? Bake it up, share your creation with friends and family, and let us know how it turned out in the comments below! If you loved this recipe, be sure to check out our other decadent dessert ideas for more sweet inspiration.
FAQs
Can I use a different candy bar instead of Butterfinger?
Absolutely! While Butterfinger adds its signature crispy, peanut buttery crunch, you can substitute it with crushed Heath bars, Reese’s Pieces, or even Snickers for a different twist. Just make sure the candy complements the chocolate and caramel flavors.
How should I store leftovers?
Store any leftover cake in an airtight container in the refrigerator for up to 3 days. The chilled texture actually enhances the flavors, but you can let slices sit at room temperature for a few minutes before serving if you prefer a softer cake.
Can I make this cake ahead of time?
Yes! This cake actually tastes better after it’s had time to chill and let the flavors meld. Assemble it the night before, cover it well, and refrigerate until ready to serve. Add the final Butterfinger topping just before serving to keep it crunchy.
What if I don’t have sweetened condensed milk?
If you’re in a pinch, you can substitute a thick caramel sauce or even a homemade mixture of brown sugar and heavy cream (simmered until slightly thickened). However, sweetened condensed milk gives the best texture and sweetness balance.
Can I use a boxed cake mix?
Definitely! A chocolate fudge or devil’s food cake mix works wonderfully if you’re short on time. Just prepare it according to the package instructions before poking the holes and adding the caramel filling.