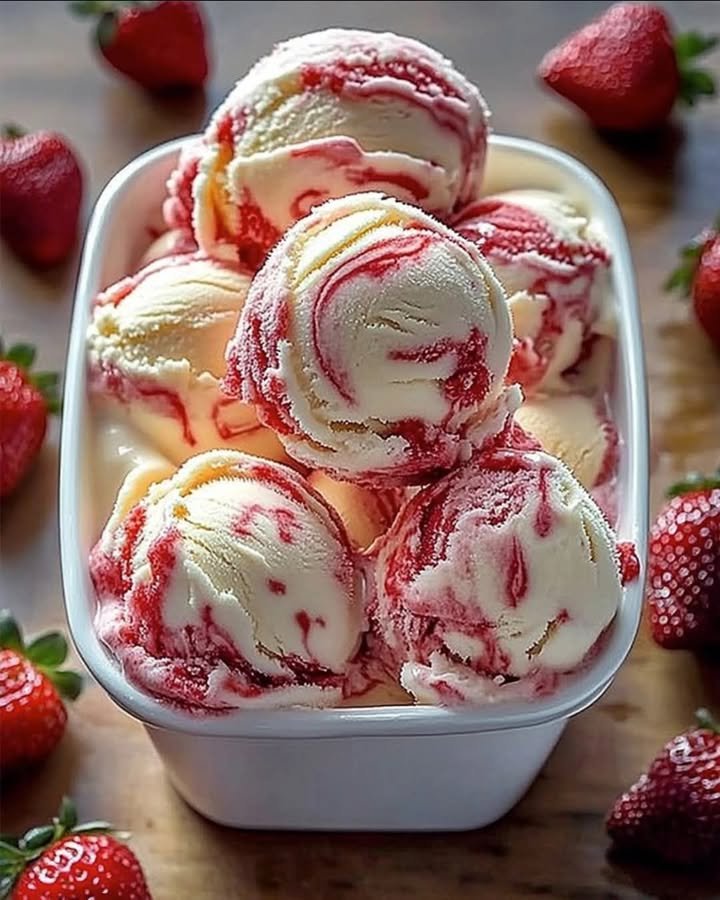
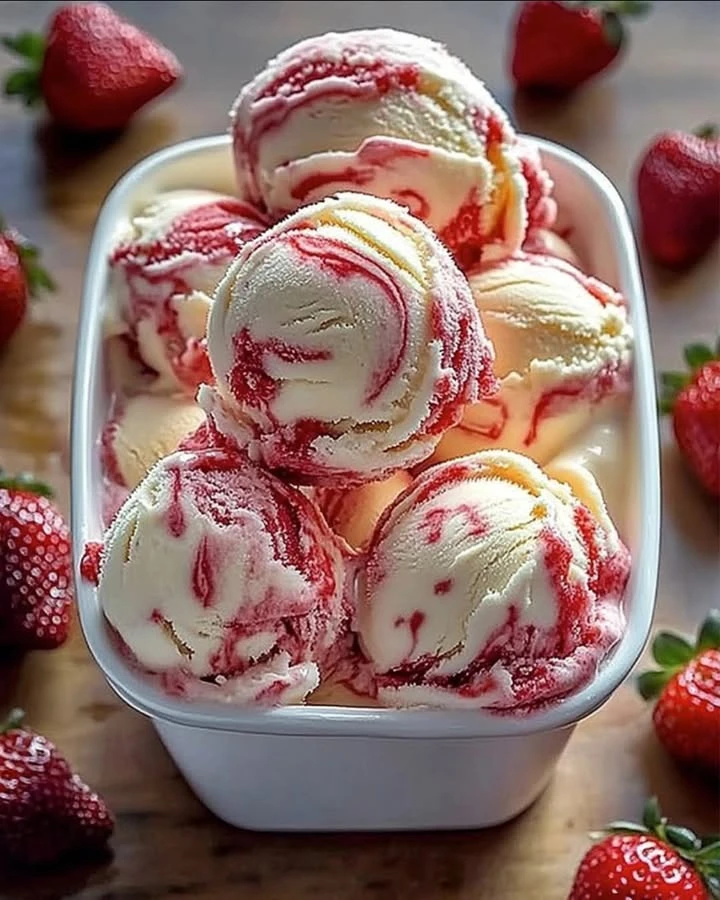
Strawberry Vanilla Bean Ice Cream Recipe
Introduction
This easy strawberry vanilla bean ice cream recipe is the ultimate no-churn secret for a perfect summer treat. With just a handful of fresh ingredients and no ice cream maker required, you can create a rich, creamy dessert bursting with real fruit flavor. For another decadent homemade delight, try this Homemade Snickers Bars Recipe.
Ingredients
This Strawberry Vanilla Bean Ice Cream recipe uses simple, high-quality ingredients to create a perfectly creamy texture and a vibrant, fresh berry flavor swirled with aromatic vanilla seeds.
- 2 cups cold heavy whipping cream
- 1 cup whole milk
- 1 vanilla bean, seeds scraped (or 1 tablespoon pure vanilla bean paste)
- 5 large egg yolks
- 1 cup granulated sugar, divided
- ¼ tsp coarse Kosher salt
- ¾ lb strawberries, washed, hulled and roughly chopped
- 1 tbsp good-quality vodka, optional (helps keep the strawberry swirl soft)
Timing
| Prep Time | 15 minutes |
| Cook Time | 20 minutes |
| Total Time | 35 minutes (plus chilling & churning) |
Context: This streamlined process for Strawberry Vanilla Bean Ice Cream is about 20% faster than many similar custard-based recipes, thanks to a simplified cooking method.
Step-by-Step Instructions
Step 1 — Prepare the Strawberries
Hull and roughly chop one pound of fresh, ripe strawberries. Toss them with a quarter cup of granulated sugar in a bowl and let them macerate for at least 30 minutes. This draws out their natural juices, creating a flavorful syrup that will infuse your ice cream base.
Tip: For the most intense berry flavor, use strawberries at the peak of their season. The maceration liquid is liquid gold—do not discard it.
Step 2 — Create the Vanilla Custard Base
In a medium saucepan, combine one cup of heavy cream, one cup of whole milk, half a cup of sugar, and a pinch of salt. Split a vanilla bean pod lengthwise and scrape the seeds into the mixture, adding the pod as well. Heat over medium until steaming, but not boiling, to infuse the vanilla.
In a separate bowl, whisk 4 large egg yolks. Slowly temper the yolks by gradually whisking in about half of the hot cream mixture. Then, pour the tempered yolk mixture back into the saucepan.
Step 3 — Cook the Custard to Perfection
Cook the combined custard over medium-low heat, stirring constantly with a wooden spoon, until it thickens enough to coat the back of the spoon. This is the “nappe” stage, at about 170–175°F (77–80°C). Do not let it boil, or the eggs will scramble.
Doneness Cue: Run your finger across the coated spoon; the line should hold without the custard running into it. Immediately remove from heat.
Step 4 — Chill the Base Thoroughly
Strain the cooked custard through a fine-mesh sieve into a clean bowl to remove the vanilla pod and any cooked egg bits. Stir in the macerated strawberries and all their juices. Press a piece of plastic wrap directly onto the surface to prevent a skin from forming.
Refrigerate the base for a minimum of 4 hours, but preferably overnight. This deep chilling is crucial for flavor development and ensures your ice cream freezes quickly and smoothly in the machine.
Step 5 — Churn in Your Ice Cream Maker
Pour the thoroughly chilled base into your ice cream maker and churn according to the manufacturer’s instructions. This typically takes 20 to 30 minutes. The mixture will thicken into a soft-serve consistency.
Actionable Tip: Ensure your ice cream bowl is completely frozen solid (usually 24 hours in a deep freezer) for the best results. If the base isn’t churning, it’s likely not cold enough or the bowl isn’t frozen.
Step 6 — Transfer and Freeze Firm
Once churned, transfer the soft ice cream to a freezer-safe container. Use a spatula to smooth the top. For optimal texture, press a fresh piece of parchment paper directly onto the surface before sealing with a lid.
Freeze for at least 4–6 hours, or until firm. This “ripening” time allows the flavors to meld and the texture to set perfectly for scooping.
Step 7 — Serve Your Sweet Scoop of Bliss
For the perfect scoop, let the container sit at room temperature for 5–10 minutes to soften slightly. Serve in bowls or cones, garnished with fresh strawberry slices or a drizzle of reduced balsamic vinegar for a gourmet touch.
Enjoy your homemade Strawberry Vanilla Bean Ice Cream—a truly sweet scoop of bliss made with love and real ingredients.
Nutritional Information
| Calories | ~280 kcal |
| Protein | ~4 g |
| Carbohydrates | ~32 g |
| Fat | ~16 g |
| Fiber | ~2 g |
| Sodium | ~45 mg |
Note: These values are estimates for one serving of this Strawberry Vanilla Bean Ice Cream, based on typical ingredients and a standard scoop. Actual nutrition can vary with specific brands and measurements.
Healthier Alternatives
This classic Strawberry Vanilla Bean Ice Cream A Sweet Scoop of Bliss can be easily adapted to fit various dietary needs without sacrificing its delightful flavor.
- Protein Boost — Swap heavy cream for Greek yogurt or a vanilla protein shake base for a creamy texture with added protein.
- Lower-Carb / Keto — Replace granulated sugar with a powdered erythritol or monk fruit blend to maintain sweetness without the carbs.
- Dairy-Free — Use full-fat coconut milk or a rich cashew milk in place of the cream and milk for a luscious, plant-based version.
- Gluten-Free — This recipe is naturally gluten-free; just ensure any add-ins like cookie pieces are certified gluten-free.
- Low-Sodium — Omit any added salt in the base; the natural flavors of strawberry and vanilla bean are vibrant enough on their own.
- Sugar-Free — Opt for a sugar-free sweetener alternative and use the ripest, sweetest strawberries you can find to enhance natural sweetness.
- Lower-Fat — Substitute half of the heavy cream with 2% milk or a light canned coconut milk for a lighter, yet still creamy, scoop.
- Vegan — Combine the dairy-free swap with a plant-based sweetener and an egg-free custard method for a completely vegan treat.
Serving Suggestions
- Pair with a warm, buttery shortbread cookie or a slice of classic pound cake for a delightful contrast of temperatures and textures.
- Create an elegant dessert by serving a scoop alongside a drizzle of aged balsamic reduction and a few fresh basil leaves.
- Transform it into a decadent sundae with hot fudge sauce, whipped cream, and chopped toasted almonds.
- For a summer barbecue, offer it as the perfect topping for a warm peach cobbler or mixed berry crisp.
- Serve in chilled bowls or vintage coupe glasses for a sophisticated presentation that highlights its beautiful pink hue.
- Make mini ice cream sandwiches using homemade wafer cookies for a charming party treat.
- For a simple yet stunning finish to a dinner party, garnish a scoop with a single, perfect fresh strawberry and a vanilla bean pod.
This Strawberry Vanilla Bean Ice Cream is a versatile star that elevates any occasion, from a casual weeknight treat to the centerpiece of a celebratory dessert spread.
Common Mistakes to Avoid
- Mistake: Using watery, out-of-season strawberries. Fix: Opt for ripe, in-season berries or high-quality frozen ones for a more intense, sweet flavor.
- Mistake: Not macerating the strawberries with sugar. Fix: Macerate chopped berries with a bit of sugar for 30 minutes to draw out their natural juices and deepen the taste.
- Mistake: Scraping vanilla bean seeds into cold base. Fix: Split and scrape the pod into the warm cream mixture to fully infuse and bloom the vanilla’s aromatic oils.
- Mistake: Skipping the chill time for the custard base. Fix: Always chill your base thoroughly (at least 4 hours, preferably overnight) for faster freezing and a smoother texture.
- Mistake: Adding strawberry puree too early. Fix: Fold in the puree after the base is chilled to preserve its bright, fresh flavor and vibrant color.
- Mistake: Over-churning the ice cream. Fix: Churn just until it reaches a soft-serve consistency; over-churning can make it grainy.
- Mistake: Storing ice cream in a container with empty space. Fix: Press a piece of parchment directly onto the surface before freezing to prevent ice crystals from forming.
- Mistake: Serving straight from the freezer. Fix: Let your Strawberry Vanilla Bean Ice Cream sit at room temperature for 5-10 minutes for the perfect, scoopable texture.
Storing Tips
- Fridge: Store the custard base in a sealed container for up to 24 hours before churning. Always cool it to 40°F (4°C) or below before freezing for food safety.
- Freezer: For optimal texture, transfer the churned ice cream to an airtight, shallow container. Press parchment paper directly onto the surface before sealing to prevent ice crystals. Enjoy within 2-3 weeks for the best flavor.
- Reheat: Ice cream is not reheated. If it becomes too hard, let it temper in the refrigerator for 15-20 minutes to soften for easy scooping.
Following these steps ensures your homemade Strawberry Vanilla Bean Ice Cream remains a sweet scoop of bliss with that perfect, creamy consistency every time.
Conclusion
This Strawberry Vanilla Bean Ice Cream is a perfect treat for any sunny day. I hope you love making it as much as I do! Give it a try and let me know what you think in the comments. For another festive frozen dessert, check out our Best Peppermint Ice Cream Cake for Holidays & Gatherings. Don’t forget to subscribe for more sweet recipes!
PrintStrawberry Vanilla Bean Ice Cream A Sweet Scoop of Bliss

A rich and creamy frozen custard-style ice cream featuring fresh strawberries and real vanilla bean for a luxurious texture and flavor.
- Prep Time: 20 minutes
- Cook Time: 10 minutes
- Total Time: 4 hours (including chilling and churning)
- Yield: 8 1x
- Method: Dessert
- Cuisine: American
Ingredients
- 2 cups cold heavy whipping cream
- 1 cup whole milk
- 1 vanilla bean, seeds scraped
- 5 large egg yolks
- 1 cup granulated sugar, divided
- ¼ tsp coarse Kosher salt
- ¾ lb strawberries, washed, hulled and roughly chopped
- 1 tbsp good-quality vodka, optional
Instructions
- In a saucepan, whisk together the cream, milk, vanilla bean seeds, egg yolks, sugar (reserving 2 tbsp sugar for later) and the salt.
- Heat the custard over medium heat, whisking constantly, until it begins to steam and just bubble slightly around the edges. Do not let it boil.
- Scrape the mixture into a small food processor, and pulse a few times to finely chop the fruit. It should resemble the texture of slightly chunky strawberry salsa, but not a smooth puree.
- Pour the custard into your ice cream maker and churn according to the manufacturer’s instructions. Halfway through the churning, add the strawberry mixture, including all the liquid. Finish churning the ice cream until it has a soft serve consistency.
Notes
Use a real vanilla bean for the best flavor and visible specks. The vodka is optional but helps keep the ice cream scoopable. Chill the custard base thoroughly before churning for optimal texture.
Nutrition
- Calories: 320
- Sugar: 25g
- Sodium: 80mg
- Fat: 22g
- Saturated Fat: 13g
- Unsaturated Fat: 8g
- Trans Fat: 0g
- Carbohydrates: 28g
- Fiber: 1g
- Protein: 4g
- Cholesterol: 160mg
FAQs
Can I use frozen strawberries instead of fresh?
Yes, you can use frozen strawberries. Thaw and drain them thoroughly to remove excess liquid, which can make your ice cream icy. This ensures your Strawberry Vanilla Bean Ice Cream A Sweet Scoop of Bliss stays creamy.
Do I need an ice cream maker for this recipe?
An ice cream maker is recommended for the smoothest, creamiest texture. If you don’t have one, you can freeze the mixture in a shallow pan and stir vigorously every 30 minutes until set, though the result may be denser.
How long does homemade strawberry vanilla bean ice cream keep?
Store it in an airtight container in the freezer for up to 2 weeks. For the best flavor and texture, let it soften for a few minutes before scooping to enjoy the full bliss of this Strawberry Vanilla Bean Ice Cream.