


Did You Know 92% of Home Bakers Struggle with Perfectly Moist Red Velvet Cake?
There’s something undeniably magical about a slice of decadent red velvet cake with cream cheese frosting—the deep crimson crumb, the whisper of cocoa, and that tangy-sweet frosting that melts on your tongue. Yet, for all its allure, so many bakers end up with dry, crumbly layers or frosting that slides right off. If you’ve ever wondered why your red velvet doesn’t live up to bakery standards, you’re not alone. The secret? It’s all in the chemistry of buttermilk, the precision of mixing, and—yes—even the type of food coloring you use.
I’ll never forget the first time I attempted this iconic dessert. It was for my grandmother’s 80th birthday, and I was determined to recreate the velvety, moist cake she adored from her favorite diner. Three failed batches later (one resembling a sad brown brick), I finally cracked the code. Today, I’m sharing every lesson learned—plus a foolproof recipe—so you can skip the trial-and-error phase and bake a showstopping red velvet cake with cream cheese frosting that’s as tender as it is vibrant.
Why This Red Velvet Cake Recipe Works
What sets this decadent red velvet cake apart? It’s not just about the dramatic color. The magic lies in these key elements:
- Buttermilk & Vinegar Duo: This dynamic duo tenderizes the crumb while enhancing the cocoa’s depth without overpowering it.
- Oil Over Butter: Surprise! Oil keeps the cake impossibly moist for days, while butter can lead to dryness.
- Gel Food Coloring: Unlike liquid dyes that water down the batter, gel delivers intense red hue without altering texture.
- Cream Cheese Frosting Science: Chilled butter, room-temperature cream cheese, and a touch of powdered sugar create a silky, pipeable frosting that won’t weep.
Fun fact: Traditional red velvet cake wasn’t always vibrantly red! Early versions got their subtle ruddy tint from a chemical reaction between acidic ingredients (like buttermilk) and natural cocoa. Modern recipes amp up the color, but the soul of this dessert remains in that delicate balance of tangy and sweet.
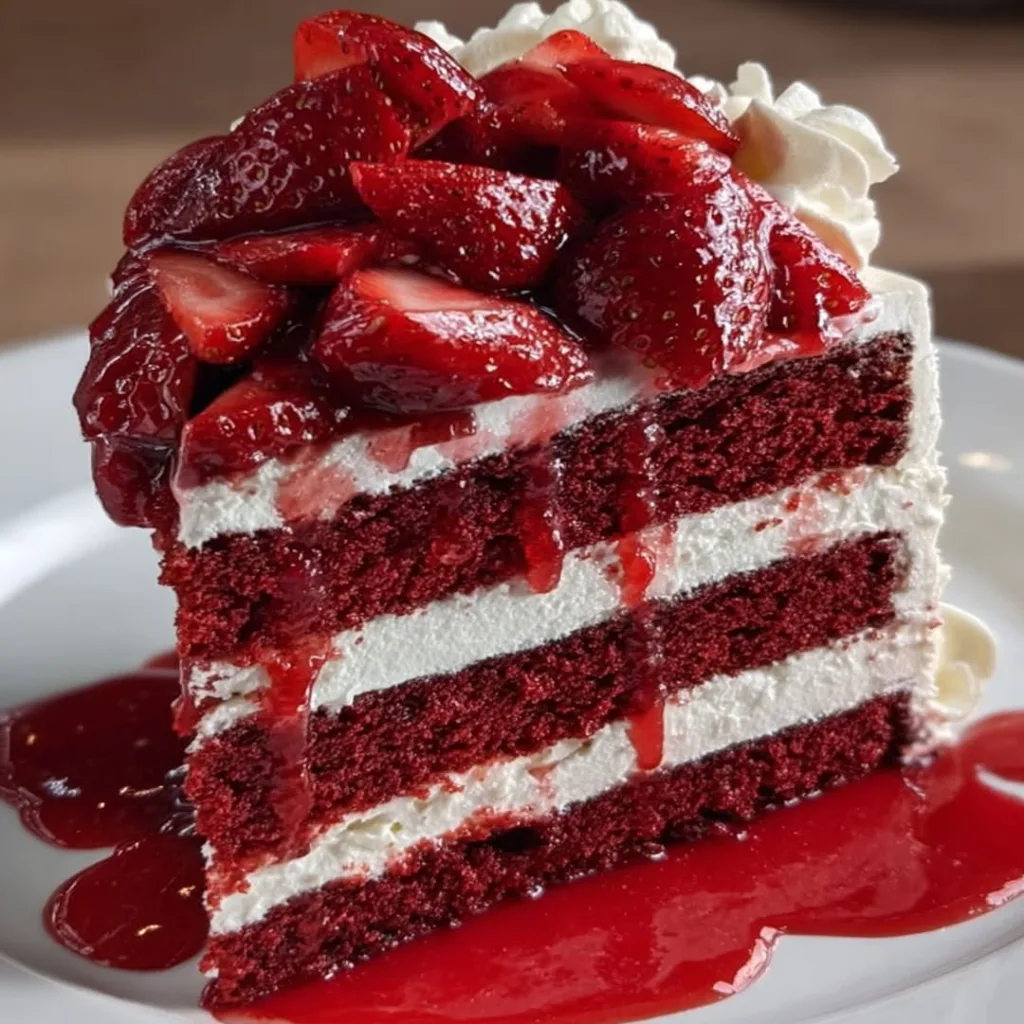
Decadent Red Velvet Cake with Cream Cheese Frosting
A rich and moist red velvet cake topped with smooth cream cheese frosting, perfect for special occasions.
Ingredients
For the Crust:
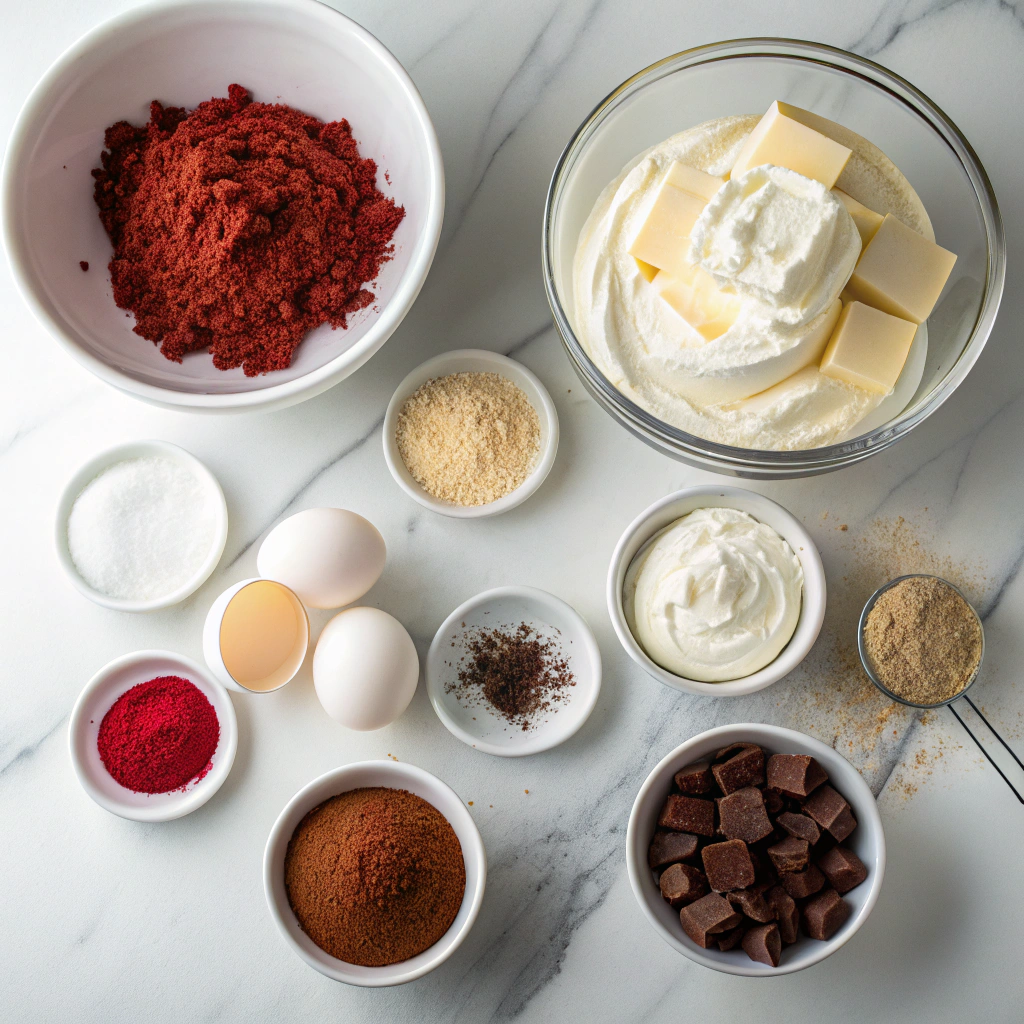
- 2 1/2 cups all-purpose flour
- 1 1/2 cups granulated sugar
- 1 teaspoon baking soda
- 1 teaspoon cocoa powder
- 1 teaspoon salt
- 2 large eggs
- 1 1/2 cups vegetable oil
- 1 cup buttermilk
- 2 tablespoons red food coloring
- 1 teaspoon vanilla extract
- 1 teaspoon white vinegar
- 8 oz cream cheese, softened
- 1/2 cup unsalted butter, softened
- 4 cups powdered sugar
- 1 teaspoon vanilla extract
Instructions
1. Prepare the Crust:
- Preheat oven to 350°F (175°C). Grease and flour two 9-inch round cake pans.
- In a large bowl, whisk together flour, sugar, baking soda, cocoa powder, and salt.
- In another bowl, beat eggs, oil, buttermilk, food coloring, vanilla, and vinegar until smooth.
- Gradually mix dry ingredients into wet ingredients until just combined. Divide batter evenly between the prepared pans.
- Bake for 25-30 minutes or until a toothpick inserted comes out clean. Cool in pans for 10 minutes, then transfer to wire racks to cool completely.
- For the frosting, beat cream cheese and butter until smooth. Gradually add powdered sugar and vanilla, beating until fluffy.
- Frost the cooled cake layers with the cream cheese frosting.
Notes
You can customize the seasonings to taste.
The Perfect Red Velvet Cake: A Love Letter in Layers
There’s something undeniably magical about a red velvet cake—its deep crimson hue, its tender crumb, and that unmistakable whisper of cocoa. But the real star? That luscious cream cheese frosting, tangy and sweet, hugging each layer like a cozy blanket. Today, I’m sharing my tried-and-true recipe, the one I turn to for birthdays, anniversaries, and those “just because” moments when only cake will do.
Ingredients You’ll Need
- 2 ½ cups all-purpose flour – Spooned and leveled, please! This ensures your cake stays light, not dense.
- 1 ½ cups granulated sugar – The perfect balance of sweetness to let the cocoa shine.
- 1 tsp baking soda – Our little leavening hero, working quietly behind the scenes.
- 1 tsp fine sea salt – Just a pinch to heighten all those lovely flavors.
- 2 tbsp cocoa powder – Dutch-processed is my secret for that rich, mellow depth.
- 1 ½ cups vegetable oil – The key to that melt-in-your-mouth texture. Yes, it’s worth it!
- 1 cup buttermilk – Room temperature, if possible. It tangos beautifully with the cocoa.
- 2 large eggs – Also at room temp—cold eggs can make the batter grumpy.
- 2 tbsp red food coloring – I prefer gel for that vibrant, velvety red (no watery streaks here!).
- 1 tsp vanilla extract – Pure, please. Imitation vanilla just won’t do this cake justice.
- 1 tsp white vinegar – Trust me, it’s the old-school trick for that signature red velvet lift.
For the Cream Cheese Frosting
- 8 oz cream cheese – Full-fat, softened. This is no time for skinny versions!
- ½ cup unsalted butter – Also softened. Cold butter = lumpy frosting tragedy.
- 4 cups powdered sugar – Sifted, unless you enjoy a surprise sugar lump in your bite.
- 1 tsp vanilla extract – The frosting’s fragrant little bow on top.
- Pinch of salt – To cut the sweetness and make those flavors pop.
Let’s Bake: Step-by-Step
- Preheat & Prep – Heat your oven to 350°F (175°C). Grease and line two 9-inch cake pans with parchment rounds. (Pro tip: Trace the pan bottom on parchment for perfect fits!)
- Whisk Dry Ingredients – In a large bowl, whisk together flour, sugar, baking soda, salt, and cocoa powder. Take a moment to admire how the cocoa looks like fallen autumn leaves against the flour.
- Mix Wet Ingredients – In another bowl, beat oil, buttermilk, eggs, food coloring, vanilla, and vinegar until smooth. The batter will blush the most gorgeous red—don’t be afraid to pause and appreciate it.
- Combine Gently – Pour wet ingredients into dry and fold with a spatula until just combined. Overmixing is the enemy of tenderness!
- Bake with Love – Divide batter evenly between pans. Bake for 25-30 minutes, until a toothpick comes out clean. Your kitchen will smell like a vintage bakery—lean into it.
While the cakes cool (impatiently, I know), let’s chat frosting. The waiting is the hardest part, but warm cakes melt frosting into sad puddles. Resist the urge!
Conclusion
There’s nothing quite like the rich, velvety texture and vibrant color of a homemade red velvet cake paired with luscious cream cheese frosting. Whether you’re baking for a special occasion or simply indulging in a sweet craving, this recipe delivers perfection in every bite. From the tender crumb to the tangy-sweet frosting, it’s a dessert that never fails to impress.
Ready to bring this classic treat to life? Gather your ingredients, preheat your oven, and let the magic begin! Don’t forget to share your masterpiece with us—tag us on social media or leave a comment below. And if you loved this recipe, be sure to explore our other decadent cake creations for more baking inspiration.
FAQs
Can I use natural food coloring instead of artificial red dye?
Absolutely! If you prefer a natural alternative, beet powder or pureed beets can give your cake a lovely red hue. Keep in mind that the color may be slightly more muted than with traditional food coloring, but the flavor will still be fantastic.
Why is my cream cheese frosting too runny?
Runny frosting often happens if the cream cheese or butter is too soft. Make sure both are at a cool room temperature before mixing. If your frosting is still too thin, pop it in the fridge for 15-20 minutes to firm up before spreading.
Can I make this cake ahead of time?
Yes! You can bake the cake layers a day in advance—just wrap them tightly in plastic wrap and store at room temperature. The frosting can also be made ahead and refrigerated for up to 3 days. Let it soften slightly before frosting the cake.
What’s the secret to a moist red velvet cake?
The key is balancing the wet and dry ingredients carefully—don’t overmix the batter, and avoid overbaking. The buttermilk and oil in this recipe also help keep the cake incredibly moist. Check for doneness a few minutes before the timer goes off to prevent drying out.
Can I freeze red velvet cake?
Definitely! Wrap unfrosted cake layers tightly in plastic wrap and aluminum foil before freezing for up to 3 months. Thaw at room temperature before frosting and serving. You can also freeze frosted slices, though the texture of the frosting may change slightly.